How to make a horse on a stick with your own hands. DIY sock horse. How to make a horse on a stick
Many of us in childhood had such a funny toy as a wooden horse, which was the head of a horse worn on a handle. Throwing his legs over him, you could spend hours playing cowboys or brave knights. And the girls felt with such a toy real princesses who were carried away not by a wooden horse, but by a real horse-horse! Today it is quite difficult to meet such a toy among the whole variety of the assortment of children's stores. However, there is a way! And all that is needed for this is desire, a wooden stick and sock. Exactly! Using this master class, you will learn how to make a horse on a stick from a sock with your own hands.
Fold the base of the ear in half. Place it on the left side of your horse’s head — the heel of your toe — and fasten it in place. Attach a second ear to the other side of the head. Point your needle and make a large knot. Pass the needle on the right side of the nose and pull it through the left side.
Pull the thread and add a tight stitch on the front of the face. Fasten the thread with a double knot and adjust the excess end. It's time to do some hair for your horse. Get a book; preferably with a hard coating. Start wrapping woolen yarn around the book.
We will need:
- a pair of large socks;
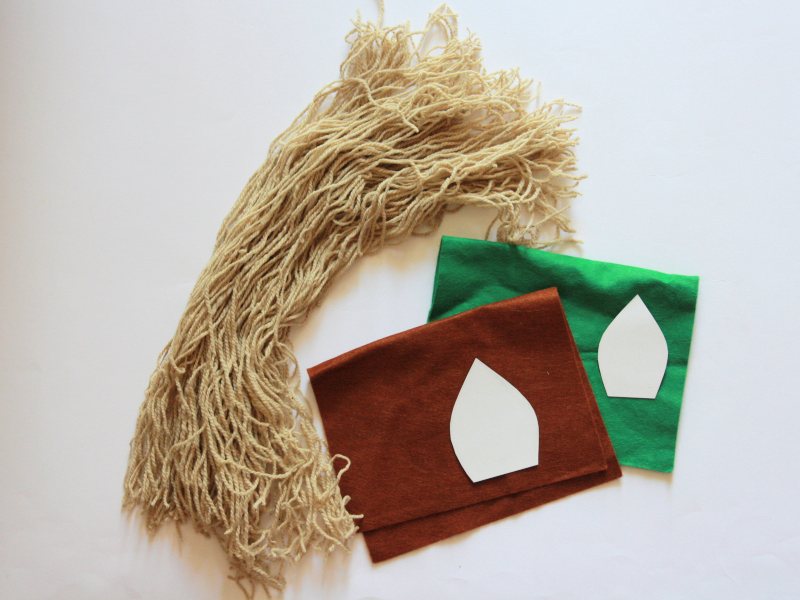
- felt of different colors;
- synthetic winterizer;
- needle, thread;
- awl;
- drill;
- wooden stick;
- handles from an old bag;
- buttons
- yarn;
- sandpaper.
 |
 |
- The horse’s head is made from a sock, so fill it with padding polyester or cotton. Fill the filler more tightly so that the craft does not lose shape when it is in the hands of a child. Then, at the top, make a mane of thick yarn by threading it with a needle. Divide the mane by laying it on both sides of the head, and pull it in place of attachment with a thread. Keep the resulting parting even. After that, align the length of the mane on each side, cutting too long threads. If you prefer an asymmetric mane, this is not necessary.
- Cut two circles out of white felt. They will serve as eyes. Sew them by placing a colored button in the center. It is advisable that a cross be embroidered in the center of the button. So the eyes will look livelier and more natural.
- To make our sock crafts look more realistic, horses need to make nostrils. To do this, pinch part of the sock along the seam and fix the nostrils thus formed with threads. Do not overtighten so as not to tear the sock!
- And now about how to sew a horse’s ears from a sock. Cut two triangles of different sizes from the felt. First sweep them along the bottom edge, and then tighten the thread. After making the second ear in the same way, sew the ears to the head.
- Sew a bridle around the muzzle, that is, straps and handles from an already unnecessary leather bag. Make seams decorative, and select threads in contrasting colors. The head of the horse from the sock, the pattern for the creation of which was not even needed, is ready!
- It’s time to take care of the head holder, which can be used with small diameter wooden sticks. Please note that the toy must be lifting for your child. If there is a man in the house, further work can be entrusted to him. Put the horse’s head on the handle, step back from the rubber of the sock 2-3 centimeters and drill a through hole. Thread a strong thread into it and wind the elastic well.
 |
 |
 |
 |
 |
 |
 |
 |
 |
 |
The list of materials necessary for the manufacture of crafts turned out to be too large? You can make a horse a simpler way. To do this, fill the sock with cotton, embroider the mouth, two nostrils, tying large knots. Cut eyes and ears of the appropriate shape from felt and sew horses to the head, make a mane of yarn.
Stop packing as soon as the yarn is long enough to cover the horse’s back, from the top of the head to the lower back. Pass one end of the thread at the bottom and one over the wrapped yarn and tie them at the bottom. Repeat the same process on the back of the book.
Carefully cut the yarn on both sides of the book. It is best to keep the book horizontal on the work surface during this process so that the yarn remains in place after cutting. It was easier for me to put knotted ones to monitor my progress and avoid mistakes.
Remove the book carefully, as you have a second pile of yarn under the book that you can use if you are making a second horse. All that remains to be done is to add a reason. Fold the cord in half and run it through the horse’s snout. Hold the open ends of the cord together while pressing them.

A horse on a stick is one of the favorite toys for a happy child under five. And to make such a horse on a stick with your own hands is not at all difficult.
You can even make some toys so that the child can go on an exciting journey with friends. A horse on a stick will always be a participant in relay races and fun starts in kindergarten or at children's parties.
DIY textile horse: master class
We showed you how to make a fun hobby toy for your children. At first, you learned how to create a base using a wooden stick, a sock, and some filling. Then you learned step by step how to make and attach eyes, ears, a mouth, a mane and a leash on your horse.
Now make a trace to keep track of the baby. Or you can even make a few more horses for your child's friends and organize races. Hope you enjoyed this tutorial! Any other ideas or requests for projects for children? Our horses really don't ride. The back muscle is not a support, but rather a tense muscle. In addition, the rest of their physique, which is not intended to add weight to wear on the back, because the horse's body is free-floating. Say, the front part does not apply to bone structures, but applies only to tendons, ligaments and muscles associated with the chest.
For manufacturing you will need:
- sock
- yarn for mane
- 1 meter long stick
- horse head filler - synthetic winterizer, holofiber or cotton wool
- felt of two colors for the eyes and ears of the horse
- 1 meter tape of any color
- 4 buttons - 2 for each eye and frenum decor
- threads
- scissors
Manufacturing process:
We will introduce you to various exercises over the next few weeks, which you can easily incorporate into your everyday driving, whether on the court or off-road. We will try to explain individual exercises that are understandable to explain to you what what exercises can bring, what and how you perform the best, that you can have the maximum benefit.
Schemes and ideas from other techniques
As an introduction, we start with an exercise that every SUV does regularly and unconsciously in any case. This is actually the first gymnastics exercise for our horses. The grounds of the rider are often completely unaware that he is already actively practicing a wide range of muscle groups of his horse in overcoming the hills, mountains and valleys of the swamp. In addition, tendons and joints are strengthened, and balance and confidence are strengthened. To go uphill, the horse must be carefully pulled out of the back.
1. Fill the sock tightly with the filler, leaving approximately 4-5 cm in the inlet empty.

2. Cut the yarn into threads of approximately equal length, the more threads - the thicker the mane of a horse on a stick.
This improves, as already suspected, the so-called traction. When a descent on a horse with hind legs is usually more under the body, even alone, to catch a dead load. This wide front back has a collection effect. Rather, spiky horses, which naturally raise their heads high in the air, can be good for mountain climbing. Because even for physical reasons, almost as a counterweight to the mandatory strongly pushing rear, they take on most of the horses to overcome the slope automatically head and neck, and down.
They inevitably go to the desired tension and become relaxed. The balance of our riders is trained in mountain riding. Of course, since the horse’s focus changes - quite logically - we, of course, must also adapt our own focus. The shift of the center of gravity of the correct and vertical rider is minimal, barely noticeable compensating movements.
3. Cut two ear blanks out of cardboard - one bigger, the other about 1 cm smaller.

4. Lay the mane on the head of the future horse so that it is more convenient to sew the threads, they can be pulled with an elastic band under the "chin" of the workpiece. Sew the mane with a buttonhole stitch as shown in the photo.
You can walk in hard-to-reach areas in all directions and just depend on the movements of the horse. When climbing a horse, we must lighten our horse in the back and move the upper body forward, how strong the mountain is entirely dependent on the degree of inclination on a steep more weight forward. It is important in any case, not to take the reins too tightly, because the horse may otherwise, of course, have a rather poor ride in the desired elongation position. However, there is nothing against a light, elastic sensation, it will even have a positive effect on the gymnastic effect.

5. Circle the cardboard blanks and cut the ears from felt, fold them and grab them with a few stitches to set the shape. Sew the ears to the horse’s head, bend back the edge on which the seams are visible. Ears are advised to sew a little further from the forehead so that they are covered by a mane.
As for the gait you need to take when you are going uphill, there are many theories. In general: flat slopes uphill are best suited for striding, slightly climbing the slopes at a lynx and steeper, you can ride in an energetic gallop - if you force the horse to walk slowly up the steep slope, provoked the appearance of tact errors - this should be avoided with small scale!
Can children do such crafts on their own?
Always ensure that you always ride in a straight line, vertically upward, and never at an angle to the slope. On a slope, our horses can easily lose their grip, fall into slides and fall. When riding on slopes, the reins are quite long - these are nuts and bolts. Only in this way does the horse have the opportunity to calmly move his neck in the rhythm of steps to the right and left. This is normal and necessary for the balance of the animal.

6. To make a bridle, wrap the horse’s face on a stick with a tape, measuring the volume, then carefully remove it and sew it. Without cutting off the excess length of the tape, rotate at a right angle, and fasten with a pair of stitches. Sew the end of the tape opposite to get this design. Sew buttons and any other decorative elements on top of the stitches on the bridle.
Of course, this does not mean that the rider, as soon as the smallest mountain appears, must first throw away the reins, here, too, a small cry reminds the horse of the rider and prevents him from headless storms. You get a particularly good gymnastic effect if the horse comes to a good slope on leashes and you let it move as slowly as possible. A horse can hardly do otherwise than push its hind legs hard and at the same time raise its back. This, of course, is the best gymnastics for the entire top line.
In particular, the area of \u200b\u200bthe lumbar spine and the back of the body is stretched and emphasized here. If the slope is very steep, it has nothing to do with going forward in the classical sense. That is when good coordination basically happens. Therefore, there are other rules for the place: in such extreme situations, you can forget everything that you have ever heard of “staying in focus,” surely forgotten. Lean back into the saddle, hold on tight and basically ride in a straight line on a slope in a straight line.

7. Now you need to make a nose. Take a double thread needle and sew a few through stitches at the end of the muzzle, then pull the thread to form a hollow. Secure the result with a simple knot.

Again, the risk of slipping and falling on a slope is very high! A useful climbing principle: “The steeper the slope, the longer the reins.” Mountain racing is an expression of uncertainty for most horses. Many riders feel uncomfortable when they go downhill, which, of course, is easily carried onto a horse, which may even have problems with coordination. The following exercise may be useful: as soon as your horse is too fast, give him a clear command to stop. The horse will inevitably carry weight to the back.
Once the horses understand how to balance their weight and the weight of the rider and where to go, you can usually go downhill. If you yourself are prone to insecurity, it is best if your horse prefers to go downhill with his hand and practice a hold command from the ground.
8. For the eyes, cut circles out of felt and sew them onto the muzzle along with matching buttons.