Secrets of posing in front of the camera. Successful poses of girls for a photo shoot (59 poses). How to pose during a photo shoot sitting, standing and posing for a portrait
A beginner model first of all needs to make a portfolio, based on which customers will make a decision regarding the conclusion of a contract. And that means you have to work with a photographer. Many young models are wondering: how to pose for a photo shoot?
Making an interesting, professional, and most importantly versatile portfolio is not an easy task, because one bad photo spoils the impression of five successful ones. In each picture, the model must show her best side and show all her abilities and professional skills. To do this, it is not necessary to have many years of experience, it is enough to know a few simple rules and skillfully use them during the next photo session.
Basic Rules
1 Let's start with breathing and the ability to breathe correctly in the frame. No need to hold your breath while shooting, because the photos are tense and unnatural. It is better to breathe calmly, evenly, so that in the process and in the picture in general, it turns out relaxed and natural. Famous models use a very interesting trick: when taking a feminine or sexy photo, they breathe through their mouths, thus creating the effect of arousal.
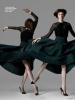
Tyra Banks at a photo shoot for Vogue magazine
2 No need to force your body to take this or that pose, if you can’t get up, as the photographer asks, then this is not your pose. You need to get into a position that would be convenient for the model, then it looks from the winning side, and the picture itself turns out to be relaxed. If you saw an interesting pose in a magazine and want to repeat it, in this case it is better to practice in front of the mirror beforehand so that you can do it without much effort at the photo session itself.

In order for the photographer to capture that “single perfect moment”, it is not necessary to make the poses significantly different from each other. Of course, the position of the body should be varied, so that the customer and the photographer have plenty to choose from, but it is enough to change any one element. For example, turning the head, tilting the body, changing the position of the hips, moving the leg to another place, or changing the position of the hands.
3 By the way, hands and fingers should be given special attention, as their position should be as natural as possible. Of the basic rules, it is worth remembering that it is unnecessary to point your hands at the camera lens, it is advisable not to clench your fingers into a fist, as it will give the impression that the model does not have them at all.
It is better to fix the hands in any position and only slightly change it later. For example, you can fix them on your hips or use your hands to interact with any object. However, in any position, the hands and fingers should be as relaxed as possible, then the picture will turn out to be natural and relaxed.
body position
When creating a portfolio, be sure to take care of full-length shots. They will help customers to consider all your external data and see the whole range of posing skills. However, the model faces a very responsible task: to choose such poses that would advantageously emphasize the charms of the figure and hide possible flaws, while the main task remains to take a professional beautiful picture.
If you don’t have many interesting poses in your arsenal, then it’s better to use the classic ones, for example, direct the torso and chest into the camera lens, and turn the hips away from it.
There is also a little secret that famous supermodels use, namely, they fix their hands during the picture a little asymmetrically to each other.

For example, if one arm hangs freely, then the other should be bent, so the picture is relaxed and natural. Avoid poses in which the arms are pressed against the body, especially if they are lowered down. In this case, the model will not seem as slim and sophisticated as it really is.
Taking pictures in a seated position
Do not think that taking a photo in a sitting position is much easier than standing. In this position, it is more difficult to take an interesting and fascinating picture, but if you follow the tips, you can easily replenish your portfolio with a few photos in a sitting position. The first thing to always remember is posture. It should be straight, even if you are asked to lean forward a little. As Tyra Banks herself says:
Imagine that you have a thread through your entire spine, and all the time they are pulling it up
Many models are worried about big thighs when they sit down. To avoid unnecessary visual weight gain, it is enough to sit sideways a little and transfer the weight to the thigh located closer to the camera. If you put your foot on a full foot, then it will be difficult to achieve refinement, lightness and femininity in the frame. Professional models put the foot resting on the toes, so the leg becomes slightly elevated, and accordingly slimmer.

Portrait photography
The portrait is the most famous and frequently used type of shooting, which should be in the portfolio of any beginner or experienced model. Portrait photography is the shooting of the model's face and shoulders. Many may think that a portrait is the most elementary type of photography that does not require special skills, but this is a profound mistake. In order to achieve an interesting, and most importantly professional shot, you need to remember and use important skills and pose correctly during a photo shoot.
 More information about Behati Prinsloo: http://website/istorii-uspeha/best/behatiprinsloo.html
 If the position of your head is not important for the photographer, then it is better to take fewer frontal shots. Only with exotic make-up and impressive scenery will such a position of the head be appropriate and interesting, and in other cases the picture may turn out to be boring and without any zest. If you turn your head a little to the side and slightly at an angle to the camera, then the picture will not only become more interesting, but your eyes will play differently, due to the fact that your gaze will be directed into the lens at a slightly angle. In such a seemingly simple position of the head, the picture will show the mystery and some intrigue.
It is worth remembering about the shoulders, which do not need to be kept in tension. Even a portrait shot will look natural if the shoulders are lowered and relaxed. Do not forget about the principle of asymmetry. A photo in which the model tilted her head to a raised shoulder will look more interesting and will surely be remembered by customers.
Celebrities know their successful angles and posing secrets, which is why in the pictures from premieres and solemn ceremonies we most often see self-confident, elegant and charming handsome men and beauties. Let's take a closer look at these photos and remember a few tricks!
We get up half-turned
Want to look slimmer? Do not turn your whole body towards the camera. Take one shoulder back, and the other a little forward. The same rule works for the hips. Visually, you will become slimmer. You can check in front of the mirror and make sure!
We bend the elbow
The hand seems neater and thinner if it is slightly bent at the elbow. In this case, the palm can be left on the hip or placed on the waist. Try not to strain your fingers, let your hands be relaxed and beautiful.
Click on photo to enlarge
Keep your posture
Remember that a person with a straight back and straightened shoulders looks much more profitable and (even taller). For women, this is especially important, because by straightening our shoulders, we push forward and lift our chest. By the way, this is one way.
Click on photo to enlarge
Watching our feet
In front of the camera, it’s better not to clubfoot, but to slightly push one leg forward, as if you want to take a step. If you have a mini skirt, you can cross your legs. Posing in high heels? Excellent! Show your legs and a beautiful rise - stand sideways to the photographer and put your foot on the toe. This will give the right tension to the calf muscles, and they will look just amazing!
Click on photo to enlarge
We place accents
It's simple: if you want to emphasize your advantages - highlight them! If you have beautiful hair, do not hide it behind your back. Slim waist or seductive hips - put your hands on them. If you want to show off your breasts, use Marilyn Monroe's favorite technique - lean towards the photographer, straighten your shoulders and slightly raise your chin. This will visually increase your volumes in the right places, lengthen your neck and make you look languid.
Click on photo to enlarge
Well, the last important point: feel free to rehearse your photo poses in front of the mirror! Then at the right moment, like a star on the red carpet, you can quickly stand up correctly, relax and smile radiantly.
By the way, these collections will help make facial expressions more lively and relaxed.
Click on photo to enlarge
And in this story there are a few more tricks that will help you appear slimmer in the photo!
Photo: photos.be.com, img2.timeinc.net, media.melty.es, hd.se, sodachocolate.com.br, img.elle.ua, i1170.photobucket.com, cdn.newadnetwork.com, eonline. com , banzaj.pl , media-cache-ak0.pinimg.com , supercoolpics.com , pinterest.com
Looking like a model is one thing, but real models aren't paid to just sit and look pretty. Their success in business declines depending on how they can pose and help the photographer to create interesting and in-demand pictures. Whether you're looking to improve your modeling career or simply become more photogenic, these tips will help you bring a new edge to your shots.
Steps
Pose practice
- By "stoop" is meant "natural". Most people don't even know they slouch, so don't try to enhance your natural slouch. Try to look normal, but keep your head up high. Your goal is to make the neck visually longer. Imagine that your chin is held by a rope.
-
Be strong from head to toe. Your whole body should be filled with life. Think of a dancer: every part of her body is tense and in motion, even if she is standing still. No part of your body should look like limp noodles!
- Engage your core first (this will help you pull in) and then pull up your arms and legs. Being "strong" in this context doesn't mean "aggressive" or "masculine" - it just means being persuasive and energetic. After all, with a camera you want to convey a feeling!
-
Be asymmetrical. For a more interesting shot, make sure you look different on each side of your body. You can add theatricality to your movements, do something completely different with each of your limbs, and tilt your head to the side if it suits the nature of the shooting. Being asymmetrical is simple: tilt one shoulder or hip so that your arms are at different levels, or slightly (or strongly) bend one leg.
- Remember that you are part of the picture. This shot is not about how the hell you are beautiful - it's about the aesthetics of photography. Even the best makeup and hairdo won't make a great photo if your body doesn't create alluring curves.
-
Make sure your nose is not pointing straight at the camera. Looking straight at the camera can work well in some theatrical shots, but in general it's best to have your face at an angle to the camera when taking the shot. Tilt your nose slightly up or down, left or right, but keep your eyes on the camera.
- Find out at what angle your face looks best. Do you have a big chin? Raise your head up and slightly to the side. Experiment in front of a mirror or in your room to see what angle your face looks like most.
- Don't forget about the direction of the light. Remember that light will cast shadows, and even if they are subtle, they will affect the look of your face. If the light source is from above, tilting your nose down will cause your brow ridges to cast a shadow over your eyes - good for an ominous photo, but not for a friendly look.
-
Look around. An interesting shot can be obtained by looking directly into the lens, but also try to stop looking in a different direction to vary the shot. What is happening there? Does she look at herself in the mirror? Or sees a leprechaun? Or maybe talking to the Queen of England? Everyone will want to know this.
- Be careful with the stereotyped look "somewhere in the distance." At best, you will look existential, and at worst, as if you are trying to look existential, staring off into the distance. Use this look as little as possible.
-
Turn three-quarters towards the camera. The three-quarter turn will make you as lean as possible and complement the previous tip. Is she facing forward? Or did she turn around? How wide is her waist? Nobody will know. Stick to a three-quarter angle - and you will look the most slender.
- A course on a specific goal will make you the most vulnerable and defenseless (in real life, by the way, too!). If you turn three-quarters to the camera, which side of you will look best? Highlight it to get the best photo.
-
Be mindful of your hands. Perhaps the hardest part of posing is figuring out what to do with the hands. They just hang awkwardly. If you're involved in a head-to-toe shoot, find poses that you feel comfortable in and that make sense. The only thing you should avoid is folding your arms around your face. This is reminiscent of a bad snapshot of the glamorous 1980s.
- A good way is to show the side of the hand. This creates the appearance of a long, thin line coming from your hand. It also avoids the fear of “do my hands give away my age?” and “do my brushes look funny?”.
Mastering tricks
-
Get your "perfect smile". There is an art to posing with the perfect smile, and the best models know how to make it look natural. This smile is halfway between your biggest smile and no smile at all. The lips are slightly parted so that only the upper teeth are visible. Such a smile is considered "soft". The result should please the eye and be devoid of any tension.
- As a rule, a smile raises the cheeks and narrows the eyes. So, let's try to relax them so that the eyes are open, and, at the same time, whites are visible. You may need some practice in front of a mirror to learn how to isolate different muscle groups, but it will be worth the effort. Whether you're a model or you just want to improve your look in photos, mastering the perfect smile can make a big difference in your photos.
-
Create depth. Being like a deer in the headlights or looking bored like on a rainy day is not an interesting claim to originality, not a new take on the materialism of the fashion industry, and certainly not a pleasing look. It just looks awkward. While shooting, you should feel something that the camera can catch. It will depend on the nature of the shoot, but whatever it is, create it. Feel. Radiate emotion.
-
Show your sense of taste. Some items of clothing that will be worn on you will make you feel like, for example, a French prostitute. Regardless of what you're wearing most of the time, it's best not to look... how to put it politely... expensive and vulgar. The world doesn't need a new Miley Cyrus in the look she wore at the Video Music Awards 2013.
- A good model should be an example of sophistication and chic. Even if you're only wearing a small bikini (unless it's the "right" kind of shoot, of course), try to look the part. Your body will fully emphasize your sexuality, so your face and posture do not have to express the same.
-
Be on the move. You should change your posture about every three seconds. A photographer doesn't want to waste time shooting the same shot over and over and over again. Even if you are not sure that you look good, do it! You will get a ton of options to choose from, and many of them will be more than amazing.
- Be a little crazy. If your poses are unique, you will be remembered. Remember the techniques you know (working with the angle of view, etc.), but dilute them with your own variations. Little things matter.
-
Hide your flaws. Everyone has them. Even two-meter-tall Dutch models are imperfect. Most likely, you are aware of your shortcomings! But the good news is that you can certainly hide them. This doesn't mean that some of your features aren't great - they just don't fit the camera.
- Putting your hands on your hips will give the illusion of a smaller waist. The gaps between the arms and body create a backdrop that deemphasizes this area. You can use this in real life too.
- Keep your chin up to make your forehead look smaller. It will also visually lengthen your neck. Conversely, if you have a large chin, tilt your head slightly.
- Rotate your knee to make your thighs appear thinner. Oh, that elusive gap between the thighs that most women don't have... But if you twist one knee, you get the desired result. And your thighs will look thinner!
- If you turn your body to the side but keep your shoulders facing the camera, your hips will look much smaller. This is almost frontal, but you and your hips will look more advantageous.
-
Practice. Find a digital camera, set up a tripod, and take thousands of shots. It costs nothing to view pictures on a computer screen, so there is no reason not to. You need to know which poses are beneficial for you and which are not.
- Find out which poses make certain parts of your body appear thinner. Decide which poses best look certain types of clothing. Some poses emphasize the strict lines of a business suit, while others look better with a flowing dress. Practice with props like a chair, or grab a vase, string, beach ball, whatever! Get creative. You never know what you will be asked to do!
Stoop a little, but keep your head high. There are a few shot poses where you need to roll your shoulders back, but in general, a slightly arched back makes your pose look natural and relaxed. This doesn't mean you have to slouch (although it does look great in some fashion shots). If you are standing, place the weight on your feet unevenly, and flex the leg that bears the least weight accordingly. You will look more relaxed and your posture will be more natural. Don "t slouch so much, though, that it makes your stomach look bigger.
How to pose for photos: a guide for beginner photographers
Learning the posing process for new photographers can sometimes seem more complicated than the basics of manual settings. However, all these posing “rules” boil down to a set of basic ideas that can help a photographer create a charming pose without imitating the work of another photographer. Remember these basic four rules so that the pose does not become a problem for you and your photos.
What is closest to the camera always seems to be the biggest
If you keep your elbows to the sides, and not put them forward, then the hands will appear smaller.
Placing objects within the photo plane gives our brains 3D cues. When placed incorrectly, our brain will automatically assume that the object is larger than it is in real life. Objects - including body parts that are closest to the camera - always appear to be the largest. If you're photographing a model with her hands covered in her hair and her elbows straight out in front of her, her arms will look unnaturally large. Instead, leave your hands in her hair, but part them to the sides.
Outside of learning how to pose for photos, this idea can also be applied to the frame. If you are shooting pregnant women, avoid shooting the belly from above or you will emphasize and focus on the belly. Shooting a subject at eye level is usually the best option. Shooting a little higher in this situation is almost universal, features such as the eyes will be emphasized and the body will appear slimmer. Sometimes, some objects can be shot from a low angle to make them appear taller, but low angles are not suitable for all body types.
Pictures where the subject is directly opposite make it appear large in the photo, if the photo is at an angle, the object will appear small

For a photo where the torso appears thinner, the camera needs to be at an angle when the shot is taken, but if you want the athlete to look big and strong, keep the line of his shoulders parallel to the camera.
The idea that a camera adds ten kilos is not a myth - while we can "see in 3D", we only see 2D information in a photograph. The trick is to use 2D to your advantage, not the other way around.
If you place the model so that the line of the shoulders is parallel to the camera, then they will look wide. If one of the shoulders is outside the camera's viewing angle, and the model is standing in the corner of the frame, then the shoulders will appear narrow. Knowing why this happens will allow you to choose a pose for your model. If you're shooting a football player and you want him to look big and strong, position him directly in front of the camera. If you're filming a new mom and she's "uncomfortable" in her new body, move her away from the camera and shoot at an angle. So you can make Sims more attractive.

Corners are always "flattering"

Angles, whether it's arm angle or high angle shots, are usually universally flattering.
Nervous models often ask their photographers, "What should I do with my hands?" The arms can be placed in a number of different ways, but the big idea is to distribute the space between the arms and torso so that they form angles. There are no hard and fast rules about where the hands should be - on the hips, running through the hair, or should gently touch the chin or rest against the wall - the idea is to keep them away from the body.
The angles can extend to the legs too - a slight taper on one leg creates a more interesting and seductive pose... The knee can be pushed forward a little, one foot slightly further forward than the other, or weight can be shifted to one foot, which will also improve the pose.
Shoulders back, chin forward
The chin and shoulders are often problematic areas in photographs, so check them out before you take your shot.
With the chin and shoulders in the wrong position, every person has a double chin and full arms. Watch for the appearance of loose skin under the chin, and ask the model to pull her chin forward a little when you notice it. Perhaps he or she will feel a little awkward, but the double chin in the photo will upset them more.
Shoulders are another common problem area. When creating angles with your hands, in order to visually make the torso thinner, you should also spread your shoulders, straighten up, and pull your chin forward, this will be another optical trick that will emphasize the face. Pushing the shoulders back becomes especially important when the model is wearing a strapless dress or sleeveless top - watch for any exposed skin above the top of the dress and correct your posture by pushing your shoulders back a little.
Important nuances:
Hair - Watch out for protruding hairs to save time when editing. Experiment with long hair by throwing it back or vice versa.
Eyes - often they create the mood of the photo. Make sure your eyes convey the right emotions.
Nose - The nose will look larger if the tip extends beyond the face and into the background. If you notice a nose outside the cheekbones, make the angle less drastic.
Chin - double check behind double chins J
Shoulders and hips - keep a little distance from the camera for the most attractive pose, except when you want the model to look bigger, like when photographing athletes.
Arms - Create angles with your arms, but use light pressure on the body parts to make the pose seem more relaxed.
Legs - Put one knee forward and the other leg back for full length photos.
Weird framing - Don't ruin a good pose with weird framing. No need to crop joints in photos.
Posing is a difficult task for new photographers, but by focusing on a few basic concepts, you can easily match your model's pose.