Installation of stainless steel pipes. Multifunctional product: stainless steel chimney. By type of chimney
How to assemble a chimney sandwich? Every novice stove-maker asks this question, because sandwich chimneys firmly occupy a leading position in the construction of fireplaces and stoves, displacing brick and metal chimneys. Their popularity is easily explained: sandwich chimneys are safe, practically do not heat up, are less prone to blockages, and besides, they are easy to install. Our article will tell you how to do it correctly.
This type of chimney includes multi-layer prefabricated stainless steel or ceramic chimneys. They are produced in the form of finished elements, assembled into a single design. Both types of sandwich chimneys have their own characteristics, but their installation is generally similar.
Stainless steel chimneys consist of a high temperature-resistant inner tube wrapped in a layer of non-combustible heat-insulating material, protected from external influences by an outer tube made of stainless steel or, for cheaper chimneys, galvanized steel. The inner pipe can be either metal or ceramic, such chimneys are called combined.
Video - installation of a combined sandwich chimney
Ceramic chimneys are a pipe made of heat-resistant ceramics, coated on the inside with high-strength glaze, and wrapped on the outside with heat-insulating mats. This structure is placed in an outer shell of expanded clay or foam concrete blocks.
Due to their design and the layer of heat insulator, sandwich chimneys from the outside never heat up to high temperatures that can lead to a fire. This feature, as well as quick and easy installation, make them popular with builders.
Metal and ceramic chimneys, despite the similarity in design, have differences, and the main one is weight. A full-fledged ceramic chimney can weigh about a ton, while the weight of a stainless steel chimney does not exceed a couple of hundred kilograms. For a ceramic chimney, a foundation is required, while for a metal chimney there are enough unloading platforms at each level of floors. At the same time, ceramic chimneys are more durable and will last you at least 20-25 years. And metal structures, especially when using fireplaces with direct chimneys or stoves like potbelly stoves, burn out after 5-10 years and must be replaced.
Installation of a stainless steel sandwich chimney
The installation of elements of a metal chimney is not difficult, the main thing is to observe the direction of connection of the elements “through smoke” and “through condensate”. What does it mean? When the furnace is lit, the smoke rises. If an obstacle is encountered in its path in the form of even an insignificant plane formed by the previous element and facing downwards, solid smoke particles settle on it, and the chimney becomes clogged over time. With condensate, the opposite is true: it flows down, lingering on the ribs of the elements directed upwards, and penetrates into the insulation, worsening its heat-insulating and fire-fighting properties. This is clearly seen in the figure.
Assembly of chimney elements "by smoke" and "by condensate"
When working, be sure to use thick gloves - thin metal can cut the skin. When installing the elements, it is necessary to check their verticality with a level and make sure that the distance to non-insulated combustible structures does not exceed 25 cm for sandwich elements and 60 cm for single pipes.
Metal sandwich chimney: installation sequence
1. A single metal pipe is installed at the outlet of the smoke collector of the furnace. Its height determines the heat transfer into the room. The pipe is placed “through the smoke” - put on the pipe from the outside. Before or after the pipe, they put a gate that blocks the chimney. All joints are coated with heat-resistant sealant.
2. A starting sandwich chimney is installed on a single pipe: a double pipe closed from the bottom end. Sandwich pipes are subsequently installed on it. The starting element is mounted on the pipe "by smoke", put on the pipe. Joints are also coated with sealant.
3. Start assembling the chimney from the necessary elements, possible elements of the chimney are shown in the figure. Pipes and elbows are mounted “by condensate”, that is, they are inserted inside the previous element so that the flowing condensate does not fall into the fibrous insulation. Joints are also desirable to coat with sealant.
4. When passing through the floors, unloading platforms are used, and the pipe itself is tightened with clamps every two meters and attached to rigid structures. It is better to do this in places where the pipes are connected, so additional strength is given to the entire chimney. From combustible structures, the pipe is separated by a layer of basalt wool, laid in a special box.
5. For pipes with many bends and branches, it is mandatory to install inspection elements with a window for cleaning. They are installed in places with open access to the pipe also "for condensate".
6. The passage through the roof and sealing is performed using a special lining - a conical roof, and an apron. The upper part of the pipe is equipped with a head or deflector.
7. During the first firing and heating of the pipe, the sealant hardens and creates additional strength and impermeability to smoke and condensate.
Video - installation of a stainless steel sandwich chimney
Installation of a ceramic sandwich chimney
The main difficulty in the installation of ceramic sandwich chimneys is the arrangement of a reliable foundation, as well as the assembly of the outer shell. Foamed expanded clay concrete blocks are used for the shell of chimneys - they are light, durable and not afraid of moisture. Ceramic pipes are heavier than metal pipes, so installation is best done by a team of two or three people.
Ceramic sandwich chimney: installation sequence
1. Check the availability and completeness of all elements of the chimney in accordance with the project: pipes, blocks, insulation, additional elements.
Insulation - basalt wool
2. Level the foundation with a sand-cement mortar and wait a few days for it to gain strength. Two or three layers of roofing material are laid on top of the screed - waterproofing will not allow moisture from the soil to penetrate into the walls of the chimney.
3. Install the base block first. This is a very important stage - any deviation from the vertical of this block will lead to a strong distortion of the entire chimney, so at this stage it is imperative to use a level.
4. After fitting and leveling, the block is placed on roofing material on the same cement-sand mortar and finally leveled.
5. For greater stability, cobblestones, crushed stone or broken bricks are laid inside the block and poured with cement-sand mortar or concrete.
6. All the following blocks are fastened together using a special solution that is resistant to high temperatures - it is purchased together with a chimney kit. The solution is applied on a metal template with a spatula.
7. To install some elements - tees, revisions - in blocks, you need to make a drink. It is performed by a grinder with a diamond-coated disc according to a ready-made template included in the kit.
8. The first element of the pipe is a condensate trap with a drain, it is installed in a block with a sawn hole for the ventilation door so that the drain faces the notch in the block.
9. A heat insulator is laid around the first pipe element - basalt wool mats.
10. The next pipe element is placed on the condensate collector, connecting the elements to a special sealant.
11. Continue assembling the chimney. The blocks are connected to the blocks with a heat-resistant solution, pipes - with a sealant. At the same time, do not forget to combine revision elements and tees with cuts in blocks, and wrap pipes with heat-insulating mats.
Rain cap
Video - installation of a ceramic sandwich chimney
A properly installed chimney is not afraid of moisture or overheating, it successfully copes with the task of removing smoke from a stove, fireplace or boiler. Timely will extend its service life, so before you assemble the sandwich chimney, carefully consider the location of all revision elements, and the operation of your chimney will become convenient and safe.
Sandwich chimneys have many advantages: ease of construction, safety, aesthetic appearance. Why not try to assemble a sandwich chimney with your own hands? As practice shows, it is really quite simple. And everyone will be able to fold such a chimney like a designer.
This work will require knowledge of the chimney and its installation - it is this material that we examined in detail in our article. We picked up photos and diagrams with a description of the main elements of the chimney system, provided step-by-step instructions for assembly and installation.
They also supplemented the material with useful tips for improving traction and a video demonstrating the process of installing a chimney in a country house.
Disadvantages of chimneys assembled from sandwich pipes:
- seal failure after a certain number of heating and cooling cycles;
- compared with a brick structure, a sandwich chimney has a higher cost;
- the service life is about 15 years, while traditional chimneys made of refractory bricks last 10 years more.
Such a short service life is mainly due to the use of low-quality materials in production.
Choosing products from a trusted brand is the first thing you can do for a long and successful operation of the chimney.
Image Gallery
How to prevent traction problems?
- the height of the structure must be equal to or greater than five meters;
- it is preferable to build a straight chimney - without bends and turns;
- turns (no more than three) are made at an angle of 45 °;
- an almost horizontal section of the chimney can extend from the boiler (with a slope of 2 °), but not more than one meter.
If during the operation of the chimney problems with the removal of smoke are found, they resort to installing special devices that increase traction.
It could be:
- It works on the principle of pressure reduction while bypassing obstacles with air. It works effectively in windy weather, but in quiet weather it can, on the contrary, prevent smoke removal.
- Stabilizer. It is an additional element that has the shape of an umbrella and is worn on top of the pipe. From below, air enters through the open area, increasing traction.
- Rotary turbine. It works using the power of the wind: rotating in one direction, it creates a rarefaction of air above the channel. In calm weather, it is not effective.
All these devices are not a panacea, especially if the chimney is not initially designed correctly.

The deflector can interfere with the output of combustion products in calm weather
Operation of chimney sandwich systems
After installing the chimney, a test fire should be carried out to check the tightness of the joints, make sure that the adjacent structures and materials do not heat up.
During the first use of the system, slight smoke and a specific smell may appear from the heating of oil residues, sealant, dust on the surface of the pipes.
Proper operation involves timely. When cleaning, do not use any detergents. An overview of the best cleaning products and methods are discussed in.
It is better if it is carried out by an organization that has a special license that gives the right to carry out this kind of work.
Conclusions and useful video on the topic
More information on how to competently assemble a reliable chimney from modular sandwich pipes can be viewed in the video:
Self-installation of a chimney from a sandwich pipe will require the user to study some of the nuances and subtleties. But on the other hand, by doing the job correctly, you can be confident in the safety of your family and yourself.
Do you have experience assembling a chimney from sandwich labor? Did you do the installation of such a chimney with your own hands? Share your experience with novice home masters - write in the comments block what difficulties you had to face during installation, how long you have been using it and how you take care of your chimney.
Whatever fuel is put into heating equipment, a good chimney is needed to remove combustion products. A practical option for the channel through which the oven gets rid of smoke is considered a stainless steel pipe.
Advantages of a stainless steel chimney
Stainless steel chimneys have been approved by stove owners due to benefits such as:
- long-term operation;
- impeccable wall strength;
- ease of installation;
- safety and increased strength;
- acceptable price.
A stainless steel chimney is much stronger than its brick counterpart. If sharp temperature changes are not reflected in any way on the metal surface, then the brick is especially sensitive to them and can crumble.
A stainless steel chimney has a lot of advantages, the main of which is a durable casing.
Most impressive is the stainless steel chimney's resistance to moisture. A pipe made of this metal remains immune to corrosion, regardless of the degree of humidity in the room.
The stainless steel chimney is a construction of separate modules, which is why it can be easily repaired by replacing the damaged part with a new one. The installation of this smoke channel is carried out using special bends. With them, engineering systems and architectural structures cease to be obstacles for installing pipes on heating equipment.
 Tees and elbows made of stainless steel simplify the work of assembling the smoke channel
 By mounting a stainless steel smoke channel, you can direct it in any direction without much hassle. This operation will not require rearrangement of the stove or fireplace.
 Stainless steel chimney can be assembled from horizontal, vertical and curved elements
 The round shape of the stainless steel pipe prevents contamination of the internal walls by combustion products. It follows that a chimney made of this metal does not require frequent cleaning.
Description of stainless steel chimney
The smoke channel made of stainless metal can be completed in different ways, so it is advisable to consider all types of the discussed design.
Types of stainless steel pipes
To equip the stove with a stainless steel chimney, you will need to make a choice between three options:

The thickness of single-layer chimneys can be from 0.6 to 2 mm. Buying a product will not hit your pocket, but you must keep in mind that the use of such products is not permissible in all cases.
You will have to refuse to purchase a single-layer stainless steel pipe if the building with the stove is not isolated from cold air. Due to the temperature difference between indoors and outdoors, there will be an overrun of the energy carrier. And the formation of a large amount of condensate can significantly reduce the life of the equipment.
 A single-layer stainless steel chimney requires careful home insulation
 The double-circuit stainless steel pipe is said to be the most reliable design. The sandwich system is able to function well, being mounted both inside the house and outside it. This is the merit of the intermediate layer of the product - a non-combustible material that retains heat. They can be ordinary mineral wool.
 Sandwich pipe perfectly retains heat and therefore can be mounted outside the house
 Corrugated Stainless Pipe
They count on a corrugated pipe if it is necessary to create a smoke channel with curved transitions. The product, made of corrugated stainless steel, works without problems, even when heated up to 900 degrees. It well removes the gases formed as a result of fuel combustion, and therefore is in great demand.
 A corrugated pipe is taken, knowing that an ordinary steel product will not be able to provide the necessary bending of the channel
 A corrugated stainless metal pipe is actively used in the installation of heating equipment, including gas boilers.
The flexibility of the corrugation provides a unique opportunity to mount the pipe in a room with beams. Even the slopes of the ceilings will not become an obstacle to passing this product through the roof.
 Corrugated stainless steel pipe bends as you like and therefore becomes indispensable in a number of cases.
 Table: technical parameters of stainless steel corrugated pipe
The latter characteristic means that the inner walls of the product are very smooth and therefore protected from excessive contamination.
Benefits of using a corrugated stainless chimney
The corrugated stainless steel chimney has earned a good reputation because:

Diameter and standards of stainless steel pipes
Steel stainless pipes differ in size. The size of the conditional passage, the outer diameter and the thickness of the walls of the pipeline may be different.
 Stainless steel pipes are available in a wide range of sizes
 Table: parameters of stainless steel pipes
| Pass, mm | Outer diameter, mm | Wall thickness, mm | Weight of a pipe 1 m long, kg | ||
| Standard pipes | reinforced pipes | Standard pipes | reinforced pipes | ||
| 10 | 17 | 2,2 | 2,8 | 0,61 | 0,74 |
| 15 | 21,3 | 2,8 | 3,2 | 1,28 | 1,43 |
| 20 | 26,8 | 2,8 | 3,2 | 1,66 | 1,86 |
| 25 | 33,5 | 3,2 | 4 | 2,39 | 2,91 |
| 32 | 42,3 | 3,3 | 4 | 3,09 | 3,78 |
| 40 | 48 | 3,5 | 4 | 3,84 | 4,34 |
| 50 | 60 | 3,5 | 4,5 | 4,88 | 6,16 |
| 65 | 75,5 | 4 | 4,5 | 4,88 | 6,16 |
| 80 | 88,5 | 4 | 4,5 | 8,34 | 9,32 |
| 100 | 114 | 4,5 | 5 | 12,15 | 13,44 |
| 125 | 140 | 4,5 | 5,5 | 15,04 | 18,24 |
| 150 | 165 | 4,5 | 5,5 | 17,81 | 21,63 |
Installation of stainless steel chimney
Details for assembling a stainless chimney are very diverse, so the configuration of the channel can be any without harm to the traction force and the working process in the furnace. Quite often, a corrugated pipe and several elbows become an element of the chimney, helping to avoid a global reconstruction of the walls.
Smoke channel assembly instructions
The stainless steel chimney is installed as follows:

Video: connecting chimney elements
Stainless pipe installation rules
Installation of the structure should be carried out, guided by the following rules:

Important principles for installing a chimney
In order to make the chimney work efficiently, it is worth listening to some recommendations. In many ways, they relate to the use of corrugated pipes. It can be mounted both inside and outside the house, but the best place to place such a product is considered to be the transition from the stove pipe to the main channel.
The advice of the masters does not bypass the shape of the hole for the pipe. It is better to make it rectangular or elliptical. The hole in the roof should be located where the flue can pass centrally between the ceiling beams and the roof framing.
 Most often, a rectangular hole is created under the chimney pipe, since it is easier to cut and seal it
 Installation of a stainless steel chimney implies mandatory waterproofing of the structure. This is important, because the upper section of the pipe, which is not protected from moisture, can be the culprit for moisture to seep onto the attic floor.
Video: installation of a chimney from a sandwich pipe
The smoke duct, made of stainless steel pipes, does its job well. The installation of this design will seem simple, like an easy mathematical task, if you know the intricacies of the process and take into account the advice of the masters.
- First of all, an adapter is put on the pipe of the boiler or furnace, which is pre-coated with a heat-resistant sealant (withstanding temperatures from 1000 to 1500 degrees) and clamped with a metal clamp.

- If the chimney exits vertically (for example, in a sauna stove), then another single-walled pipe is required, on which a tank for heating water or a mesh heater can be placed. It is impossible to install a sandwich right away, since the thermal insulation layer from severe overheating will very soon sinter to the state of a stone, cease to perform its function, and this section of the chimney will fail.
If the chimney is installed on a heating boiler with an outlet to the street, then a horizontal section is mounted after the adapter pipe, which should go outside. The length of this section, as already mentioned, is no more than a meter, and it needs to be given a slight slope outward. The remaining open layer of thermal insulator must be closed with a special plug.
- To pass through the wall, a hole is punched in it so that there is a gap between the pipe and the wall material. If the wall is made of hot material, then the gap should be at least 200 mm. Usually a square opening of 400 × 400 mm is made. From the inside, its walls are sheathed with minerite (basalt cardboard). Then a factory or home-made pass-through block is inserted.

A sandwich pipe is passed through it and connected to the boiler. The space of the passage block is densely filled with basalt mineral wool. Outside, this node is closed with a metal plate or a decorative rosette included in the kit. The remaining gaps can be filled with sealant.
 Ready-made pass-through unit operating on the principle of "sandwich in a sandwich"
 Some manufacturers provide special walk-through blocks with a thermal insulation layer already filled. The choice of a particular model will depend on the material and thickness of the wall or ceiling.
If the walls are made of non-combustible material, then it is possible to place a sleeve from an asbestos-cement pipe for the passage, and fix the sandwich element inserted into it in the center with mineral wool stuffing, and also cover it on both sides with decorative metal plates.

- At the exit to support brackets are installed on the outer side of the wall, on which the plate rests. It will serve as the main support for the vertical part of the chimney. Structurally, it can immediately include an inspection unit with a condensate outlet cock.
- After the pipe is brought out, the installation of the vertical part begins. And here you need to understand the intricacies of installing pipes "by smoke" and "by condensate".
 Two installation principles: "by smoke" and "by condensate"
 - If the upper section of the pipe is put on the lower one with a wider socket, then this is called a “smoke” connection - ascending gases have no barriers to free exit to the outside. However, in this case, a small gap inevitably remains, directed upwards (shown by a red arrow in the diagram), where the flowing drops of the resulting condensate will fall. This will most negatively affect the operation of the chimney - the insulation period will soon become damp and will no longer cope with the task of thermal insulation of the internal channel. And that, in turn, means even more. condensation, reduction of thrust and, as a result, a decrease in the efficiency of the boiler.
— In the case of “condensate” installation, drops of moisture freely flow down the surface, into condensate receiver. And in order to prevent exhaust gases from escaping, the outer pipe of the sandwich structure must be mounted “through the smoke” (blue arrow in the diagram). In addition, a layer of sealant is applied in this place and a clamp is tightened, so that reliable obturation from the exit of smoke through the sandwich pipe is ensured. And a small amount of gases that can penetrate the insulation layer will contribute to its ventilation.
Therefore, during installation, the following rules are followed: on the first, horizontal section to the tee, installation is carried out “by smoke”. Throughout the rest sandwich chimney the inner pipe is installed “through condensate”, and the outer pipe is installed “through smoke” using sealant and carefully tightening the assembly with a clamp.
 Installation of the inner pipe "by condensate"
 - Qualitatively mount both the outer and inner pipes at the same time sandwich chimney almost impossible. They usually do it this way. The inner pipe with its tapered end extends slightly outward (by 150 - 200 mm) and is firmly, until it stops, inserted into the socket of the element already mounted below. Then the narrowed part of the outer pipe, located below, is smeared with a sealant, and the block of thermal insulation and the outer pipe remaining on top is shifted down to the tightest possible connection. A clamp is put on, and the top tube skirt is tightened (as shown in the diagram).

- Installation continues in the same order upwards. Attached to the wall at regular intervals. brackets with clamps fix the t ruble in a vertical or inclined position at the required distance from the surface of the building.
- If the construction is heavy, then a relief bracket is provided with a corresponding plate equipped with a connecting element to continue the installation above.
- Installation ends with the installation of a cone and the required head.

- If necessary, a special clamp with three lugs is attached to the pipe for attaching stretch marks. Stretch marks are attached on the opposite side to the fixed parts of the roof or building.
Video: installation master class sandwich chimney outside the house
Features of installation with an internal location of the chimney
During installation sandwich chimney inside the room, there are nuances of passing it through the ceiling and roof.
- First of all, once again it can be noted that after the section with a single-walled pipe, at the inlet from the boiler, an element with a gate valve is installed so that the heat does not immediately escape vertically into the atmosphere.

- At the transition to the sandwich, a starting plug must be installed, which will close the protruding edge of the thermal insulation layer.

- The passage of the pipe through the ceiling corresponds in general terms to the passage through the wall of combustible materials already described.

Be sure to attach a passage unit (box-shaped or cylindrical) from below to the ceiling, which must be densely filled with thermal insulation material - mineral wool, or in this case expanded clay is allowed.

From above, the passage unit is then closed with a metal plate.
As already mentioned, some manufacturers provide in detailing systems special feed-through modules, which are a kind of "sandwich in a sandwich". Working with such elements is even easier - an opening of the desired shape and size is cut out under them, the block is installed in it, and then a sandwich pipe is threaded through the hole.

- When designing a chimney system, the location of the floor beams and roof rafters must be taken into account - the pipe should run approximately in the middle between adjacent elements. If necessary, sometimes it is necessary to slightly change the direction of the chimney, using bends of 45 ° for this. It is forbidden to use rectangular branches for this purpose.

- The joining of pipes in the thickness of the ceiling or at the level of the roof is completely excluded. It is necessary to observe the distance from the joint to the floor or roof level of at least 250 — 300 mm.

- During the passage, an opening is first cut out, as a rule, of a rectangular shape.

- Then another section of the chimney is drawn through this window.
- It is necessary to provide accurate positioning pipes in the center of this opening. This can be done with a metal sheet with an elliptical hole cut out, fixed to the back of the roof, or even simply by fixing the chimney with metal profiles.

- Then a special roofing module is put on the pipe - conical roof, having an angle corresponding to the steepness of the roof slope. It is attached to the roof deck, and is closed from above with a comfrey, which is fixed with a clamp or a locking screw.

- The upper edge of the metal support plate of the roof, if possible, is led under the roofing material. If this is not possible, then a thorough sealing is performed with a sealant.

Very easy to use elastic kryzy (they are often called "Master Flash"). They can be used for almost any slope slope, including mounting on relief roofing (slate, corrugated board, etc.). The hole in the conical part is cut out a little smaller in diameter than that of the pipe passing through it to ensure maximum sealing. The supporting part of the "Master Flash" can be given the required shape, and then, after smearing the bottom surface with a layer of sealant, this assembly is attached to the roof with self-tapping screws.
 Finished roof sandwich chimney section
 The final stage has no features - the same installation of the head with the necessary elements.
Video: installation sandwich chimney with penetration through the ceiling and roof
So, to perform an independent installation of a chimney sandwich, at first glance, is not so difficult. However, this event requires stable skills, increased accuracy, caution, especially when working at heights. There are no trifles in this matter, because an incorrectly assembled system can cause a fire or other small and big troubles.
Before starting the assembly and installation of a stainless steel chimney, experienced specialists carry out preparatory installation work. To do this, experts suggest using a special type of sealant that can withstand temperatures up to 100 0 C. It is with this substance that it will be necessary to process all the seams and in the future joint in the inner cavity of the chimney pipes.
In addition, the sealant serves as an additional guarantee of the tightness of the product, because in some cases even welding can “retreat”. There is no need to use sealant on the outside of a stainless steel chimney. Click here for an overview of stainless steel sandwich chimneys.
The photo shows stainless steel chimneys.
How to assemble?
The main rule to remember when assembling is to treat the connecting elements of the stainless steel chimney with special care and accuracy. The entire structure must be reinforced with additional elements in the form of clamps. In the event that the chimney is purchased, then all elements must be included. Clamps are placed at each junction of the product - this is approximately every 1.5-2 meters.
Only if the assembly of the device is done correctly will it be possible to obtain a sealed and reliable chimney.
How to install?
In accordance with the general rules for the installation of stainless steel chimneys, installation should be done from the bottom up. This means that first they fix that part of the chimney that is attached to the heating device, and only after that they move on to the rest of the structural elements.
Then fix each of the pipes. They are mounted as follows: the side of the smaller diameter is attached to the pipe of the larger diameter. This method of forming the structure will prevent moisture and dirt from entering the internal cavity of the chimney. Read an overview of the characteristics of a galvanized steel chimney on this page.
The maximum size of one element of the "highway" cannot exceed one and a half meters.
At the joints of the product, clamps made of brass or stainless steel should be used. In order to fix the device, special brackets and bolts marked M10 and M8 should be used.
To take care of the stainless steel chimney, it is necessary to install a small door at the very bottom of the device.
In order to simplify the entire process of installing a stainless steel chimney as much as possible, a project diagram should be prepared in advance. In addition, such a drawing will allow you to orient the owner of the building with respect to the overall dimensions of the entire structure and determine the number of all component parts of the device.
Tip: you should purchase material 30% more, because during the installation process it will be difficult to be distracted from work. It requires discipline and care. In the event that some elements are a little higher or longer, they can be shortened a little. If the fastener fails for some reason, then there will be no need to run to the store “for the supplement”. Read our review of stainless steel chimneys.
According to experienced specialists, in the event that even after studying the material and the advice of the masters, self-confidence has not increased, it is worth using the services of specialists. This is the only way to save your time and money.
Sealing
As mentioned above, in order to seal the system, you need to use a special heat-resistant type of sealant. They lubricate the inside of stainless steel pipes, but some experts argue that for maximum effect, the outer part of the system should also be lubricated. It should also be noted that the clamps are installed at maximum "pressure". Only in this way will it be possible to guarantee the absolute tightness of the entire surface of the device as a whole.
How to clean?
Any appliance requires good attitude and care, the same goes for a stainless steel chimney. It is in order to be able to clean the device that a small door or a so-called glass is installed in its lower part. This element can be removed and the inner surface of the pipes can be cleaned. Read an overview of the types of chimney for a fireplace.
Dirt in the system is the formation of a space with a high level of roughness, and this has a direct impact on the functionality of the device and the operation of the entire system.
Even for comfortable care of the stainless steel chimney, an ash pan is specially installed. It will collect solid elements of combustion.
The picture shows the installation of a stainless steel chimney.
Burnt stainless steel chimney, what to do?
The service life of a stainless steel chimney can last several decades. But, there are also troubles. For example, one of the parts of the device may burn out. There are two ways to carry out repairs:
- complete replacement of the element,
- local repair.
The first option involves replacing the entire pipe section, but the second option involves the use of additional construction equipment. By welding, the damaged area is repaired. It should be reinforced with a stronger metal.
Instructions on how to assemble and install a stainless steel chimney
An article on how to assemble and install a stainless steel chimney, describes the design and connection, installation rules and installation diagram, there is a video, instructions for sealing, how to clean and what to do if the chimney burnt out
Whatever fuel is put into heating equipment, a good chimney is needed to remove combustion products. A practical option for the channel through which the oven gets rid of smoke is considered a stainless steel pipe.
Advantages of a stainless steel chimney
Stainless steel chimneys have been approved by stove owners due to benefits such as:
- long operation,
- impeccable wall strength,
- ease of installation,
- safety and increased strength,
- acceptable price.
A stainless steel chimney is much stronger than its brick counterpart. If sharp temperature changes are not reflected in any way on the metal surface, then the brick is especially sensitive to them and can crumble.
A stainless steel chimney has a lot of advantages, the main of which is a durable casing.
Most impressive is the stainless steel chimney's resistance to moisture. A pipe made of this metal remains immune to corrosion, regardless of the degree of humidity in the room.
The stainless steel chimney is a construction of separate modules, which is why it can be easily repaired by replacing the damaged part with a new one. The installation of this smoke channel is carried out using special bends. With them, engineering systems and architectural structures cease to be obstacles for installing pipes on heating equipment.
Tees and elbows made of stainless steel simplify the work of assembling the smoke channel
By mounting a stainless steel smoke channel, you can direct it in any direction without much hassle. This operation will not require rearrangement of the stove or fireplace.
Stainless steel chimney can be assembled from horizontal, vertical and curved elements
The round shape of the stainless steel pipe prevents contamination of the internal walls by combustion products. It follows that a chimney made of this metal does not require frequent cleaning.
Description of stainless steel chimney
The smoke channel made of stainless metal can be completed in different ways, so it is advisable to consider all types of the discussed design.
Types of stainless steel pipes
To equip the stove with a stainless steel chimney, you will need to make a choice between three options:
- single-layer steel product,
The simplest chimney consists of several single-wall pipes
Corrugated stainless steel pipe has helical flexible walls
A stainless steel sandwich pipe consists of two pipes of different diameters, between which a heater is placed
The thickness of single-layer chimneys can be from 0.6 to 2 mm. Buying a product will not hit your pocket, but you must keep in mind that the use of such products is not permissible in all cases.
You will have to refuse to purchase a single-layer stainless steel pipe if the building with the stove is not isolated from cold air. Due to the temperature difference between indoors and outdoors, there will be an overrun of the energy carrier. And the formation of a large amount of condensate can significantly reduce the life of the equipment.
A single-layer stainless steel chimney requires careful home insulation
The double-circuit stainless steel pipe is said to be the most reliable design. The sandwich system is able to function well, being mounted both inside the house and outside it. This is the merit of the intermediate layer of the product - a non-combustible material that retains heat. They can be ordinary mineral wool.
Sandwich pipe perfectly retains heat and therefore can be mounted outside the house
Corrugated Stainless Pipe
They count on a corrugated pipe if it is necessary to create a smoke channel with curved transitions. The product, made of corrugated stainless steel, works without problems, even when heated up to 900 degrees. It well removes the gases formed as a result of fuel combustion, and therefore is in great demand.
A corrugated pipe is taken, knowing that an ordinary steel product will not be able to provide the necessary bending of the channel
A corrugated stainless metal pipe is actively used in the installation of heating equipment, including gas boilers.
The flexibility of the corrugation provides a unique opportunity to mount the pipe in a room with beams. Even the slopes of the ceilings will not become an obstacle to passing this product through the roof.
Corrugated stainless steel pipe bends as you like and therefore becomes indispensable in a number of cases.
Multifunctional product: stainless steel chimney
Chimneys made of stainless steel. Advantages, types and characteristics of a steel chimney. DIY installation instructions.

With the onset of spring comes the summer season. In public transport, talk about the upcoming "exploits" in the dachas began to be heard. If the beautiful half mainly talks about what flowers and berries are planned for sowing, then the strong and skillful half usually talks about tools, building materials and, of course, about baths. What is a bath without a stove, and a stove without a chimney? More and more often it is discussed how to properly assemble a chimney, which pipe to take, how to mount it, whether it will be made of stainless steel or galvanized, how will it be right and wrong?
At present, the so-called Buleryan furnaces are widely used. This name has long become a household name - many people habitually call any long-burning steel furnaces this way, although this is fundamentally wrong. But the people, not knowing much about brands, quite correctly noticed - no matter what size and shape the oven is, if it burns for a long time, it will be called Buleryanovsky. The principle of operation of these furnaces is very similar to each other, and most importantly, it is quite easy to make a chimney for them, because the requirements for it are somewhat simpler than for a conventional furnace. In newfangled stoves, the combustion temperature is somewhat lower, respectively, and the chimney is simpler.
We use a sandwich pipe for the chimney
Technology does not stand still, now there are many different ways to build chimneys. Today we will discuss how to assemble a chimney from sandwich pipes for long-burning stoves. Let's say a few words about what is a sandwich pipe? This is a two-pipe stainless steel chimney design. The smaller diameter pipe is inserted into the larger diameter pipe.
A non-combustible material is laid between them, which performs three functions:
- sharply lowers the temperature of the air propagating from the inner pipe
- fire-resistant non-combustible protection
- lack of sharp cooling of the pipe in cold weather
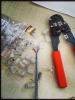
The advantage of a chimney made of sandwich pipes is a fairly easy installation, accessible to almost everyone who is not afraid of heights, able to work with a screwdriver and pliers. You will not need another tool for mounting a chimney sandwich (unless, of course, the builders left holes for the pipe in the ceiling or in the wall in accordance with the project). In any case, you will practically have no questions about how to properly assemble a sandwich chimney.
Choosing a material
I would like to advise: you need to assemble the chimney exclusively from stainless steel pipes. Although the price for galvanizing is almost one and a half times lower, keep in mind that condensation always forms in pipes of this type. Its amount can only be reduced by properly assembling the chimney sandwich, but it will not be possible to completely remove it. Condensation has appeared - rust will also appear. You will notice the oxidation process (rust) on the outer pipe of the chimney and you will be able to replace the outer pipe in time, but on the inner pipe it will not work. This can lead to the most unpleasant consequences.
Assembly rules
Many are wondering how to properly assemble the chimney pipes, how and what to insert? Should the narrow corrugated end of the pipe be inserted from above into the wide pipe or vice versa? The reality of life is that both cases are correct, you just need to clearly imagine what you want. So, if we insert the corrugated end into a wide pipe from above, we get the “condensate” scheme, on the contrary, “smoke”.
Already by the names it becomes clear that the second circuit needs to be assembled when you are sure of a large amount of condensate. Several cases are possible:
- firewood with raw wood (with a rare visit to the hacienda, this is a normal phenomenon)
- kindling after complete cooling in frost
- insufficient insulation of the external street pipe of the chimney
Scheme "on condensate"
Do not save on the last meter, make the pipe completely insulated to the very top. So it will be correct to assemble the sandwich chimney.
Scheme "by smoke"
The “by smoke” scheme must be assembled first of all when you have a significant part of the chimney passing through the living quarters. The smoke does not encounter obstacles in its path, does not seep into the cracks (which will inevitably arise due to temperature changes, any physical influences, etc.), and is completely removed to the street. This scheme is better suited for houses with permanent residence, with a daily furnace fire, when the pipe does not have time to cool down to the degree of abundant condensation. The flow of condensate into the thermal insulation layer leads to its damage. Then there is its "dumping", rotting with the release of unpleasant odors, further burning out. Therefore, if you do not plan to permanently live in the room where the stove is installed, it would be more correct to bring the chimney horizontally through the wall to the street, as shown in the figure.
Pay attention to the presence of a T-shaped element at the bottom of the street part. A container is attached to it from below to collect condensate and tar formed during combustion in long-burning furnaces.
How to assemble a chimney for the “smoke” scheme is shown in the figure.
Please note - in the assembled state, the optimal height of such a chimney should be at least five meters from the level of the grate. At this height, the necessary traction is provided.
Passage of floors
I would like to focus on the passage of walls, ceilings and the actual roof itself. Be sure to install walk-through wells. The passage well is clearly visible in the previous photo, fragment number 4. The same is installed at the transition of the floors.
In the ceilings, it is advisable to fill the well with expanded clay or fill it tightly with non-combustible thermal insulation. When crossing walls, filling the well with thermal insulation is mandatory.
For waterproofing the roof, use a special roof cut.
The height of the chimney above the roof
Thinking about how high to raise the chimney pipe above the roof, we will use the drawing
If the height of the pipe above the roof exceeds 1 meter, be sure to use braces to secure it. Remember that the pipe is subject to quite a strong wind load at this height. In winter, on a flat roof, the pipe will experience serious shear loads under the pressure of melting snow sliding down the roof in the thaw.
Ideally, if the chimney does not have many bends and turns, but sometimes it is impossible to do without it. Use only special angular transitions, of which there are a great many: 30, 45, 90 degrees.
When starting to purchase accessories for installing a chimney from a sandwich pipe, take the time to plan. Sit down with a piece of paper and a pencil, be sure to carefully draw all the elements, curves, dimensions. Remember that standard pipes are produced in the dimensions of half a meter and a meter. Provide sealing clamps, clamps for fastening the cable extensions, the installation location of the slide gate (some furnaces are equipped with them by default).
How to properly assemble a chimney
Today we will discuss how to properly assemble a chimney from sandwich pipes, what is a sandwich pipe? This is a two-pipe stainless steel chimney design. pipe smaller

Stainless steel chimneys differ from brick chimneys in their ease of installation, low cost, ease of maintenance and durability. For the production of pipes for the chimney, only materials that are resistant to the external environment are used. How to make a chimney yourself, read on.
Chimneys made of stainless steel pipes
Chimney design
The initial stage of manufacturing a chimney is the development of a project, according to which in the future it will be possible to determine the amount of materials required to assemble the structure.
When designing a structure, the following are determined:
- type of pipes to be used for construction,
- chimney dimensions,
- the amount of materials.
From what pipes can a chimney be made
The following stainless steel chimney pipes are used for construction:
- standard or monotubes. Single-wall chimney can withstand temperatures up to 450ºС and are mainly used for buildings located in warm regions,
Standard stainless pipes
- sandwich pipes. They are made of several layers of metal, between which a layer of insulation is laid. Sandwich pipes can be used in various regions, including the Far North.
Pipes with additional insulation
Chimney sizing
After choosing the type of pipes, the dimensions of the chimney are determined. At this stage, you need to calculate:
- the length of the pipeline for removing smoke,
- flue diameter.
When calculating the length of the structure, the following rules must be followed:
- for normal draft and complete removal of harmful substances from the living space, the total length of the chimney should not be less than 5 m,
- the minimum height to which it is necessary to bring the chimney on the roof of the house is 0.5 m,
- when removing the pipe at a distance from the roof ridge, it is necessary to take into account the permissible norms of deviation from the horizon.
Permissible deflection angles of the chimney
To independently determine the diameter of the chimney pipes for a boiler, fireplace, stove or other heating equipment, you need to know the power of the heating device.
To calculate the cross section, you can use:
- formulas. Such a calculation is considered the most difficult, since the formulas take into account the indicators of the amount of fuel burned, the rate of passage of gases in the pipe, the thrust indicator, and so on,
Independent calculation of the section
- special programs. On the Internet you can find many programs developed by specialists that simplify the calculation process as much as possible,
- normative parameters calculated by experts earlier.
The following standards have been developed for the cross section of the smoke channel:
- for a device with a power of less than 3.5 kW, pipes with a size of 0.14x0.14 m are suitable,
- if the power of the heating equipment for a bath or a house is more than 3.5 kW, but less than 5.2 kW, then it is necessary to use pipes with dimensions of 0.14x0.20 m,
- if a gas boiler or other equipment with a capacity of more than 5.2 kW is installed, then pipes of 0.14x0.27 m are optimally suited.
Preparation of materials and tools for assembly
To assemble the chimney, you will need to purchase:
- pipes of a certain diameter and length,
- brackets for attaching the pipeline to the roof and ceiling to give the system additional strength,
- crimp clamps that allow you to connect the individual elements of the stainless steel chimney into a single structure,
- revision. A special element is installed for the convenience of monitoring the state of the chimney system and timely cleaning,
- unloading platform for the correct passage of the chimney through the ceiling,
- a node for bringing the system to the roof, which includes such components as an apron and a roof,
- cone and cap (fungus). Additionally, you can install a deflector or spark arrester.
The main elements of the design of the chimney channel
Chimney assembly
Installation of a corrosion-proof flue is made upwards from the heater. With the reverse assembly scheme, the pipes are filled with condensate, which prevents the normal operation of the system.
So, the do-it-yourself chimney assembly scheme is as follows:
- the first straight pipe is connected to the outlet from the heater. If the diameters of the outlet and the chimney do not match, then an additional adapter is required,
Device for joining pipes of different diameters
- a revision and the next pipe are fixed, which extends the chimney system to the ceiling of the room,
- the passage of the chimney through the ceiling is equipped. For this:
- a hole is formed in the ceiling, the diameter of which is slightly larger than the diameter of the pipes,
- the passage of the chimney system in the ceiling is reinforced with beams, beams or any other elements. This is necessary for the reliability of the ceiling and protect it from destruction,
- a bracket for fixing the chimney is installed in the hole,
- an insulated tee is attached to the bracket, to which the lower and upper pipes will be connected in the future,
- the through hole is insulated with any non-combustible material. Finishing material is covered with asbestos sheet and stainless steel plate,
Arrangement of passage through the ceiling
- the chimney is extended to exit to the roof,
- the outlet of the pipe to the roof is equipped. The work is carried out according to the following scheme:
- a hole of the required diameter is also cut in the roof, the area around which is strengthened,
- a mounting bracket, a roof (special cutting) and an apron are installed in the hole,
- from the inside, a metal sheet is fixed on the roof to prevent fire,
- pipes are pulled out
Arrangement of passage through the roof
- the remaining elements of the chimney are installed. All joints, especially when passing through the ceiling and roof, are sealed for strength.
A stainless steel chimney is an inexpensive and stylish solution for making a smoke channel in any room. Modern systems during assembly do not require certain knowledge and special tools. The finished design is obtained as safe, strong and durable as possible.
How to make a stainless steel chimney
To remove harmful combustion products from the stove or fireplace, a chimney is installed. Currently, chimneys, which are made of stainless steel, are very popular.