Do I need a Mauerlat for a log house. Do-it-yourself Mauerlat for a gable roof: we fix the Mauerlat of a gable roof according to the instructions. Boards fastened together
Proper and durable fastening of rafters during the construction of a house is one of the key points of the entire construction process. Therefore, it is important that all components of the system are accurately matched, installed in place and firmly fastened into a single structure. It is undesirable for the builder to proceed with the installation of rafter elements without a pre-drawn scheme and the calculation of the quantity and range of required materials and accessories.
The roof truss system is the frame and skeleton of the roof.
The structural basis of the system
Rafters, i.e., the supporting base of a pitched roof, are log or block beams on which the so-called roofing pie is laid. The composition of the latter includes a layer of vapor barrier, waterproofing material and the final roofing. The soles of the rafters, i.e. their lower part, are attached directly to the wall of the building or to the Mauerlat. At the top, the rafters are laid by building them up from separate parts in a straight line, or at the required angle, and attached to the roof purlin or its ridge.
Hanging rafters can experience deformation loads, including compression and bending, which creates a significant bursting force. This is due to the fact that the fastening is made without additional support. This is permissible for the walls of the house, the distance between which does not exceed 6.5 m. Otherwise, a horizontal beam is installed - a puff, designed to evenly distribute the load. Very often it is also used as the basis of the overlap.

Figure 1. Elements and connection of layered rafters.
Roof structure with intermediate piers, requires the installation of layered rafters. The rafter soles are fixed to the Mauerlat, and the top to the roof ridge. In the middle, such rafters rest on supporting pillars or intermediate walls. This significantly reduces deformation and overload and makes the truss system fastening strong and durable.
An important part of the supporting base of the roof is the Mauerlat. It is made of timber, with a minimum section of 15 x 15 cm. For log cabins, Mauerlat can be omitted, but capital buildings made of concrete and brick are not built without it. Mauerlat is installed parallel to the roof ridge on the walls along the length of the house. Why is it necessary to make a concrete reinforced base with vertical mortgage screws on the walls. Mauerlat is put on these screws and fastened with nuts. (Fig. 1: Rafter attachment patterns.)
Back to index
Accessories for rafters
The fasteners for the rafter system are metal. It consists of:

- steel corner;
- perforated tape for tightening system elements;
- nails, staples, screws, bolts, hairpins, knitting wire;
- metal plates;
- mounting "sled" to prevent deformation during shrinkage of the structure.
Back to index
Connection methods
It is necessary to determine how to fix the rafters when designing attachment points. For example, they are attached to the Mauerlat in a rigid way.
For such an attachment, “saddles” are cut out on the soles of the rafters according to the template. With the help of them, the beams are mounted on the Mauerlat, which remains solid. The “saddle” and the Mauerlat are joined with nails: one is hammered vertically in the middle, and the other two are driven at a slight angle to the carrier beam. You can also use metal corners, for fixing which nails with special spikes on the leg are used. Another mounting option is a retaining beam, installed under the sole of the rafter with an emphasis.

Elastic fastening of rafters is used in buildings made of beams or logs, since structures made of them shrink significantly in the first years after the construction of the house. The lack of the required fastening play can lead to failure or collapse of the roof. For sliding fastening, a steel corner with elliptical nail holes or special fastening “sleds” is used.
For work on fixing the structure, the following tools are required:
- roulette;
- building level;
- square;
- hammer;
- wrenches;
- electric drill;
- saw;
- screwdriver;
- pencil.
Back to index
Roof installation without mauerlat
If the rafters are fastened directly to the floor beams, a point distribution of the weight of the roof comes out. Therefore, the beams must be elongated and protrude 40 cm beyond the line of the walls. To maintain the same angle when fastening across the beams, it is necessary to pull the string. It will become a guide when cutting grooves under the soles of the rafters.

Fastening rafters with a beam is made in the following ways:
- spiked tooth;
- stubborn tooth;
- emphasis on the end of the beam.
The required number of teeth (1 or 2) is determined by the angle of inclination of the sole of the rafters. Having inserted the rafter ends into the grooves, they are additionally fixed on the beams using a bolted connection or steel corners.
When fastening with a beam is carried out by cutting, a single tooth is enough. For this method of fastening, the following rules must be observed:
- The connection of the beams with the truss system is carried out if an angle of 35 ° is formed between them.
- A protrusion with a spike is made at the base of the sole of the rafter, and a corresponding nest is made in the carrier beam.
- The depth of the socket should be less than 25 - 30% of the width of the sole.
- To avoid chipping the end under the pressure of the rafter's leg, the cut is performed by retreating 25 - 40 cm from the cantilever end of the beam.
- To prevent lateral displacement allow teeth with stops or spikes;
A hollow roof with an angle of inclination not reaching 35 ° requires a cut, carried out in the following ways:
- In 2 spikes;
- Point-blank without spikes or with 1 spike;
- In a castle with 2 spikes.
Back to index
Fastening the ends to the roof ridge

The question of how to attach the rafters to the upper roof beam is solved using 1 of 3 schemes:
- Directly with nails or plates, cutting off the upper parts of the rafters according to the template at the required angle.
- For overlapping, long bolts, nails or studs are used.
- Butt-mounting on a roof ridge requires sawing out a "saddle" at the sole, as well as at the top end to support the ridge beam.
Rafter extension.
To increase the length of the rafters to the size of the roof, you need:
- Make an oblique cut and connect the segments with a bolt with a diameter of 10-12 mm or more;
- Butt-join and secure with overlay bars, which are fixed with nails;
- Connect with an overlap with a cutout of at least 1 m, placing fasteners on both sides.
A gable roof is one of the most common roofing options in individual construction. It is reliable, and it can be decorated with a variety of materials. The roof pie is a complex system of rafters, layers of various materials, but if you want to figure out how to build all this, you can. One of the parts that are almost always included in this design and are indispensable is the Mauerlat for a gable roof. What is it and how to make it?

Mauerlat is a special connecting element between the walls of the house and the roof itself. The strength and reliability of the entire structure will largely depend on how correctly it is made and fixed. That is why Mauerlat and its creation should be given special attention.

Mauerlat is a so-called belt, which is mounted around the entire perimeter of the upper part of the walls right on their end. The rafters are fixed on it during the construction of the roof. Its purpose is a reliable connection between the walls of the building and the elements of the roof, and it is this element that will evenly distribute the load of the entire roofing pie on the walls and foundation. Mauerlat also allows you to significantly reduce the windage of the roof and will not allow the wind to rip it off the house, that is the resistance of the roof to wind loads is significantly increased due to the Mauerlat.

On a note! Sometimes roofs are mounted without installing a power plate, that is, the rafters are simply fixed on the floor beams. But in this case, the entire load from them falls precisely on the places of support, and not on the entire wall. Because of this, there is a risk of rapid wear and subsequent destruction of the structure.

When building a roof that has two slopes, the mauerlat is always installed on two parallel walls on which the roof will rest, and not on all ends of the perimeter of the walls. If the house is built of timber or logs, then this detail is not always necessary - the upper part of the wall will perfectly cope with the main tasks of the Mauerlat.
What is it made from?
The type and technical characteristics of the material used to build the Mauerlat will depend on several factors, including the type of roof, the need to equip the attic, the size of the house and the quality of the walls, the material used to make the entire structure, climatic conditions, etc. To create This element can be used wood, channel, I-beams, metal.

Bar prices
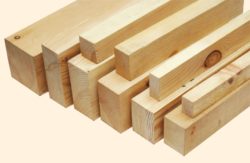
Mauerlat made of wood
The most common material for creating this element is ordinary wood. This is an easy-to-handle and affordable option, but at the same time it is distinguished by its durability and strength. It is much easier to work with a tree than with others, since it can be easily adjusted to the desired dimensions, even if mistakes were made in the preliminary calculations.
Table. What is a wooden Mauerlat.
| wood type | Peculiarities |
|---|---|
| This is the easiest and most convenient option. The beam is already sawn in advance, it is strong enough, thick, reliable. Unlike logs, it will not be able to roll off the end of the walls and fall. Usually, a beam 15-20 cm thick is used to create a Mauerlat. The main parameters of the sections are: 10x10 cm, 15x15 cm, 10x15 cm, 8x18 cm, 20x20 cm. |
| Instead of timber, boards are sometimes used as Mauerlat. However, due to their small thickness, they will have minimal reliability. To improve this quality, several boards are fastened together into a single structure. This method allows you to save some amount of money spent on construction. The option is suitable for arranging roofs on small country houses, but it is not recommended to stop on it during capital construction. |


Attention! When buying wood, it is important to carefully evaluate its quality, including inspecting for the presence of knots, especially when purchasing timber. Knots should not occupy more than 2/3 of the thickness of the material, as they will not allow the tree to stretch and cracks may appear on the walls of the building due to improperly distributed loads.

A wooden mauerlat can be used in the construction of a roof both on a wooden house (in this case, the element is installed extremely rarely), and on those built from aerated concrete or foam concrete. In the latter cases, it is recommended to attend to the construction of a reinforced concrete belt around the perimeter of the building. The fixation of the wooden Mauerlat is carried out with anchor bolts.

Prices for building boards
Building boards
Metal Mauerlat
This is a kind of combination. Here, metal pipes are used for manufacturing, which are pulled into pre-made holes in the rafters.

This option will be optimal if the roof truss system is also made of metal. Working with a metal element is more difficult than with a wooden one, but such a design will turn out to be much more reliable. It is better to use high-quality steel pipes with a small cross section.

Prices for various types of steel pipes
Steel pipe
Laying methods
Fixing the Mauerlat on the walls can be done in different ways. First of all, with the arrangement of the armored belt and without it. This element is necessary if the strength of the material from which the walls are made raises certain doubts - that is, there is a risk of gradual destruction of the structure as a result of the load that the roof carries out.

Mounting the Mauerlat to the walls is carried out in several main ways:
- anchor bolts at least 20 cm long;
- staples, fittings or studs embedded in the walls during their laying (for example, from brick). Typically, the technique is used if the area of \u200b\u200bthe roof slopes does not exceed 250 m 2;
- staples to small bars embedded in a brick wall;
- to the studs installed in the armored belt, formed along the length of the wall.


Video - Methods for attaching the Mauerlat
Mauerlat mounting features
Mauerlat, when installing a gable roof, is installed on two walls parallel to each other, on which the roof will rest. If the rafters are mounted on a layered system with a ridge run having supports, then the mauerlat can also be installed on a load-bearing wall located in the middle of the structure.

If the house is completely built of wood, then it does not need to equip the Mauerlat. But you can’t do without it when building a roof on brick, foam concrete and other types of houses.
On a note! The more modest the house, the less requirements are placed on the reliability of its fixation.

The Mauerlat itself can be fixed so as to be laid along the inner or outer edge of the wall end or in the middle of the end. But the distance from the outer edge of the wall in any case should be at least 5 cm.
If hanging rafters are being installed, then the Mauerlat is not installed. The rafters are attached to floor beams laid across the walls. It is the beam here that will provide the rigidity of the truss system. However, the hanging rafter option can only be used in the case of building buildings with a small span between the walls. In this case, usually the walls are made of logs or timber.

Mauerlat calculation
The correct calculation of the materials necessary for arranging the Mauerlat will allow you not to buy too much and not spend an excessive amount of money. And knowing its certain parameters (such as weight, volume) will allow you to determine the type of fastening so that the entire system is reliable. To make calculations, certain formulas and material parameters are used. First of all, the length and perimeter of the future element are determined. Then the weight of the material used is calculated by the formula M = R x V, where R is the density of the wood used, V is the volume of the entire material. The volume can be calculated using the formula V = S x L, where S is the section (at least 10x10 cm), and L is the length of the beam.

Preparing to create a reinforcing belt
The thickness of the reinforcing belt should be calculated based on the load indicators that it will experience under the influence of the rafter system, wind and precipitation. Its width cannot be less than the width of the end of the wall.
For work, you will need to purchase cement grade M400. It is poured in one go to make the structure reliable and monolithic. The concrete mixture is made from crushed stone, sand, cement in a ratio of 3:3:1. To improve the properties of the mixture, plasticizers can be added to it. For formwork, boards or building blocks, OSB boards and other materials can be used.

The armored belt is made as follows - a timber formwork is created in the upper part of the wall, reinforcing bars are laid (in parallel, one above the other). Anchor bolts, studs, staples (diameter - about 14 mm) are fixed to these rods with wire. The step between the individual fasteners should not exceed 100 cm. They are located strictly vertically. The created formwork is poured with a concrete mixture with a thickness of at least 5 cm. The formwork can be removed no earlier than 10-12 days after pouring.

Between the Mauerlat and the wall of the house or the armored belt, it is important to lay waterproofing material, as well as take care of additional insulation or sealing of gaps. Otherwise, it is in this place that cold bridges can form. For waterproofing, a strip of roofing material is usually used.

The length and section of the studs or anchors are determined depending on how thick the Mauerlat is used, how thick the waterproofing and heat-insulating materials are laid. The height of the installed stud must exceed the height of the Mauerlat beam by at least 3 cm - this is necessary to be able to screw the nuts and fix the support element itself.
Advice! The mounting location for the Mauerlat mounts must be determined in advance.

Mauerlat installation
Consider how the process of installing a Mauerlat takes place without arranging a reinforcing belt on walls made of aerated concrete blocks.
Step 1. First of all, the end of the wall, which will act as the base for the Mauerlat, is leveled. For this, cement glue is used, which was used when laying gas blocks. It is applied to the end of the wall with a trowel, and then leveled with a wide spatula.

Step 2 The layer of cement, which was used to level the end of the wall, is dried. Its evenness is checked using the building level.

Step 3 Next is the laying of waterproofing material. In this case, the roofing material will play its role. The material is cut into strips having the same width as the end of the wall. They are evenly laid on the base and straightened out. Individual strips are overlapped.

Step 4. The beam used as a Mauerlat is laid on the end of the wall on top of the roofing material. It is aligned on the inside of the wall.


Important! The beam is treated with an antiseptic before laying, as well as a composition that protects it from moisture. Before laying the element must be well dried.
Step 5 So that when installing the rafter system, the rafters are not installed on anchor bolts, markings are made in the places where the rafters themselves will be attached. In this case, the pitch between the rafters is 833 mm.


Step 6 Holes for anchors are made in the Mauerlat with a drill. The dimensions of the anchors used are 12x150 mm. In accordance with them, the length and diameter of the drill are selected.

Step 7 Perforators make holes in concrete. They are made directly through previously made holes in the Mauerlat.

Step 8 Nuts under the washer are put on all anchors - they will increase the area of \u200b\u200bthe head of the fixing element and allow you to better press the Mauerlat to the end of the wall.

Step 9 Anchors are driven into previously prepared holes with a hammer.

Step 10 To make them sit securely, they are additionally wrapped with a wrench.

Step 11 The gaps between the Mauerlat and the walls of the house are sealed with acrylic sealant.

Video - Mauerlat for a gable roof
Mauerlat must be used in the construction of a gable roof, if the walls of the house are made of materials such as brick, aerated concrete, etc. It is not so difficult to make it, but the presence of a Mauerlat will allow you not to worry about the condition of the walls and the reliability of the roof throughout the entire period of operation.
As a rule, a solid reinforced concrete belt is poured under such load-bearing structural elements. However, some amateur builders, apparently for reasons of saving time and materials, are trying to find ways to fix the Mauerlat on aerated concrete without an armored belt. Let's see how this is possible, and whether it is worth resorting to such a solution at all.
A few words about the importance of Mauerlat
What is a Mauerlat and why is it needed? To a person inexperienced in matters of construction, this tricky word often does not say anything at all. Meanwhile, we are talking about one of the most important load-bearing parts of the building structure.
What is the foundation - probably everyone knows. So, in terms of its functionality, the Mauerlat can be compared with a foundation tape. True, she is responsible for the loads transmitted from the entire building as a whole, and the Mauerlat is only for those that are formed during the operation of the entire roof structure - the truss system, roofing, insulation "pie", the inner lining of the slopes (if any) and etc.

And the loads here can be considerable, and what is most dangerous is to have a bursting direction perpendicular to the surfaces of the walls, that is, to work for their destruction. It's all about the angles of the roof slopes - this is what gives such a decomposition of the force application vectors, both from the severity of the roof structure itself, and under external loads - snow and wind.
Such bursting point loads transmitted from the rafter legs are especially dangerous for walls lined with piece material - brick or masonry blocks (which includes aerated concrete). This means that it is necessary to distribute the drop-down load as evenly as possible along the entire length of the wall. And, again, by analogy with the foundation tape, a powerful wooden beam can cope with this, which rests tightly throughout its entire length against the end of the wall.

The second remarkable quality of the Mauerlat is the significant simplification of installation work when installing the truss system. Agree that attaching each rafter leg to the main wall is much more difficult than, as they say, "tree to tree." With the presence of a Mauerlat, very wide possibilities for using various connection schemes come off, from “deaf” to movable, using a variety of fasteners.

As a Mauerlat, a wooden beam with a cross section of 100 × 100 mm and above is usually used (as a rule, depending on the massiveness of the roof structure, another 100 × 150, 150 × 150, 150 × 200 mm are chosen). Very often they rely on an unspoken, in principle, but effective rule - the thickness of the Mauerlat should be at least two thicknesses of the rafter legs.
Width - depending on the thickness of the wall on which it is installed. At the same time, they try to arrange the beam so that it does not fall flush with the surface of the wall either outside or inside. So it will be easier to protect the wood from the negative effects of the external environment, to insulate this rather difficult node in terms of ensuring normal thermal insulation. This rule is not mandatory, but if you read the advice of the masters, then all of them almost unanimously advise leaving at least 50 mm from the edge on each side.

It is possible to make a Mauerlat from a log, but such a solution does not seem to be optimal - the operations of attaching to the wall, and then inserting the rafter legs will become much more difficult and, accordingly, will require increased skills in carpentry.
It is clear that in view of the high responsibility of this element of the roof structure, for such purposes, they try to choose dried wood of the first grade, which does not have curvature, pronounced knotting, cracks, signs of biological decomposition, and other defects.

For Mauerlat, selected hardwood is generally recommended. But finding such material is not easy, therefore, high-quality pine is most often used, but only by exposing it to a very picky choice: saving on quality in this case is completely unacceptable.
By the way, the Mauerlat may not be wooden. For example, if it is planned to create a truss system from prefabricated or welded metal trusses, then a steel beam will also be used as a power plate - usually a channel or an I-beam. However, in the practice of private construction, such solutions are rarely resorted to - wood remains a "classic".
Mauerlat may not be used on walls made of timber or logs (its role will be played by the last row - the top trim), and on frame houses - for the same reason. Sometimes they refuse the Mauerlat when the walls are built from a material that is durable, resistant to point and bursting loads (for example, concrete), and at the same time the roof structure involves attaching the rafters to the outer extension of the floor beams. For walls made of piece materials, it will not be possible to do without a Mauerlat in any case.
It is clear that in order for the Mauerlat to fully perform its functions, the reliability of its fastening to the wall should not cause any concern. With concrete, stone, brick walls - it's easier, since there are many ways to securely fix the timber at the end of the wall. For example, when laying ceramic or silicate bricks, bookmarks are made from wooden blocks. This makes it possible then to use ordinary steel brackets for fastening the Mauerlat. But to complete such bookmarks with aerated concrete is an absolutely hopeless task, you don’t even have to try, since no reliability will be provided. We have to look for other ways, which will be discussed later in the article.

On aerated concrete walls, Mauerlat is recommended to be performed according to a “closed circuit”, that is, in the form of a frame that completely encircles the entire perimeter of the building - this is how the maximum reliability of the structure is achieved. However, this is not always possible - for example, in the case when gables are laid out from the same foam blocks. This means that the more reliable the fastening of the beam to the end of the wall should be.
How is a gable truss system calculated?
In the course of the presentation, we have already once referred the reader to the size of the rafter leg - the section of the Mauerlat depends on this to a certain extent. But, taking into account the angles of steepness and all the drop-out loads - read in a special publication of our portal.
How can I attach a mauerlat beam to a gas silicate wall without an armored belt?
First of all, a builder who faces such a problem must clearly answer the question for himself - “Is it really not possible for me to pour a reinforced concrete belt so as not to have problems in principle?” Why? - Yes, because any of the options proposed below is not without certain shortcomings. And besides - the very possibility of installing a Mauerlat without an armored belt is rather doubtful, and is accepted with many reservations.

No matter how much you look, it is unlikely that you will be able to find intelligible criteria when experts say unequivocally - yes, you can do without a concrete armored belt on this gas silicate wall. There are only many "ifs" in which, it seems, one can hope for the success of such a montage.
Aerated concrete prices
aerated concrete
- If the house or outbuilding is small (unfortunately, there are no evaluation criteria).
- If the roof has a not too complex and heavy structure (let's say that we are talking about simple ones from, for example, corrugated board or metal tiles - all other roofing materials, together with their crate, will be heavier).
- If the climatic conditions of the construction region do not imply a large snow load and wind pressure (and where is the guarantee that a weather anomaly will not happen?).
- If the design of the truss system will minimize bursting loads. This can be provided:
- The use of hanging stops, rigidly tied with horizontal puffs.
- The use of layered rafters, with obligatory support at the point of the ridge connection, if at the point of connection of the rafter legs to each other, a hinge connection is provided on the ridge, and the attachment point to the Mauerlat involves the use of movable, sliding joints.

In a word, the list of conditions in order to try to do without an armored belt (and even then without complete confidence in success) is quite large. And it is necessary, probably, to think ten times before choosing this particular path.
However, the Internet offers several ways to mount a Mauerlat beam directly on a gas silicate wall without pouring an armored belt. Let's try to understand them.
Mauerlat fastening with wire
One of the simplest methods, which is often used in the construction of brick walls. In this case, approximately 4–5 rows before the end of the masonry, bundles of steel wire with a diameter of approximately 3 mm (3–4 cores in a bundle) are laid between rows so that they look out from both the outer and inner sides of the wall. The length of the release of these "pigtails" is made such that it provides coverage for the Mauerlat beam mounted at the end of the masonry and allows for reliable twisting and tightening of the wire loop without any problems. The location step of such leash bookmarks is usually chosen equal to the installation step of the rafters, so that the attachment points of the Mauerlat fall between adjacent rafter pairs.

When the wall is ready, it is laid on its end. Then a bar is installed on top, leveled, and then a wire loop is created and tightened. Tightening is usually carried out with the help of a crowbar (mount), achieving the tightest pressing of the beam against the wall.

It would seem - here it is, the simplest solution. However, take a closer look: all the examples shown are only on a brick wall. They write that this method also works well with gas silicate blocks, only the laying of wire "pigtails" is carried out approximately two rows before the end of the masonry.
They write something, but it was not possible to find a single reliable evidence of the reliability of such a method with gas silicate walls on the Internet.
According to personal feelings - will the wire under heavy loads, and even more so - with possible vibration, for example, in strong wind, work like a “hacksaw blade”, gradually biting into the gas silicate block (which can be sawn with a hand saw)? After all, this is a violation of the integrity of the masonry, and a weakening of the fixation of the Mauerlat on the wall, with all the ensuing consequences.
In a word, not everything is so obvious...
Fastening the beam with anchors or dowels
It would seem - the simplest and most reliable way, proven by practice and time. Everything is so, but only if we are not talking about gas silicate. The increased fragility of this material may well give a surprise when a crack or even a chip forms when the anchor is tightened or the dowel is screwed in.
Of course, on sale in our time you can find a considerable range of fasteners designed specifically for aerated concrete walls. But, you see, it is one thing to fix furniture, interior items, or even a frame for wall insulation - and a completely different powerful one, which becomes the basis for the entire roof structure.

Considering that the holding properties of gas silicate are small, you will have to purchase anchors of maximum length - about 300 ÷ 500 mm, so that, taking into account the thickness of the Mauerlat beam, you can more or less reliably “hook” on the wall. But the cost of such long powerful anchors is considerable, so this must also be borne in mind.
The work on mounting the Mauerlat on the anchors is carried out approximately in the following sequence:
| Illustration | |
|---|---|
 | First of all, it is necessary to provide reliable waterproofing between the gas silicate and the stacked timber. Otherwise, at the place of contact of wood with other building material, a center of dampness will inevitably appear and, as a result, biological decomposition. |
 | For a waterproofing barrier, a strip of high-quality roofing material is quite suitable - it is laid so that it completely covers the entire end of the wall. If it enters a few on the sides, it’s not scary, since this one is easy to cut off later. The strip can be laid dry, that is, without the use of bituminous mastic. |
 | After that, a Mauerlat is laid on the end of the wall. In this example, a high-quality board 50 × 150 mm is used for it, which, by the way, looks a bit thin in terms of thickness. But the principle of fastening does not change from this. |
 | The beam is laid exactly in its place, as provided by the project, leveled. |
 | The necessary markup is carried out. In principle, in this case, it boils down to marking out the areas for installing the rafter legs - then the Mauerlat fastening anchors can be placed between them - and there will be no mutual interference. |
 | The place of attachment of the rafter leg is outlined. Anchors can be positioned arbitrarily, repeating the step of the rafters. |
 | Here it is, the anchor bolt. Let's make a reservation right away - in this example, an armored belt is still poured on top of the gas silicate wall, so the master uses relatively small anchors, 12 mm in diameter and 150 mm long. In mature concrete, such fastening will provide the required reliability. But if there is no armored belt, you will have to install the longest fasteners - up to half a meter. |
 | Further, a pen-shaped drill for wood (in this case, 12 mm in diameter) is installed in the drill, and through holes are drilled in the Mauerlat beam, up to the end of the wall. It is recommended to immediately sweep away the sawdust so that it does not fall back into the canal. |
 | After that, a puncher with a drill for 12 is used. Directly through a hole in the wood, a channel for the anchor is drilled into the wall material. |
 | After the hole is ready, an anchor is inserted into it. Further, the anchor must be hammered with a hammer for its entire length, until the washer stops under the nut into the wood. |
 | And the last step is to tighten all the anchors using the appropriate key, thereby firmly pressing the Mauerlat beam to the end of the wall. |
Will such a connection be reliable? With concrete, yes. With gas silicate directly - the question is complex, even with a large anchor length. In any case, no studies or results of the study of experience on this issue on the Internet could be found - neither positive nor negative.
Let's focus on one more thing. Often, the length of the timber in order to lay out the Mauerlat along the wall in one piece is not enough, and you have to resort to splicing. Experienced carpenters can make very interesting and reliable interlocks, but for a non-professional, it will be enough to make a half-tree connecting knot. A prerequisite: at this place it will then be necessary to provide for fastening - an anchor or a hairpin in order to tighten the junction.
Prices for corrugated board
corrugated board

A similar approach is also used in the corners where the beams of adjacent walls are joined - a locking connection, followed by tightening with the selected fasteners.
In addition, in order to tie all sides of the Mauerlat into the most rigid frame, reinforcement of the connection with steel brackets is practiced at the corners. One of the diagrams above shows this well.
Another tip - if you have to join two sections of timber on the wall, then you should strive to ensure that they are approximately the same length. For example, on a wall with a length 8,5 meters it is better to use bars not 6 + 2,5 , and, for example, 4,2 + 4,3 m.
Technological innovations - chemical anchors
A dozen years ago, few people heard about these innovative methods of fastening parts in various materials. Today, chemical anchors are widely available for sale, however, it is not yet possible to call them publicly available at a price.
By the way, many of the home craftsmen carried out similar fastening technologies without special chemical anchors - we are talking about those cases when a mixture of epoxy and a hardener was poured into the hole made, and then the part was inserted - a reliable connection was obtained in a day.

The advertising that accompanies such chemical anchors ascribes to them the highest strength qualities. True, one can already meet consumer complaints, although, perhaps, they are related to the fact that there are a lot of low-quality fakes of such chemistry on the market. And if we talk about reputable manufacturers of such materials, then we should focus on the brands Sormat, Hilti, Nobex, Fischer, Tox, Tecseal, Tecfix, Technox, KEW and some others.
By themselves, chemical anchors can differ in the principle of their application.
- So, one variety has a capsule (ampoule) layout.

An ampoule is inserted into the hole drilled under the anchor, which contains a one- or two-component composition, which begins to quickly harden after mixing and contact with air.
After laying the ampoule, the anchor (pin) itself is inserted into the hole, and hammered to the required depth. When clogging, the anchor destroys the ampoule, sucking fills the entire space of the channel. Including between the walls and threads of the stud. At normal air temperature, after 25 ÷ 45 minutes, the composition completely polymerizes, hardens, provides reliable retention and immobility of the anchor even under considerable load.
- Another type of chemical anchors involves the use of cartridges (tubes) with a polymer composition (usually two-component) and a special dispenser gun. The gun is similar in design to the one we usually use with silicone sealants or "liquid nails". And some types of chemical anchors are directly designed for such simple guns.

In addition, depending on the material of the wall, additional devices can also be used. For example, let's see how a chemical anchor is installed, which is designed specifically for porous concrete.
| Illustration | Brief description of the operation to be performed |
|---|---|
 | The illustration shows the possible components of a set of chemical anchors "Fisher" - these are the cartridges themselves with compositions of different hardening speeds, dosing guns. The channel for any chemical anchor always needs to be thoroughly cleaned of dust - for this there is a special pump for purging and pumping out, brushes of different diameters. A drill with a special nozzle allows you to make conical holes (just what you need for porous concrete). And, finally, various adapters, guide adapters, mesh bushings for hollow walls, and stud anchors themselves of various lengths. |
 | In this case, we are interested in the topic of the article namely the gas silicate wall - porous concrete. |
 | The drilling of the channel under the anchor begins. For this, a special drill with a round stop-limiter and a spherical nozzle is used. |
 | First, a straight hole is drilled - all the way to the limiter. |
 | The stopper rested against the wall, and thanks to the spherical shape of the nozzle, the hole begins to be conical - as shown in the illustration. |
 | When the channel is ready, the drill is placed straight and carefully so as not to break the accidentally narrowed top of the cone, it is removed from the hole. |
 | After that, they take a hand pump - it is necessary to thoroughly clean the channel from dust. Purge begins with the pump probe fully immersed in the hole. |
 | Then the pump probe is gradually removed from the channel without stopping the purge. If necessary, use a round brush of the appropriate diameter. This purging operation should be repeated at least four times - the presence of dust drastically reduces the reliability of the chemical anchor. Ideally, it is necessary to strive for the channel to be completely clean. |
 | After cleaning, a plastic sleeve is inserted into the hole. It will “ennoble” the edge of the hole and, most importantly, ensure the position of the inserted anchor (stud) perpendicular to the wall surface. |
 | Chemistry is getting ready to work. A cartridge is inserted into the gun, a mixer nozzle is screwed on. A small release of the composition is made on any surface - you need to make sure that all components are completely mixed - this will show an even color of the outgoing mixture. |
 | After that, the spout is inserted into the sleeve that limits the hole, and the filling of the cavity with the composite composition begins. |
 | Typically, the cavity is filled to about ¾ of its volume. |
 | Next, an anchor-stud of the required length is taken and carefully screwed (in the literal sense of the word) into the plastic mass that fills the conical cavity - for this, at this stage, the effort of the fingers is sufficient. It is important to ensure that the stud takes a position perpendicular to the wall - the guide sleeve will help with this, but it still does not interfere with checking. The pin is screwed all the way into the wall. |
 | It remains to wait only 45 minutes - and at normal temperature (about +20 °C) the anchor will be ready for load testing. |
What else is said about the advantages of chemical anchors:
- The fastening is considered high-strength, durable - the service life is estimated at 50 years.
- The used polymer composite is completely inert to atmospheric, biological, chemical influences.
- When installing such an anchor, there are no bursting loads inside porous concrete, that is, the risk of a crack or chip is practically eliminated.
- At the same time, the penetration of the composite into the pores of aerated concrete adjacent to the drilled channel ensures the maximum degree of adhesion of the chemical dowel to the wall material.
Well, now - about the shortcomings. There are not many of them, but judge for yourself:
- The cost of chemical dowels is high, and mounting the Mauerlat will cost a very impressive amount. Moreover, our task requires very deep channels with their complete filling with composite - so a fair amount of cartridges will be required.
- Chemical anchors are not resistant to high temperatures. It is clear that on the Mauerlat, temperatures above 100 degrees, in principle, have nowhere to come from, but nevertheless ...
- No reliable data on the timing and results of the operation of chemical anchors for attaching the Mauerlat to aerated concrete without an armored belt have been identified. That is, there are suggestions that it should seem to work out well - but there are no results of the tests carried out yet. Maybe you want to be the first?
Video: Hilti Chemical Anchor Demonstration
Mauerlat fastening on embedded studs
If, even before attaching the Mauerlat, studs stick out from the end of the wall at the right distance from each other, the installation process is simplified to the limit.

- Marks for the location of the studs are transferred to the beam - for this it is enough to lay the Mauerlat on top and tap a little - the studs will leave marks that will become the centers of drilling holes.
- Further, a waterproofing strip is “pricked” on these studs.
- Then a beam with drilled holes is strung.
- Wide washers are put on the studs, nuts are baited - and a completely understandable procedure for pressing the Mauerlat to the end part of the wall takes place.
Everything is very simple, but except for one thing - how to fix studs into an aerated concrete wall. This is where the difficulties begin.
There are such tips - a deep, about 500 mm, hole is drilled in aerated concrete masonry, a hole with a diameter of about 3-4 mm larger than the diameter of the stud. The channel is then filled with masonry adhesive or cement laitance. After that, a hairpin is inserted into it until it stops - and in this form it is left until the solution has completely set.
It would seem easy, but some craftsmen who have tried this method are clearly not enthusiastic about it - solutions can shrink, it is difficult to avoid void areas, and the quality of such a knot is still not the highest. Some fasteners can become loose due to dynamic load or vibration, and this is fraught with a general weakening of the structure, the appearance of cracks on gas silicate blocks - with all the ensuing sad consequences.
Another option for early installation of studs. In this case, they are welded perpendicular to the metal plates, which will be placed in the masonry joint before installing the last row of gas silicate blocks. The shape of the plates does not play a big role - for example, they can be as shown in the illustration.

The main thing is that the plates create a support for the stud and at the same time work against the pulling load. With this approach, holes are drilled in the blocks of the upper row in advance, before they are installed in the masonry, then studs are inserted there, if necessary, the edges of the block are “aligned” so that it does not skew due to the thickness of the plate. After that, masonry is carried out - and when the wall is ready, there is immediately a number of embedded studs for mounting the Mauerlat.
 The plates are hidden in the masonry joints, and the studs become a convenient tool for securely fixing the Mauerlat.
 And yet, the most reliable installation of embedded studs is ensured only when pouring a reinforced belt.
Is it reasonable to refuse to fill the armored belt?
And now, on the contrary, a direct question to the reader - how serious are your reasons to refuse this simple, but very reliable, proven, guaranteeing the strength of the roof structure being created, the operation of pouring the armored belt? Let's take another look at how simple and clear it all is before making a final decision.
The process of pouring a reinforced belt is nothing complicated!
| Illustration | Brief description of the operation to be performed |
|---|---|
 | If you look at all kinds of instructions and manuals on the construction of houses from aerated concrete blocks, the issue of attaching a Mauerlat beam to the end of the walls without a reinforced concrete belt is not even considered. And only somewhere in the text can there be a modest mention: as an exception, for example, on small outbuildings, with roofs of a small area, if the climatic conditions of the region do not imply a pronounced snow and wind load, etc. In a word, practically at your own peril and risk. Is it really so difficult to fill in the armored belt in order to get away from this dependence - “if” at once? |
 | By the way, there is nothing particularly difficult in this, that is, something that even a novice builder would not be able to do. Manufacturers of aerated concrete building materials have provided in their assortment a special type of blocks designed specifically for the last row of masonry. They have a characteristic shape, for which they received the name U-blocks (for their resemblance to this letter of the Latin alphabet). In fact, this is a non-removable formwork made of aerated concrete in the factory for pouring a reinforced belt. |
 | Look at the illustration - it shows various sizes of aerated concrete U-blocks. The smallest block (200 mm thick) has a symmetrical shape, all the others have one wall thicker than the other. This thickened wall should look towards the street - it is made wider for reasons of maximum preservation of thermal insulation qualities. |
 | The dimensions of the “channel” for the reinforced belt itself are not so large, that is, a lot of concrete is not required, and it will not be difficult to make it for a medium-sized country house on your own right at the place of work. Moreover, you still have to fill it manually, since the concrete pump in this case will not be an assistant - the “tape” is too narrow and small. The amount of concrete for this operation will be discussed below. It would seem, why even think about ways to do without an armored belt - isn't it better to start pouring it right away? However, many are stopped by the fact that U-blocks, which require less material during production, are also significantly more expensive, since they are usually sold by the piece. But it turns out that such blocks can be made independently, using standard wall blocks, or you can do without them altogether by applying other technical solutions. |
 | So, U-blocks can be cut from standard wall blocks. |
 | To begin with, of course, markup is carried out - the width of the cut fragment ... |
 | ... and its depth. |
 | Lines are drawn along which cuts will be made. In this case, the master decided to cut a “channel” 120 mm wide and 160 mm deep. This will be enough for a reinforced belt. |
 | If walls were built from gas silicate blocks, then the master must have a tool for cutting them. Usually this is a powerful hand saw with a large tooth. They begin to make cuts along the marked lines - to the depth of the “channel” being created. |
 | To achieve evenness of the cut in depth, the block is sawn in turn, achieving the desired immersion of the saw, first with one ... |
 | ... and then on the other side. By the way, we don’t have a picture, but judging by the assurances of the masters, such even and identical cuts in depth can also be made with a circular saw. True, the release of the saw may be insufficient (well, you need at least 100 mm of cutting depth) - finally, you can work with a hand saw. Why not an option? |
 | A block with slots made is placed "on the butt". |
 | Next up is the perforator. A drill is inserted into its cartridge - the diameter is not so important (usually 8 ÷ 12 mm is enough), but it is better to take a longer length, about 400 mm, so that the drilled hole reaches approximately the middle of the block. A series of holes are drilled along the line defining the bottom of the “channel” being created, with a distance between their centers of the order of 15 mm. |
 | Then the block is turned over, and a similar operation is carried out on the opposite side. |
 | After that, a light blow with a hammer is usually enough - and the fragment cut from three sides falls out of the block. By the way, these fragments, if they have not split, should not be thrown away - they can still come in handy during construction. |
 | And to fill the reinforced belt, there remains such a home-made U-block. |
 | If necessary, the remaining irregularities can be trimmed with a chisel ... |
 | ... sweep away crumbs and dust ... |
 | ...and send the finished block to the place of their storage before laying. |
 | After a sufficient number of homemade U-blocks have been prepared, they move on to laying the last row of the wall. Work usually starts from the corner. |
 | Glue for aerated concrete is prepared from a dry mixture. Blocks are laid out sequentially. Everything is as in ordinary masonry - first, glue is applied with a layer of the desired thickness ... |
 | …this layer is then leveled and spread with a notched trowel… |
 | ... and then another gas silicate U-block is installed. Work continues in a similar way until the entire row is laid out - until a “channel” is formed for pouring the armored belt. |
 | Particular attention is paid to the corners and junctions of the walls - here you will have to think about how to join the U-blocks so that the "channel" for the armored belt is not interrupted. One of the options is shown in the illustration, but other solutions are quite acceptable. |
 | To some, this approach may seem overly time-consuming, and, moreover, accompanied by a large amount of waste. Well, this is true to a certain extent, and it is quite possible to apply other methods of creating formwork for the armored belt. Here is one of them. To create the walls of this kind of fixed formwork, in this case, gas silicate blocks of smaller thickness are used - they are often called additional ones. For example, you can use blocks with a thickness of 100 mm - to create an external wall. |
 | A number of these blocks are laid on the adhesive along the outer contour of the wall (the illustration shows only an installation example). |
 | Any armored belt, due to the specific thermal properties of concrete, always turns into a powerful "cold bridge". To reduce this disadvantage, it is advisable to immediately provide for a layer of insulation - lay along the outer wall of the fixed formwork (if the width of the wall block allows) extruded polystyrene foam with a thickness of about 50 mm. |
 | On the opposite side, the wall of our "formwork" is formed by a thin block, 50 or 75 mm thick. This row is also installed on gas silicate adhesive. |
 | The result is something like this picture - a channel for further pouring of the reinforced belt (shown in the illustration with the reinforcing cage already laid). By the way, you can slightly reduce the depth of the “channel” if it turns out to be too large. At the bottom, also on glue, you can lay fragments cut out from additional blocks, so that the depth is in the region of 150 ÷ 180 mm - this is quite enough. |
 | There are more options. For example, on the one hand - the same gas silicate block 100 mm and a layer of insulation, and on the other - just a wooden (or OSB) formwork, pressed to the surface or set exactly along the end of the wall. |
 | But the option and generally without the use of gas silicate blocks. Wooden formwork is installed on both sides. But from the outside, along the formwork boards, a strip of expanded polystyrene 100 mm thick and a width corresponding to the height of the “channel” created for the armored belt is laid. |
 | Here is this option, so to speak, live - with the insulation laid along the outer perimeter of the formwork. Although the insulation is not mandatory in this case, it should not be neglected - this has already been mentioned above. But on the inner walls it is not needed - if it is also planned to pour a reinforced belt there, then only wooden formwork on both sides will be enough. |
 | After the formwork (in any of its versions) is exposed, they proceed to knitting the reinforcing frame. As a rule, for the armo-belt under the Mauerlat, too much reinforcement is not required - four rods of a periodic profile (class A-III) with a diameter of 10 mm are enough. |
 | The spatial position of the reinforcement bars can be provided in various ways. The "classics", of course, are clamps made of smooth or corrugated reinforcement, with a section of 6 or 8 mm. - about the same as on a strip foundation. |
 | But often this scheme is also simplified - it still looks “too heavy” for an armored belt along the top of the wall. If you look at the examples presented, then many masters use very non-standard solutions. This one, for example, cut squares from a ready-made welded reinforcing mesh for a screed - and uses them as a kind of clamp templates. |
 | Binding is carried out in the usual way - with the help of steel binding wire. |
 | And such a picture is obtained after linking - a neat spatial structure of four rods of longitudinal reinforcement. |
 | And here is another original solution. Apparently, the owner has the opportunity to inexpensively (or even for nothing) get waste from the production of metal products. One can only envy such creativity! |
 | Be that as it may, no one cancels the rules for knitting reinforcement, especially in areas of reinforcement (longitudinal connection of rods, turns, junction areas). Therefore, appropriate bends, overlaps, clamps, etc. are made. - all according to the rules of the strip foundation. By the way, pay attention to an extremely important nuance. The presence of a reinforced belt leaves practically no difficulties for the subsequent fastening of the Mauerlat - matured concrete will perfectly hold even conventional expansion anchors. And yet, before pouring concrete, one more operation can be done - install the studs in advance, linking them to the reinforcement cage. After the belt hardens, the master will immediately have ready-made reliable fasteners for the beam. |
 | There are also several options for installing studs. So, for example, a guide hole is drilled under them in the bottom of the channel, and the stud itself is linked to the lintel of the frame reinforcing structure (as shown in the figure). |
 | The hairpin can also be located with an offset from the center line of the armored belt - it all depends on its width and the planned place for laying the Mauerlat. The figure shows how the embedded stud is tied to the longitudinal reinforcement rods. |
 | Here it is shown how, for the sake of economy, threaded stud lengths are simply welded to transverse reinforcement stirrups. True, for this it is already necessary to have a very good command of the skills of electric welding. |
 | If you screw a nut at the bottom of the stud and put on a wide washer, the reliability of the resulting fastening will increase significantly. After the full maturation of the poured concrete belt, it will be almost impossible to pull out such a hairpin. |
 | The step of installing the studs is usually taken the same as the step of the future installation of the rafter legs. At the same time, it is desirable that these Mauerlat attachment points fall between the rafters - so that they do not interfere with further installation operations. |
 | After installing and linking the studs, it is recommended to close the upper threaded part, together with the baited nut, with a stretch film - so that the thread does not clog when pouring concrete. |
 | It is necessary to ensure that the reinforcement rods are located at a certain distance from the walls of the improvised "formwork" - so that a protective layer of concrete is created. For these purposes, you can use special liners - they will provide the necessary clearances from both the bottom and the sides. |
 | Concrete is being prepared. As a rule, for such an armo-belt, the M200 concrete grade is sufficient (but not lower). In a medium-sized house, a large amount of concrete is not required for these purposes - it is quite possible to do it yourself in a concrete mixer. |
 | Then the finished solution is fed up (by buckets), and gradually the “channel” of the armored belt is filled with it. |
 | It is very important to ensure that when pouring there are no unfilled voids. To do this, the poured concrete is carefully “bayoneted”, that is, it is pierced along the entire length of the filled section with a piece of reinforcement or a pointed wooden lath - this will allow air bubbles to escape. |
 | After “bayoneting”, the solution is compacted as much as possible with a trowel or spatula, while leveling the surface of the created belt. |
 | So they sequentially move on, along the entire length of the created belt. |
 | The belt is filled and aligned. This illustration shows a variant without studs - the owner assumes the use of conventional expansion anchors for mounting the Mauerlat. |
 | But the option - with linked mortgage studs. After pouring the belt and its final maturation, for the masters who will deal with the truss system, there are ready-made fasteners. In any case, the armo-belt must be given time for high-quality maturation - it is advisable to start further robots no earlier than a month after pouring. |
As promised above - a few auxiliary materials:
Reinforcement of the strip foundation - how to do it right?
It has already been mentioned in the table that the principles of spatial reinforcement of the autumn belt are similar to the foundation tape - especially in matters of reinforcement at intersections, junctions and at corners. Details are given in a special publication of our portal. And in another article are given. Plus, in both articles there are convenient calculators for calculating materials.
And, finally, a calculator that will help you quickly and accurately determine the required amount of M200 concrete for pouring the armored belt, and the number of components for its manufacture.
The roof is one of the main elements of the house, along with walls and foundations. Without its proper arrangement, the house will not be strong enough and comfortable enough to live in. The result of a bad roof will be dampness, wet walls, all kinds of diseases and additional heating costs.
The preferred type of roof depends on the climate of the area, the prevailing weather conditions. The most common in our conditions are gable, fairly simple to build and maintain, and reduce the load from snow or other heavenly moisture. Aesthetics plays an important role in choosing them.
Types of gable roofs
A gable roof is a fairly simple structure consisting of two slopes connected at an angle to each other. They form something like a triangle. But with all the simplicity of this figure, triangles are different. The gable roofs also differ from each other.
The main difference between their designs is the angle of inclination. Depending on the type of building and other necessary conditions, it may vary. In addition, the angles at which the slopes are installed may differ from each other. As a result, one of the types is erected:
- Simple symmetrical;
- Simple asymmetrical;
- Broken (kink can be both internal and external).
Each of the types has its positive and negative sides, forcing builders to choose one or the other, depending on the circumstances.
Simple symmetrical roof
 Simple symmetrical roof
 This type of construction is undoubtedly the most common. It is the easiest option for making your own. His appearance always looks good. In the end, it is also good because under such a roof there is a lot of useful attic space.
The name of the design shows what is its distinguishing feature: the slopes form an isosceles triangle. The symmetry of this figure allows it to look proportional on any home.
Simple asymmetrical roof
 simple asymmetric roof
 The main difference from the previous version is also directly reflected in the title. The ridge of this type of roof is displaced to the side and as a result, the triangle formed by it turns from isosceles to versatile. This design looks modern, so it is well suited for houses in a modern style.
The asymmetric roof has two important features:
- Reducing the size of the attic space;
- Unequal load distribution.
As a result, this type of construction is good for those who need extra space for rooms that can go right up to the roof. But it requires correct calculations.
broken roof
 broken roof
 This type of construction is the most complex, so not everyone decides to do it with their own hands. Although, in fact, it is quite possible. It's just important to make the right calculations from the start. After all, the main feature is the irregular shape, where the loads are distributed extremely unevenly.
The main advantage of a sloping roof, in addition to its diverse appearance, is that it gives a maximum of free space under it. As a result, it is possible to equip a full-fledged residential second floor, an attic. Due to this feature, it is also called the attic.
Construction of the truss system
The truss system is the basis of the roof. There are two main design solutions for gable roof rafters:
- Hanging.
 The design of the gable roof truss system
 The first of them is used when the house has internal supports, for example, load-bearing walls. In their absence, the hanging type is preferable.
But, no matter what type of truss system it is decided to build, anyone who wants to know how to build a roof with their own hands must understand the main structural elements. Namely:

- rafter leg or simply rafters. Rafter legs are the basis of the design of the entire system. They are placed on top, along the building, and interconnected to form a farm. Since it is they who hold the roof covering on themselves, it is also important to use durable wood here. It is desirable that it be a log or timber. Installation is carried out on the basis of pre-made calculations, since it will be very difficult to change something later;
- rafter rack. This structural element helps to distribute the load from the rafters. It is a vertical bar. Its location depends on the type of structure that the roof has and on its dimensions. If we are talking about a simple symmetrical roof with a small span, then the rack is installed in the center. If the width is large, then two are additionally placed on the sides. The asymmetric version assumes the location of this element depending on the length of the rafter, and the broken one - two on the sides. True, if there are more than one room, then in the latter case an additional rack in the center is needed;
- Run. The main task of the runs is to connect the rafters, at the same time giving them rigidity. Runs can be ridge or side. The first is located at the very top of the roof, in the region of its ridge. Make runs from timber. Sometimes boards are used. The most common is a section of 50 by 150 mm. If the run is made not only of a ridge, but of several beams or boards on the sides with a long roof, then they are supported by a stand coming from the ridge and resting on a bed. Side runs are connected to it by means of struts;
- Strut. They are a structure of beams located at a certain angle and resting on a bed. Their main task is to serve as supports for the racks. Can be diagonal or longitudinal. The latter are used most often, they are on the same plane with the rafters. At the same time, the former are necessary if there is an increased snow or wind load in the area. With it, it is also desirable to choose a strut angle of 45 degrees;
- Sill. Located at the very bottom of the structure. If possible, it is placed on an internal load-bearing wall. Its main purpose is to serve as a support for racks. Slopes are attached to it;
- puff. This element connects the rafter legs, being perpendicular to them. In parallel, it provides greater structural rigidity;
- Rigel. It also connects the rafter legs, but unlike the puff, not from below, but from above. Overlapped. They make a crossbar from a board of the same section as the rafters themselves;
- crate. This element is installed at the final stage of mounting the truss structure, since it is the basis for the coating. It consists of beams and boards, with which the rafters are connected in parallel from top to bottom. Besides the fact that it serves to fasten the roof, the crate helps to redistribute the load from it. Therefore, the distance between the elements depends on the material that will be used for coating.
A general idea of the meaning of each structural element will greatly facilitate the task of building a gable roof with your own hands.
Calculations
The calculation of the load on the various elements of the roof is the most important step, since the strength and safety of the structure depends on it. It must be remembered that it is the triangle that is its most rigid part.
Loads on rafters can be of three types:
- Permanent. These are the loads that the rafters constantly feel. For example, the weight of finishing and roofing materials, battens, etc. In order to find out it is enough to add up all these weights. Usually the constant load is about 40 kg/sq.m.;
- Variables. They act at different times with different strengths. These include, for example, wind. In order to calculate the wind load or the load from precipitation, you need to look into the SNiP;
- Special. We are talking about loads associated with increased seismic activity.
When calculating the load exerted by snow, its weight is multiplied by a set correction factor that takes into account wind pressure. A coefficient of dependence on the angle of inclination of the roof is also introduced - the lower it is, the greater the load. At an angle exceeding 60 degrees, it is not taken into account.
Tilt angle
The correct calculation of the angle of inclination depends on some features. First, a lot depends on the material chosen. So, ondulin, corrugated board, metal tiles, slate require an angle of 20–45 degrees. A soft roof - up to 20 degrees.
Secondly, the angle of inclination depends on the climate in which the roof is being built. If there is little rainfall, then you can make it insignificant. And with a large number - on the contrary. But, it is worth remembering that large angles are subject to large wind loads.
Rafter length
Calculating the length of the rafters is not particularly difficult. It is based on the Pythagorean theorem. The length of the rafter is taken as the hypotenuse of the triangle. And the role of the legs is played by the height of the roof and half the width of the house. To the value obtained, it is worth adding a few tens of centimeters for washing down.
Step of rafter legs
Their choice depends on the weight of the structure used to cover the roof and the material used. Usually it varies between 60-100 cm.
Rafter section
Calculation of the correct required section of the rafters is one of the most important points, since this indicator greatly affects the reliability of the structure. This takes into account:
- Loads;
- Rafter length;
- Rafter step;
- material used;
- The type of wood used in the construction of the house.
The higher the pitch of the rafter legs, the higher the cross section.
The video shows a detailed description of the calculation of the truss system.
Types of truss systems
There are two main types of rafter systems, from which they choose when erecting a gable roof. We are talking about hanging and layered and rafters. Each of the types is designed for different structures.
Hanging structure

 Hanging truss system
 Hanging are designed for small houses, whose width does not exceed 6–6.5 linear meters. They are not suitable for houses with a wide roof. Also, they are not used where there is an average load-bearing wall.
Design features
A feature of the design of hanging rafters is that they rest on two extreme load-bearing walls. As a result, the system is under a strong influence of the bursting force. If necessary, it is reduced with the help of a crossbar fastened at the bottom.
Mauerlat mount
The design feature of the hanging rafters dictates how they are attached to the "foundation" of the entire system - the Mauerlat. The only mounting option is to use a node with a zero degree of freedom. Hinges, for example, cannot be used.
Layered system
 Laminated rafter system
 Laminated rafters are the only option when it comes to a large roof. But they need either the presence of an internal load-bearing wall, or specially installed intermediate supports. Parallel to the Mauerlat, a bed is laid, which takes on part of the load from the structure.
Differences between hanging and layered rafters
Hanging rafters do not require intermediate supports or an internal load-bearing wall, but their bursting force greatly affects the structure. At the same time, due to the fact that they also rest on a bed in the middle, layered rafters are lighter, including assembly. They are better suited for large roofs.
Do-it-yourself gable roof device
As already noted, the gable roof is especially popular due to the fact that its design allows you to build it yourself. Which is naturally quite attractive for those who like to build themselves or want to save a lot.
The construction of a gable roof structure consists of several large stages, each of which is important to perform correctly. In this case, the roof will stand for a long time and will not collapse.
Installation and fastening of the Mauerlat
Formally, a gable roof can be made without a Mauerlat. In this case, the rafters will rest on the floor beams. But this is not recommended for one simple but important reason - the beams will have to take on the additional load from the roof.
A Mauerlat is installed along the wall on which the rafters will rest, parallel to the ridge of the house, as shown in the photo.

 Mauerlat
 Mauerlat connection
The ends of the bars that will be connected are cut down at an angle of 90 degrees. After the ends are applied to each other, they are fastened with bolts and only with them. It is important not to use any other material instead of bolts, such as nails or wire.
Fastening
Mounting methods for the Mauerlat are based on the fact that it is installed on top of the wall. At the same time, it can be located both strictly in the center of the wall, and with an offset to one of the edges. But it is important to keep a distance of five centimeters to the outer edge.
A layer of waterproofing is placed between the wall and the timber. A simple roofing material is suitable for this.
This will protect the wood from the influence of moisture that can get on the walls. The mount itself must be as strong as possible, because it will have to withstand the wind load. There are several ways to fix the Mauerlat to the wall.
The methods of attaching the Mauerlat to the walls largely depend on what material the house is built from.
- If the building is erected from a monolith, then anchor bolts are the best solution;
- If the house is being built from timber, then wooden dowels are the usual solution. They can be reinforced with additional fasteners;
- A fairly common mounting option are staples. They are loved because they are quite versatile, although they are not the most durable solution;
- If the building was erected from porous materials, such as foam concrete, then mounting the Mauerlat on the reinforcement would be the right choice;
- Hinged fastening, due to the fact that it is sliding, is suitable primarily for those houses that are built from materials that give noticeable shrinkage;
- As an additional fastener, you can use a strong, for example, knitting, wire. It does not apply as a standalone option.
The right choice of fasteners will make it possible to survive the blows of even the strongest winds.
Installation of rafters and racks
There are two options for assembling the rafter legs. They can be assembled either from above, on the roof, or below, on the ground. The second option is easier to do with your own hands, but it takes more time. The second will require the use of mechanisms, since it is difficult to lift the structure of the truss system up manually.
But, one way or another, the manufacture of rafters must be done strictly according to the markup. For this, special templates are well suited, which are made of plywood after all calculations have been made.
 Rafter attachment scheme
 Before attaching the rafter legs to the Mauerlat, they must be washed down. Only rafters can be sawn, since such procedures on the Mauerlat weaken it. Three nails are used for fastening. Two of them are hammered along the edges, and the third must be driven through the upper plane of the structure in the center. Thanks to the use of three nails driven in this way, the rafter leg is well attracted to the Mauerlat and does not move.
As for the top attachment of the rafters to each other, there are three main ways to do this.
- Without support bar. Rafters can be spliced end-to-end or overlap. In the first case, the ends are cut so that equal angles are formed. After applying the ends to each other, they are connected using a metal or wooden plank. In addition, a nail is driven in at the top. When overlapping, the ends are cut as needed and connected with bolts;
- Using a support bar. This method is necessary when it comes to a large roof. The rafters at the ridge are also fastened end-to-end or overlapped, but in addition they rest on a beam, which in turn also serves as a support for the racks;
- Cutting method. It involves cutting the rafter legs into the support beam.
The ridge support is mounted after the two extreme rafter legs are installed. Then there is the fastening of the racks. And then, the remaining rafters. You can see all this in a photo or video.
Insulation and water protection
Proper insulation and waterproofing are very important in the domestic climate. Especially when it comes to the roof, which is constantly and strongly affected by the environment. And the moisture that accumulates in the house itself also rises to the attic in the form of steam.
Based on the foregoing, it is important to choose a heater that has the function of vapor barrier. Otherwise, its type does not matter. But, with regard to waterproofing, then its rolled types are considered the most suitable. For example, a special film. It can be easily laid directly on the rafters. How this is done can be seen in the video.
Lathing installation
The crate is mounted last, but it plays an important role.
Without it, it is inconvenient to move along the roof, and the roofing material presses unnecessarily on the rafters. In addition, it makes it possible for an air cushion to appear between the roofing material and the insulation.
The design of the lathing and its step depend on what material will be laid on the roof.
- The lattice crate is laid under slate, tile or metal tile, corrugated board. In the case of metal tiles, the distance should be 350 mm, and for slate and corrugated board - 400 mm;
- A solid crate is used for soft types of coverage.

 Lathing installation
 They make it from a bar or board, and if we are talking about soft - from plywood, OSB sheets or the same board. They are laid on a beam located along the rafters, as shown in the photo and video.
Roof area calculation
A gable roof often has a simple shape, so calculating its area is not difficult. But this is extremely important to do exactly, because the consumption of materials depends on the knowledge of the area.
 Roof area calculation
 When calculating the roof area, for this, in order not to get confused, you should not pay attention to the parameters of various ventilation openings, skylights or chimneys. It is enough just to find out the height from the ceiling to the ridge and the length of the ridge run. These parameters are multiplied. If the roof area is divided by the sine of the angle of inclination of the rafter, then you can find out the area of \u200b\u200bone slope.
Typical parameters
A design feature that distinguishes a gable roof is that it can be divided into separate standard parts. By calculating the area of each such element, separately and adding everything together, you can get the desired value of the amount of materials.
Since the roof is made with a slope, you need to know its angle.
The cosine of an angle is needed to determine the exact area of \u200b\u200balmost all elements.
Typical elements are the legs of the rafters, which form the basis of the trusses. In addition to them, there are braces, struts, supports, runs.
Roofing: selection and installation
 Installation of metal roofing
 Installation of roofing is the final stage of work. But it is preceded by the choice of a suitable material. Nowadays, manufacturers offer a huge selection of roofing materials, each of which has its pros and cons. The choice is always up to the consumer and depends on his aesthetic preferences, financial possibilities and climate.
- Natural tiles. This is a very beautiful, traditional, but at the same time expensive material. Its high price is offset by a very long service life, unless of course it is specially beaten or it is affected by extremely adverse weather conditions;
- Metallic coating. Such a roof is also a fairly traditional solution. Today, manufacturers offer many options for metal sheets for the roof, which differ not only in strength, but also in appearance;
- Wooden roof. A shingle or spindle roof undoubtedly has many aesthetic merits. But it is quite expensive and without special treatment is prone to rotting;
- Bulk coating. It is considered quite inexpensive and reliable. Belongs to the category of soft coatings. The disadvantage is that it can only be used on roofs with not very steep slopes.
The installation of each type of material is carried out in its own way and different fasteners are used for them. Information can be obtained from the video or from the manufacturer. After mounted cornice overhangs.
Fastening parts
The ability to properly fix the smallest details is the most important in making a roof with your own hands. There are several basic methods for connecting and fastening parts of a roof structure.
So, the groove connection is used by fastening the diagonal parts. If we are talking about connecting perpendicular elements, then it is suitable only for those of them where strength is not so important.
Metal corners and plates are also quite popular. They have good durability. But the disadvantage is the danger that some screws will turn out from the loads. To minimize risks, a combined fastening method is used.
gable roof cost
The cost varies greatly from whether the roof is made by hand or with the help of craftsmen. In the latter case, it will come out much more expensive and the price can reach several hundred thousand. In the first case, the main costs will go to materials.
The total cost of the design includes:
- materials;
- Mauerlat installation;
- Installation of the truss system;
- Installation of waterproofing;
- Installation of the crate;
- Roof installation.
Performing any of these elements with your own hands reduces the cost of construction.
 Finishing the gable with siding
 The pediment is a prominent part of the house. Therefore, it is customary to use attractive materials for its sheathing. It can be a board to match the roof, plywood or siding. In the case of wooden houses, the pediment can be cut in advance. More about this in the video.
The gable roof, due to the simplicity and accessibility of the design, which allows you to arrange it, including with your own hands, has become a truly universal solution. Knowledge of individual features will make it easy to avoid the main problems during its construction.
And as it turned out later - in vain! Let's see what's what.
In general, the Mauerlat has two main purposes.
The first is to take on the load from the beams and distribute it evenly on the wall. And in the second case - to transfer the load from the "spread" of the rafters. This is during the construction of a simple roof, when the rafters abut each other from above, and the bottom cuts into the Mauerlat, and there are no additional fights and puffs. In general, not my case. Therefore, I consider here the first purpose of the Mauerlat.
The mass at the roof is huge! It is necessary to take into account everything: the floor beams, the entire truss system, the ceiling, the insulation, the crate, the roof itself, the mass of rubbish that will be stored in the attic, the snow on this roof. In general, it runs decently, and all this presses pointwise on my gas silicate, trying to push through and destroy it.
When I started building the roof, I roughly figured out what was what.
- 8 cubes of wood (mass of dry pine 650-700 kg) - 5600 kg;
- about 70 sheets of OSB (about 16 kg each) - 1120 kg;
- soft roof 210 square meters (weight of one square of roof 8.5 kg) - 1615 kg;
- insulation 22 cubes (37 kg each) - 814 kg
Here, I think, it is necessary to understand a little. We are looking for SNiP by any search engine. I don’t cite the link because it’s harmful, but because today the link is SNiP, and tomorrow it’s not known what. Clause 5.2 of the SNiP says: the calculated value of the weight of the snow cover Sg per 1 m 2 of the horizontal surface of the earth should be taken depending on the snow region of the Russian Federation. This is not the area of the roof, but the area of the horizontal surface of the roof. In other words, this is the area of land covered by the roof. For example, if you cover with a roof 100 m2 of area
and make a gable roof at an angle of 60 degrees, then the roof area will increase exactly 2 times, and the area of \u200b\u200bthe horizontal surface of the earth under this roof will remain as it was 100 squares.

And snow will fall on this roof like on 100 squares of land. This seems to have been sorted out.
The dimensions of my house are 12x13.5, the roof protrudes 30 cm on each side. The horizontal surface is 12.6x14.1 \u003d 177m 2. On map number 1 (Zoning the territory of the Russian Federation according to the calculated value of the weight of the snow cover of the earth), we are looking for our settlement, we find out the snow region,

put in the table.

The number in brackets, in my case 180, will indicate the load per 1 m 2 to us. We multiply 177x180, we get almost 32 tons. If you add everything (both the snow and the roof), you get an impressive colossus - 41 tons in weight !!! My poor blocks...
We look at the picture and count the points where the beam lies on the block. I counted 126 points.

Our block has a width of 20 cm, the width of the beam is 5 cm. We multiply one by the other, we get the area of \u200b\u200bone point of 100 cm 2. We divide 41000 kg by the number of points, we get 325 kg of pressure on each point, or 3.25 kg per cm 2.
We find out the compressive strength of the material. In my case, according to the manufacturer, destruction occurs at a load of 27 kg / cm 2, which, you see, is much more than 3.25? It was for this reason that I decided that I did not need a Mauerlat.