Queries 1C two accumulation registers. Remains and turnovers. Types of accumulation register
It's time to talk about accumulation registers. Registers are needed to accumulate information about the movements of funds. Simply put, with their help you can find out the amount of cash balances, materials and their movements.
Let's take an example, if you have read previous articles (and if not, I advise you to read them in the 1C Enterprise section) in which I talked about how to create a new information base, how to create a document and a reference book, and also discussed many other nuances. So we have a document Arrival of Goods. Which contains the following details, supplier, name of the goods supplied, quantity, price and amount.
It would be nice for us to see how much product we have left in our warehouse and in what quantity. To solve this problem we will use an accumulation register. In the example I will use the creation of an accumulation register in 1C 8.2, but for 1 8.3 this instruction is also suitable.
How to create an accumulation register in 1C example
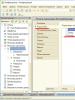
And so let’s start by opening our database in configurator mode, looking for the Accumulation Registers item and adding a new one. You already know how to add it, if not, then right-click and click add. Write the name of the register, say Balance in warehouse.
Let's add it to the reports subsystem so this is also a kind of report.

On the data tab, add Dimension, write the name Name and Resources, write Quantity.

Go to the Registrars tab and mark our document.

Now you need to open the Goods Receipt document and go to the Movements tab. And mark on the created accumulation register. Next, click on Motion Builder.

In the movement designer, you need to indicate what will be filled in from where and from which fields. Set the register movement type to Incoming. Just below you need to select the tabular part of our document, i.e. Materials. Now fill in the expressions opposite Name, write or select from the right window TekStrokMaterials.Name and opposite Quantity write TekStrokMaterials.Quantity and click ok.

In order for our register to be visible in the document, you need to open the document form. Go to the Command Interface tab and check it in the Visibility column.

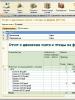
We launch our database and check the result. We open the Goods Arrival document, go through it, go to the register and see what we have there.

If you did everything correctly, you should see the following. All fields must be completed.

Well, you and I have created the first accumulation register. At the moment, the register is only accumulating information. In the next lesson we will do the expense, but for now that’s all.
Object 1C "Accumulation registers" - these are applied objects that form the basis of the mechanism for accounting for the movement of funds (finance, goods, materials, etc.), designed for storing operational accounting indicators and allow you to automate such areas as warehouse accounting, mutual settlements, and planning.
In other words, these are application configuration objects that allow you to quickly record and store movements of any assets or liabilities of an enterprise.
The accumulation register is a table with information that collects all certain movements (receipts, write-offs or turnover).
The accumulation register forms a multidimensional measurement system and allows you to “accumulate” numerical data in the context of several dimensions. For example, in such a register you can accumulate information about product balances by product line and warehouse, or information on sales volumes by product line and company division.
Residual register(Residues) stores movements, and also, based on them, the remainders after each movement. Residual accumulation registers are used, for example, to record goods in warehouses.
Negotiable register(Revolutions) stores movements without indicating their direction, and does not imply separate storage of residues. An example of using a negotiable register is recording data on an enterprise's revenue.
From the point of view of the tabular model, the accumulation register contains:
- measurements;
- resources (can be either numeric or definable);
- requisites.
When forming the structure of the accumulation register, a registrar must be appointed, and at least one resource must be created.
[collapse]
A mandatory attribute of the accumulation register is “Period”, and the frequency cannot be adjusted - records are stored accurate to the second. The information stored in the accumulation register is always linked to the time axis.
When writing data to the accumulation register, the “Period” must not be empty. “Period” is a standard detail that must be filled out.
Standard details of the 1C accumulation register are available on the "Data" - "Standard Details" tab.
- Period- the date of movement does not have to coincide with the date of the document;
- Registrar- a document that makes an entry in the register;
- Line Number- serial number of the line in the record set, unique within the registrar;
- Activity- is responsible for getting records into virtual tables (a quick way to obtain profile information from registers); cannot be set for each entry individually within the record document (the minimum for a set of records can be set);
- ViewDvisions- income or expense.
Uniqueness of records of the 1C object "Accumulation registers"
The system provides control over the uniqueness of records stored in the accumulation register. Thanks to this, the accumulation register cannot contain two entries relating to the same line of the same document.
Uniqueness of entries in the accumulation register movement table determined by the "Registrar" and "Line number" fields.

[collapse]
Accumulation registers are always subordinate to the document registrar. Therefore, among their standard details there is always " ".
Functionality of the 1C accumulation register
The main functionality that the accumulation register provides to the developer is:
- selecting records in a given interval according to specified criteria;
- selection of records by registrar;
- obtaining balances and turnover at a specified point in time based on specified measurement values;
- mode of operation with division of totals, which provides higher parallelism of writing to the register;
- disabling the use of running totals;
- calculation of results for the specified date;
- reading, modifying and writing a set of records to a register;
- the ability to write to the register without recalculating the results;
- a complete recalculation of the results and a recalculation of the results for the specified period.
For accumulation registers, the totals separation mode can be enabled:

If separation is enabled, then an additional column with a value of the “Number” type will be added to the register totals table, which will act as a separator for the remainder of the data in the event of simultaneous writing to the register by two documents.
[collapse]
Structure of the 1C object "Accumulation registers"
Information in the accumulation register is stored in the form of records, each of which contains:
- measurement values (describe the sections in which information is stored);
- the corresponding resource values (accumulate the necessary numerical quantitative data).
An accounting section can be, for example, warehouse, item, product characteristics, product series, quality.
By specifying the measurements we are interested in, we can obtain the quantity - resource - at any time.
In the context of different dimensions, in the future, for example, you can obtain balances for a specific date.
Design features of the accumulation register:
- Above all, it is necessary to put the measurements that will be most often requested in the system;
- property "Index" accumulation register measurements must be set to measurements in cases where it is planned to frequently apply selections for the measurement when obtaining data and this measurement can have a large number of variants of value. For example, we have a register “ProductsInWarehouses” (dimensions “Warehouse, Nomenclature”, resource - “Quantity”). It is more correct to index the “Nomenclature”, but the “Warehouse” field should not be indexed, since the number of warehouses in the system, as a rule, is not significant.
Accumulation Register Entry Set
This is a collection of its strings (records) existing in the computer's memory.
A set of records is always associated with a specific record document (i.e. determined by the registrar document), since there cannot be independent accumulation registers. Operating with a set of records, you can read this data from the database, delete it, change it, and add it under certain conditions. When writing, it usually replaces all records available in the database for a given condition with the records contained in the set. If records are not replaced, then the set is cleared after the write is completed.
The maximum number of records in a set is 999,999,999.
Accumulation Register Entry Setcan be used:
- to change accumulation register entries for a specific registrar;
- to add accumulation register entries for a specific registrar;
- to delete accumulation register entries for a specific registrar;
- to read a set of records for a specific recorder.
Important! Selection can only be based on equality.
Since the accumulation register is used to accumulate numeric values, each entry makes a change to the stored resources - movement. Movements, in general, can either add some increments to stored resources or subtract them:
- parish movement(“+”) - if an increase in stored resources should be performed;
- flow movement("-") - if a reduction of stored resources should be performed.
Along with each entry in the accumulation register, additional arbitrary information can be stored. The accumulation register details are used for this purpose.
The required standard requisite for the accumulation register is the registrar.

[collapse]
Registrar - this is a document during which register entries are generated (i.e. it is a document that can make movements in the accumulation register).
Records are only meaningful if the recorder exists; When deleting a record document, the records will also be deleted.
The list of registrar documents is specified on the corresponding “Registrars” tab of the window for editing the “Accumulation Register” configuration object.
Figure "Recorders" tab of the window for editing the configuration object "Accumulation register"

[collapse]
However, you can programmatically make a record without a recorder document (but it still assumes that there is a recorder). Also, the creation of records can occur not only during events, but also for some other events; there are no strict restrictions here.
Most algorithms for creating movement in the accumulation register are formed when posting a document (procedure “Processing Posting”).
Connection of the 1C object "Accumulation registers" with the registrar
A change in the state of the accumulation register usually occurs when a document is posted. Therefore, each register entry is associated with a specific document - the registrar, the line number of this document, and the date - period.

[collapse]
In general, the value of the "Period" field may not coincide with the document date. For example, the Sales Plan document can record the company's expected sales on several different dates in the accumulation register.
The composition of documents that can create entries in the accumulation register is specified by the developer during the creation process.

[collapse]
Features of working with registrars when processing documents:
- Entries in the accumulation register can be formed:
- when carrying out a document;
- when recording a document;
- when filling out the document.
- Mandatory condition in relation to the Registrar when recording data in the accumulation register: The record document must be recorded. Until the document is recorded, there is no link to it in the system, and the link must be indicated in the "Registrars" field.
- The "Registrars" field can contain a non-empty link only to the registrar document(type controlled).
- Type field data "Registrars" determined on the "Registrars" tab in the configuration object editing window.
- For the "Registrars" field, you can define the typeDocumentLink.<ИмяДокумента>. WITH The list of recorder types is quite specific (screenshot above).
- Things to remember:
- one accumulation register can be associated with any number of document types;
- one document type can be associated with any number of accumulation registers;
- when deleting a document-recorder, records are automatically deleted from the database;
- records may exist without the presence of a record document when using an exchange plan, which may lead to to violation of referential integrity information base.
- The date of the registrar's document is in no way related to the period of the register. The date of the register entry is determined programmatically and can either coincide with the date of the document or be completely different.
1C object movement designer "Accumulation registers"
The algorithms by which register entries are generated are described using the built-in language in the procedures of the corresponding documents. The system contains, which helps the developer create algorithms for document processing.
Balance registers and turnover registers
There are two types of accumulation registers:
- balance accumulation registers(stores the total values of resources - balances);
- revolution accumulation registers(stores only changes in these resources - revolutions).
The existence of a register for accumulating turnover is due to the fact that when automating economic activities, there are a large number of situations when it is only necessary to accumulate turnover, and the values of the balances do not make sense. A typical example of using a turnover accumulation register is the “Revenue and Cost of Sales” register, which stores information about sales volumes.
Since the turnover accumulation register does not accumulate the remaining resources, the “direction” of the movement of resources (income or expenditure) does not make sense for it; Only the amount of change in resources is accumulated. Therefore, all entries in the revolution accumulation register are marked with the same icons.
Units of registers for accumulating revolutions
For negotiable accumulation registers, the platform supports a special aggregate mechanism, which can significantly speed up the retrieval of data from registers containing a large number of records - hundreds of thousands and millions of records.
Aggregates- this is a special mechanism implemented in circulating accumulation registers and allows to significantly reduce the time for generating reports.
Each aggregate is a specialized storage containing aggregated register data in various sections, convenient for generating reports in this information base. The system automatically evaluates the intensity of users’ work with certain sections of information and, based on accumulated statistics, selects the optimal composition of supported aggregates.
The use of aggregates allows analysts and managers to analyze available information by switching between different viewing views with a short system response time. At the same time, the system uses accumulated aggregated data and always ensures that the reports received are up to date.
Multiple aggregates can be created for any register.
The platform contains a special one, with which you can change the composition of units and configure their use.
The aggregate designer can be called from the window for editing the circulating accumulation register (the "Data" tab).
List form and record set form of the 1C object "Accumulation registers"
In order for the user to view the data contained in the accumulation register, the system supports the following views of the accumulation register:
- accumulation register list form- allows you to sort and select the displayed information according to several criteria; the system can automatically generate this form;
- accumulation register record set form- allows you to add, change and delete entries.
Along with this, the developer has the opportunity to create his own (custom) forms, which the system will use instead of the default form.

The task of any accounting system is to store and promptly display information for the user, i.e. The goal of any system design is to promptly provide the user with a report. With the help of the data obtained, as a rule, management decisions are made at enterprises.
Let's assume that we have 1000 different documents: receipt of goods, write-off, return, sale, etc. And each of the documents changes the quantity of a certain product in the warehouse. To get information about the current quantity in the warehouse, you need to go through everything: some increase the quantity of goods, some decrease, some can increase or decrease. And if it is also necessary to take into account the warehouse, the organization?.. Such a system is very resource-intensive.
To simplify this process, 1C developers came up with special configuration objects. They are used for the convenience of storing and retrieving information; in 1C 8.3 and 8.2 all kinds of registers are used; in this article we will talk specifically about Accumulation registers.
The accumulation register itself is a table with information that collects all movements (receipts/write-offs or turnover) of certain documents. Let's look at what the movement table looks like using the example of a typical accumulation register “Goods in warehouses” in the “Trade Management 10.3” configuration:

Here we see that 1C “Sales” documents reduce the quantity of a certain product in a certain storage location, and receipt documents, on the contrary, increase the quantity. As a result, we get an overall picture in which we can clearly see what, when and in what quantity was received (written off) according to accounting. It is much more convenient to build a report using such a table.
Accumulation register in the configurator
What is an accumulation register from the point of view of configuration development? Let's start by looking at the fields of the accumulation register in:
Get 267 video lessons on 1C for free:

The accumulation register has Dimensions, Resources, Details and Standard details.
Let's first consider the standard details of the accumulation register:

- period— the date of movement does not have to coincide with the date of the document;
- registrar- a document that makes an entry in the register;
- line number— serial number of the line in the record set, unique within the registrar;
- activity— is responsible for getting records into virtual tables (more about them below);
- viewmovement- income or expense.
Accumulation register measurements
A dimension is a section in which records are kept. In the above example, the accounting section is: warehouse, nomenclature, product characteristics, product series, quality. That is, by specifying the measurements we are interested in, we can obtain the quantity—resource—at any time. In the context of different dimensions, in the future, for example, you can obtain balances for a specific date.
Accumulation register resource
A resource is a numeric field in which information is stored in the context of the dimensions described above.
Otherwise, the interactions of dimensions/resources can be schematically depicted as a coordinate system:

Two dimensions - abscissa and ordinate of the coordinate system, i.e. in this example, the dimensions are warehouse and item. At the intersection of dimensions we can get a quantity - a resource. For example, at the “main” warehouse of the product “pencil” there is 1 piece in stock.
Details of the accumulation register 1C
Accumulation register details serve as a “comment” or additional information; in terms of measurements, balances/turnovers cannot be obtained. Used quite rarely.
Types of accumulation register
There are two types of accumulation register − turnovers and balances.
If the purpose of the accumulation register is not to obtain balances, it is necessary to use the type of accumulation register - rpm. A typical example of using a turnover register is recording sales volumes. In this case, we only need to know what sales were over a certain period of time; balances in this case do not make sense.
If the purpose of using the accumulation register is to obtain balances for a certain period, we need a register with the form leftovers. This type allows you to receive both balances and turnover. For such a register, the system automatically calculates balances. An example of a “residual” register is goods in warehouses, money in the cash register.
Using a register type leftovers where you can get by rpm, is considered a blunder in the design of the accumulation register from a system performance perspective.
Depending on the type of register, the system will create different virtual tables for the accumulation register. A virtual table is a quick way to obtain profile information from registers.
For the accumulation register it is:
- Leftovers;
- Revolutions;
- Remains and turnovers.
For the solution developer, the data is taken from one (virtual) table, but in fact the 1C platform takes it from many tables, transforming them into the required form.
Proper design of accumulation registers
Accumulation registers must be designed from the required reports. The most difficult thing in the 1C 8.3 system is storing information correctly so that it can be easily retrieved at any time.
Among the features of register design, it should be noted the need to correctly arrange the dimensions in the register. Above all, you need to put the measurements that will be requested most often in the system.
Indexing accumulation register dimensions
Accumulation register measurements have the property of “indexing”. This property must be set to measurements in cases where it is planned to frequently apply selections to the measurement when receiving data and this measurement can have a large number of value options.
For example, the register is “ProductsInWarehouses”, the dimensions are “Warehouse, Nomenclature”, the resource is “Quantity”.
It is more correct to index the “Nomenclature”, but the “Warehouse” field should not be indexed, because the number of warehouses in the system, as a rule, is not significant.
Report “Balances and Turnovers” created for receiving a statement of balances and turnover.
The statement is displayed in the form of a table with columns “Starting balance”, “Receipt”, “Expense”, “Final balance” and detailing columns.
This report can be built for any balance accumulation register present in the configuration.
Path: Reports – Universal – Balances and turnover

After opening the main report form, you need to do this, which can be done directly on the main form. In this case it is necessary:
- in field " Accounting section" select the balance accumulation register for which you want to generate a report (selection is made from the proposed list);
- in field “The period from ... to ....”— specify the period for which the report will be generated.
NOTE: If the field “The period from ... to ....” is left blank, the report will be generated for the entire period of operation of the system;
- To generate a report in a form convenient for us, we configure it using the button “ Settings".
- When using the button, you can configure the selection of data displayed in the report. ( In addition, selection can be configured on the “Selection"settings forms.)
By the button " Form" The report is generated in accordance with the current settings.
Button " Heading" allows you to get a more compact view of the report by hiding its header.

Also, the report can be initially configured using "Settings" buttons which will allow you to set all possible report parameters, incl. and those that are specified on the main form.
The form contains the following tabs:
- Are common;
- Groups;
- Selection;
- Fields;
- Sorting.
On the bookmark "Are common" you can set the reporting period, select an accounting section, other general parameters and indicators.

As parameters suggested:
- "Use Properties and Categories"— after checking the box, it becomes possible to select and group data by properties, select by categories of objects;
- "Color the factions"— report groupings will be highlighted in different colors;
- “Summarize all levels” - When grouping the report, total data for each group will be displayed.

"Index"— numerical values summarized in the report. These values are displayed in the columns “Begin Balance”, “End Balance”, “Income”, “Expense”.
“Output in different columns”— with the checkbox checked, each indicator will be displayed in a separate column; if the checkbox is unchecked, the indicators will be displayed one below the other.

On the bookmark Groups You can customize the report detail:
— Grouping lines will contain the total values of the selected indicators;
— Type of totals determines whether additional hierarchical groupings need to be added to the report
The system offers the following types of data grouping:
Elements– generating a report on the elements that are included in the selected accumulation register
Hierarchy— generating a report on groups that include elements,
Hierarchy only used only if totals for elements are not needed, but only totals for groups are needed
— To build a report by groups, you need to select a characteristic by which the report will be detailed. For this it is necessary to Row Grouping add grouping view from popup window "Field Selection".

On the bookmark "Selection" data, conditions for generating a report are established

Each line specifies one selection element containing:
- Field, the values of which are subject to selection conditions.
- Checkbox for using selection element . Allows you to easily disable and enable individual selection elements without removing or adding elements.
- Comparison type– selection condition for which the report will be generated.
The system offers the following comparison types:
Equals— the report will be built only on the selected attribute;
Not equal— the report will be based on all characteristics except the selected one;
On the list— the report will be based on a list of characteristics;
Not on the list— the report will be based on all characteristics, except for those that were selected;
In Group— the report will be built based on all the characteristics located in the selected folder from the corresponding directory.
Not in group— the report will be built based on all characteristics, except for items located in the selected folder from the corresponding directory.;
In a group from the list— similar to comparison In the list, only several folders from the corresponding directory are selected as list values;
Not in a group from the list- similar to the comparison Not in the list, only several folders from the corresponding directory are selected as list values.

- Meaning, values are indicated to determine the selection conditions for entering the interval, which is specified by two values - the boundaries of the interval. If a condition is imposed on being in a list, the comparison values are specified by a list of values.

On the tab " Fields" You can specify a list of fields to be displayed in the report. By default, if the list is empty, the fields selected in the grouping list are displayed in the report.
The fields display additional information that will be displayed when generating the report in columns.

On the tab " Sorting" You can set the order in which report lines will be displayed.
Each line specifies the field and sort order. If sorting is not specified, then automatic ordering is used (character strings - alphabetically, numbers - ascending, etc.). Indicator fields can be selected as ordering fields, which allows you to sort report lines in descending or ascending order of the indicator.

After specifying all the conditions for generating a report, when you click OK, the report is generated

Post Views: 2,537
Let's continue to consider the work of our document “Service Provision”. Until now, we have created movement accumulation registers only for document lines that contain materials. We did not take into account the services contained in the document.
The fact is that when accounting for services, completely different criteria are important than when accounting for materials. First of all, it makes no sense to talk about how many services there were and how many are left; only the amount and number of services that were provided over a certain period of time are important. In addition, the following points are interesting:
what services were provided (to create a service rating)
which particular client the services were provided to (to provide him with a discount on the volume of previously paid services,
which master provided services (to calculate his wages)
It is obvious that existing accumulation registers are completely unsuitable for solving such problems. Therefore, we will create another “storage” of data that will be used in our program - the circulating accumulation register “Sales”.
10.2. What is a negotiable accumulation register?
Accumulation registers can be balance registers and turnover registers.
The “Material Remaining” and “Material Cost” registers that exist in our training configuration are balance registers. If you remember the moment when we created the “Materials” report, then in the report designer we saw that the system creates three virtual tables for such registers: a table of balances, turnover and a cumulative table of balances and turnover.
The circulating accumulation register is very similar to the balance register, already familiar to us, for which the concept of “remainder” does not make sense. The turnover register accumulates only revolutions; the balances are without
are different. Therefore, the only virtual table that the system will create for such a register will be the turnover table.
Otherwise, the turnover register is no different from the balance register.
It should be said about one feature of the design of accumulation registers, which is directly related to the possibility of obtaining balances.
When creating a circulating accumulation register, there is no particular difficulty in determining which parameters should be the dimensions of the register - we can assign any parameters we need as its dimensions.
The situation is completely different in the case of an accumulation register that supports the accumulation of balances. For him, the choice of measurements should be made based on the fact that register movements can be carried out “in two directions”: income and expense. Thus, as measurements it is necessary to choose those parameters according to which movements will accurately be carried out in both one and the other direction.
For example, if materials are accounted for in terms of item and warehouse, it is obvious that both item and warehouse can be measurements, since both the receipt and consumption of materials will always be carried out indicating a specific item and a specific warehouse. If in this situation there is a desire to reflect the accounting of materials also in the context of the supplier, then here it is necessary to proceed from the specific accounting scheme adopted at the enterprise.
Most likely, when materials are received, the supplier will be indicated, but when materials are consumed, with a high degree of probability, the supplier will not be indicated, since in most cases this is completely unnecessary information. This means that the supplier should be added as an accumulation register attribute.
If, when consuming materials, the supplier will be indicated for sure, then it makes sense to add the supplier to the register dimensions.
In other words, for each of the dimensions of the balance accumulation register, a change in resources must necessarily be carried out in both directions: income and expense.
For register details, this principle is unimportant; according to register details, resources can only be received or only spent.
Violation of this principle of constructing accumulation registers will lead to unproductive use of system resources and, as a result, slowdown and loss of performance.
10.3. Creation of a working accumulation register
Now that we know “almost everything” about accumulation registers, let’s open the configurator and create a new configuration object, accumulation register. Let's call it “Sales” and define the type of register - “Turnover”.
262. Let's create a new configuration object Accumulation register: select the object on the tree Accumulation register, MP, select Add , in the Name field enter Sales , in the Advanced List View enter Movements in the Sales register, click Next.
263. On the Subsystems tab, select Accounting, Materials Accounting, Services.
264. On the Data tab, create register dimensions:
265. Create register three resource:
Quantity, type Number, length 22, precision 2, Revenue, type Number, length 22, precision 2, Cost, type Number, length 22, precision 2.
266. Make available in the section action panel the command to view accumulation register entries: select a branch in the configuration object tree Subsystems, MP, All subsystems, in the All subsystems window on the left in the Subsystems list, select the Accounting subsystem, in the Navigation Panel group. Normal for the Sales team, turn on visibility and drag it to the group Navigation panel. See also.
267. Do the same for subsystems Provision of services and
Materials Accounting
268. Open the window for editing the configuration object Document Provision of Services and on the Movements tab we indicate that this document will create movements in the Sales register.
269. Select a tab Other, Object Module.
270. Enter the code that creates the Sales register movements produced by the Provision of Services document, highlighted in bold:
Procedure ProcessingConduct(Failure, Mode) //((__MOTION_REGISTER_CONSTRUCTOR
// This fragment was built by the constructor.
// When reusing the constructor, changes made manually will be lost!!!
Movements.RemainingMaterials.Write = True; Movement.CostMaterials.Write = True;
Movements.Sales.Record = True;
For each Tech LineList of Nomenclatures From the List of Nomenclatures Cycle
TechStringList of Nomenclature.Nomenclature.Type of Nomenclature
= Enumeration. Types of Nomenclature. Material Then
// Register Material Remaining Consumption
Movement = Movements.RemainingMaterials.Add();
Movement.Period = Date;
Movement.Warehouse = Warehouse;
Movement = Movements.MaterialsCost.Add();
Movement.MovementType = AccumulationMotionType.Expense;
Movement.Period = Date;
Movement.Material = TekStringList of Nomenclature.Nomenclature;

Movement.Cost = TechStringListItems.Quantity*TechStringListItems.Cost;
endIf;
Movement = Movements.Sales.Add(); Movement.Period = Date;
Movement.Nomenclature = TechStringList of Nomenclature.Nomenclature;
Movement.Client = Client; Move.Master = Master;
Movement.Quantity = TechStringList of Nomenclature.Quantity;
Movement.Revenue = TechLineList of Items.Amount;
Movement.Cost = TechStringListItems.Cost*TechStringListItems.Quantity;
EndCycle; //))__CONSTRUCTOR_MOVEMENT_REGISTERS
End of Procedure
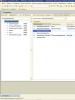
271. Let's launch 1C:Enterprise in debug mode, open the document Provision of Services dated July 27, click Conduct, go to the list of movements in the Sales register.
272. Open the document Provision of Services dated July 29, click Proceed, go to the list of movements in the Sales register.
![]()
273. Open the document Provision of Services dated July 29, click Proceed, go to the list of movements in the Sales register.
11th day. Reports 11.1. Methods to access data
The 1C:enterprise system supports two ways to access data stored in the database:
object (read and write)
tabular (for reading).
The object way of accessing data is implemented through the use of built-in language objects. At the same time, when accessing any object of the built-in language, we access a certain set of data located in the database as a single object.
For example, the DocumentObject.Service Provision object will contain the values of all the details of the Service Provision document and all its tabular parts.
Tabular access to data is implemented using database queries, which are compiled in a query language. Here the developer gets the opportunity to operate with individual fields of the database tables in which certain data is stored.
11.2. Working with requests
To generate and execute queries to database tables, the system uses a special Request object. The query is convenient to use when you need to obtain a complex data sample, grouped and sorted in the desired way. One of the classic examples of its application is a summary of the state of the accounting register at a certain point in time. In addition, the query mechanism makes it easy to obtain information in different time frames.
11.3. Query Data Sources
The query receives initial information from a set of tables.
All tables that the query language operates on can be divided into two groups:
real tables
virtual tables.
Real tables contain data from any one real table stored in a database.
For example, the real table is Directory.Clients corresponding to the Clients directory.
Virtual tables are formed mainly from data from several database tables. For example, the virtual table is Accumulation Register.Material Remainings.RemainingsAndTurnover, formed from several tables of the accumulation register Material Remaining.
What they have in common is that they can be given a number of parameters that determine what data will be included in these virtual tables.
Virtual tables are not stored in the database.
Real tables are divided into object (reference) and non-object.
Object tables provide information about reference data types (directories, documents, etc.). And in non-object ones - all other data types (constants, registers, etc.).
A special feature of object tables is that they include a Link field containing a link to the current record.
11.4. Query language
The algorithm by which data will be selected from the input query tables is described in a special language - the query language.
The request text may consist of parts:
1. request description
2. query merging
3. ordering results
4. auto-ordering
5. description of the results.
The only required part is the description of the request.
Query description – defines data sources, selection fields, groupings, etc.
Query merging – determines how the results of executing several queries will be combined.
Result ordering—defines the ordering conditions for query result rows.
Auto-ordering allows you to enable automatic ordering of query result rows.

Description of totals – determines which totals need to be calculated in the query and how to group the result.
Data composition system
The data composition system is designed to create custom reports.
The source data for the report layout contains the data layout diagram. These are data sets and methods for working with them.
The developer creates a data composition scheme in which he describes the request text, data sets, connections between them, available fields, data retrieval parameters, and sets the initial layout settings - report structure, data layout, etc.

The developer creates a data layout scheme and default settings.
Based on the layout and settings, the layout builder creates a layout.
The data composition processor selects data from information security according to the layout layout, aggregates and formats this data.
The layout result is processed by the output processor, and as a result, the user receives the resulting spreadsheet document.
11.5. Selecting data from one table
274. Let's create a report: select the Reports, MP branch in the configuration object tree, select Add, enter in the Name field
Register of Documents Provision of Services , press tab and in the field The synonym should appear Register of Documents Provision of Services , in the advanced view field, enter List of services provided,
275. click Open with data composition diagram
276. Add a new data set - query: click the Add button, select .
277. Create a request text: click the button Request constructor
sa.
278. Provision of Services, from this table we select the fields Warehouse,
279. Select a tabAssociations/Aliases, indicate that the Link field will have the Document alias.
280. Select a tab Order, specify that the query result should be ordered by the value of the Document field.
281. Click OK.
Provision of Services. Warehouse,
Providing Services. Master,
SORT BY
Document

Provision of Services. Warehouse,
Providing Services. Master,
Document.Provision of Services HOW to ProvideServices
SORT BY
Document
Description of the request Result ordering (ascending by default) List of selection fields
After AS data source alias Data sources
282. select settings tab, select Report, MP, New
grouping.
283. On the Selected fields tab, move the fields with the mouse.
284.
285. In the window for editing the configuration object Report Document RegistryProvision of Services, select the Subsystems tab, select Provision of Services.
286. Let's launch 1C:Enterprise in debug mode, in the action panel of the Provision of services section, select Register of documents for the provision of services, click Generate.
We see that the report contains a register of documents Provision of services. Moreover, by double-clicking on the Document field, we can open the source document and also perform other actions.
11.6. Selecting data from two tables
286. Let's create a report: select a branch in the configuration object tree Reports, MP, select Add, enter Service Rating in the Name field, press tab and it should appear in the Synonym field
287. click Open with data composition diagram . In the layout designer window, select a layout type Data composition diagram, click Finish.
288. Add a new data set - query: click the Add button, select Add Dataset - Query.
289. Create a request text: click the button Request constructor
sa.
290. As a data source for the request, select the object table Nomenclature and the virtual table of the accumulation register SalesTurnover.
290. Let's rename the Nomenclature table to sprNomenclature
291. Let's move the fields SprNomenclature.Link and SalesTurnover.RevenueTurnover to the list of fields.
292. select the communications tab. Since the query involves several tables, it is necessary to determine the relationship between them.
By default, the platform has already created a connection for the Nomenclature field. That is, the values of the Nomenclature dimension of the Sales register must be equal to the reference to the Nomenclature directory element.
293. Uncheck the All checkbox for the SalesTurnover table and set the SprNomenclature table.
This type of connection will be a left join, that is, the result of the request will include all records in the Nomenclature reference book and those records in the Sales register that satisfy the connection condition for the Nomenclature field.

As a result of the request, all services will be present, and for some of them the revenue turnover will be indicated.
294. Select the Conditions tab and set the selection so that the groups in the Nomenclature directory do not appear in the report.
295. Select the standard nomenclature, select the ThisGroup field, check the Custom checkbox, and enter the code in the Condition field:
sprNomenclature.ThisGroup = FALSE

296. Another condition is that the selected item is a service. This is a Simple condition. Drag the Item Type field to the list of conditions. The platform will automatically generate a condition according to which the item type must be equal to the value of the Item Type parameter. Next, before executing the request, we will pass the enumeration value – Service – to the Nomenclature Type parameter.
297. Select the Merge/Aliases tab, the Link field will have an alias Service, and the register field is Revenue.
298. Select a tab Order, select Revenue, specify that the query result should be sorted in descending order of the revenue field value.
299. Click OK.
SalesTurnover.RevenueTurnover AS Revenue FROM
Directory.Nomenclature AS referenceNomenclature
LEFT CONNECTION RegisterAccumulations.Sales.Turnover AS SalesTurnover
Software SalesTurnover.Nomenclature = referenceNomenclature.Link
WHERE sprNomenclature.ThisGroup = FALSE
And sprNomenclature.Type of Nomenclature = &Type of Nomenclature-
ORDER BY Revenue DECREASE
In the data composition system, resources refer to fields whose values are calculated based on detailed records included in the grouping. Resources are group or overall report totals.
300. Select the Resources tab, select Revenue, select >> to have the designer select all available resources for which the total can be calculated. For us, this is the Revenue resource.
Options
The user is interested in data on economic activity for a certain period. Therefore, any report has parameters that specify the beginning and end of the reporting period.
Report parameters set the conditions for selecting records for the report.
301. Select a tab Options
302. We will relieve the user of the need to specify the time when entering the date of the period for which the report is generated: select the Date, M2 field in the Start of Period line, select Date in the Date Composition list, click OK.
303. For the End of Period parameter, select the Availability restriction checkbox.
304. click the Add button, enter End Date in the Name field, select Date in the Type list, specify Date Composition - Date.
305. Select the End of Period parameter, enter the expression in the Expression field
EndPeriod(&EndDate, "Day")
306. Select line Type of Nomenclature, In the list of the Value column, select Service.
Settings
307. select the settings tab, select Report, MP, New grouping.
A grouping of detailed records will appear in the report structure.
308. On the Selected fields tab, move the mouse to the fields Service, Revenue.
309. Select the Other Settings tab, enter the report title – Service Rating.
Quick custom settings
310. Select a tab
311.
312. For the Start Date field, in the Values list, select Start of this month.
313. For the End Date field, in the Values list, select Start of this day.
314. Let's close the data composition schema designer.
315. In the window for editing the configuration object Report Service Rating, select the Subsystems tab, select Provision of services.
316. Let's launch 1C:Enterprise in debug mode, in the action panel of the Services section, select Service rating.
Symbol
317. In the configurator, open the data composition scheme on the Settings tab, select the tab at the bottom of the window Symbol, Click the Add button.
318. In the Design field, select burgundy text color, click-
319. Then we indicate the Condition upon the occurrence of which the design will be applied, select New element, click the Add button, in the Left value column indicate Revenue, in the Comparison type column indicate Less, in the Right value column indicate 700,
click OK.
That is, when the Revenue field has a value less than 700, something will be highlighted in red.
320. Now let's set the list of fields to be created: in the Form fields field, click three dots, click Add, select Service, select Revenue, click OK.
321. In the Symbol Representation field, enter Unpopular service. This is what the user will see in their settings.
322. Now let’s add the created condition to the user settings: click the button Custom Element Properties
settings , check the box Include in user settings and set the property Edit mode to value
Ordinary.
We've included the conditional appearance setting we created in the normal user settings. These settings, unlike quick settings, are not located in the report form, but are called up by clicking the Settings button.
323. Let's launch 1C:Enterprise in debugging mode, in the action panel of the Services section, select Service rating, click Generate.
We see that the amount of services is less than 700 rubles. highlighted in red.
323. Click the Settings button, uncheck the Unpopular service setting, click Finish editing.
324. Click create, you see the color highlighting has disappeared.
Custom Settings
325. In the configurator on the tab Data composition schema settings contain complete report settings that are specified by the developer. Some of them can be presented to the user to create a random selection, conditional report design, etc.
326. Click the Custom Settings Item Properties button located at the top of the command panel of the settings window.
327. Set the usage flag for settings Selection and Conditional design and set their edit mode to
value Normal, click OK.
328. Select the Selection tab, expand the Service field, select the Parent, M2 field, and drag it to the selection list on the right side of the window.
We have created the ability to select by groups of services that the user can set in 1C:Enterprise mode.
329. Let's launch 1C:Enterprise in debug mode, in the action panel of the Services section, select Service Rating, click Settings, the Selection and Symbol settings appear there.
We created the Unpopular service setting in advance in the configurator. And now, having added the conditional notation setting in general,
We provided the user with the ability to create any number of their own conditions.
330. Let's set the selection in the report so that it includes the following services related to the installation of washing machines: click three dots in the user settings window in the Selection line: in the Selection line, click three dots, in the Value line, click three dots, expand the Services group and select Washing machines from the Nomenclature directory, click OK, click Finish editing, click Generate.
The report only includes installation services for washing machines.
331. Click Settings, in the Selection line, click the Cleaning button.
11.7. Report 3. Displaying data for all days in the selected period
The Craftsmen's Revenue report will contain information about how much revenue the LLC received thanks to the work of the craftsmen, with details by day in the selected period and a breakdown of the clients served on each day.
331. Let's create a report: select the Reports, MP branch in the configuration object tree, select Add, enter in the Name field RevenueMasters, press tab and in the Synonym field the revenue of the mothers should appear, in the expanded view field enter the List of services provided,
332 click Open with data composition diagram . In the layout designer window, select a layout type Data composition diagram, click Finish.
333. Add a new data set - query: click the Add button, select Add Dataset - Query.
334. Create a request text: click the button Request constructor
sa.
335. As a data source for the request, select the virtual table of the accumulation registerSales.Turnover.
336. In the Tables field, select Sales.Turnover, click the Virtual table parameters button, select Day in the Frequency list, click OK.
337. Select fields from table SalesTurnover.Master, Pro
salesTurnover.Period, SalesTurnoverClient, SalesTurnover.RevenueTurnover.
338. Select a tabAssociations/Aliases, indicate that field SalesTurnover.RevenueTurnover will have the alias Revenue, click OK.
SalesTurnover.Master,
SalesTurnover.Period,
SalesTurnover.Customer, SalesTurnover.RevenueTurnover AS Revenue
RegisterAccumulations.Sales.Turnover(, Day,) AS SalesTurnover
339. Select the Resources tab, select Revenue.
Options
340. Select the Parameters tab, for the Start of Period parameter enter Heading Start Date, in the Type field select the composition of the date Date.
342. Add the EndDate parameter, Date type, date composition –
343. For EndPeriod, specify the expressionEndPeriod(&EndDate, “Day”)
and the Restrict availability check box. Settings
344. Select the Settings tab, select the root element Report, click Add, add a top-level grouping by the Master field, add a grouping nested in the previous one by the Period field, add another grouping nested in the Detailed records grouping by the Period field without specifying a grouping field.
345. Select the Selected Fields tab, add the fields Customer, Revenue.
346. Select the Other Settings tab, in the Grouping Fields Location list, select Separately and only in totals, in the Vertical Location of General Tiogs list, select Start, and in the Heading field, enter Mater Revenue.
347. Select a tab Options, select Start Date, click Custom Settings Item Properties, enable the Include in Custom Settings check box, click OK.
348. Select the Options tab, select End Date, click Custom Settings Item Properties, select the Include in Custom Settings check box, and click OK.
349. In the window for editing the configuration object Report Masters' Revenue, select the Subsystems tab, select Provision of services and Payroll.
350. Let's launch 1C:Enterprise in debugging mode, in the action panel of the Services section, select Craftsmen's Revenue, set the period from July 1 to July 30, click Generate.
Displays all dates in the selected period
We only show those days for which there is non-zero data in the Sales accumulation register table. We need to show data with detail for all days in the selected period.
351. In the data composition scheme, select Settings, select the Period grouping, click the Period tab in the command bar of the window.
352. Select the Grouping Fields tab, select the Period field,
V In the Add-on Type list, select a day.
353. In the new row in the Period Start Date column, M2, click the Clear button, click the T data type selection button, select Data Composition Field, click OK, select the three dots, select the Period Start option.
354. In the new row in the Period End Date column, M2, click the Clear button, click the T data type selection button, select Data Composition Field, click OK, select the three dots, select the End Date option.

355. Let's launch 1C:Enterprise in debugging mode, in the action panel of the Services section, select Craftsmen's Revenue, set the period from July 1 to July 30, click Generate.
New version of the report. Diagram
Logically, a diagram is a collection of points, series, and series values at a point.
Moments or objects for which we obtain characteristic values are used as points, and characteristics whose values interest us are used as series. At the intersection of the series and the point is the value of the chart.
For example, a diagram of sales of product types by month consists of points - months, series - product types and values - sales turnover.
A diagram as an object of the built-in language has three areas: the construction area, the title area, the legend area

356. Open the data composition scheme on the Settings tab, select Add in the list of report options, enter the name Revenue Volume.
357. Let's add a chart to the report structure: select the root element Report, MP, New Chart.
358. Select the Points, MP, New grouping branch, select the Master field.
359. Select Selected Fields, click Report, select
360. Select the Other Settings tab, select Chart Type – Measurement.
361. Select the stripes of the measurement diagram according to Fig.
362. Select a tab Options, select Start Date, click Custom Settings Item Properties, enable the Include in Custom Settings check box, click OK.
363. Select the Options tab, select End Date, click Custom Settings Item Properties, select the Include in Custom Settings check box, and click OK.
364. Let's launch 1C:Enterprise in debugging mode, in the action panel of the Provision of services section, select Masters' Revenue, click select option, select Revenue Amount, click
11.8. Report 4. Obtaining current values from the periodic register of information
The report will contain information about what services the LLC provides and at what price.
365. Let's create a report: select the branch Reports, MP in the tree of configuration objects, select Add, in the Name field enter List of Services, press tab and in the Synonym field List of services should appear, in the advanced view field enter List of services provided,
366 click Open with data composition diagram . In the layout designer window, select a layout type Data composition diagram, click Finish.
367. Add a new data set - query: click the Add button, select Add Dataset - Query.
368. Create a request text: click the button Request constructor
sa.
369. Select the object table as the data source for the query Nomenclature and virtual table of the register of information Prices. Latest Cut.
370. Rename the Nomenclature table to sprNomenclature.
371. In the Tables field, select Prices.CuttingLatest, click the Virtual table parameters button, in the Period field enter &ReportDate.
372. Select fields from table sprNomenclature.Parent,

373. Select the Links tab, uncheck the All checkbox for the register table, and enable the All checkbox for the lookup table.
374. Select the condition tab, select the Item type field,
375. Select the Association/Aliases tab, replace the Parent field with Service Group, Link to Service field, click OK.
SELECT sprNomenclature.Parent AS Service Group,
FROM Directory.Nomenclature AS referenceNomenclature
LEFT JOIN RegisterInformation.Prices.SliceLast(&ReportDate,) AS PricesSliceLast
Software (PricesSliceLast.Nomenclature = referenceNomenclature.Link)
WHERE referenceNomenclature.Type of Nomenclature = &Type of Nomenclature
376. Select the Resources tab, select Price.
377. Select the Parameters tab, for the Item Type parameter in the Value column, select Service.
378. For the Report Date parameter, remove the availability restriction (Og), in the Type field, select the date composition – Date.
379. For the Period parameter, set the availability limit.
380. Select the Settings tab, select the root element Report, MP, New grouping by the Service Group field, Hierarchy grouping type.
379. Select the grouping GroupServices, MP, New grouping without specifying the group field (Detailed records).
380. Select Selected fields, specify the fields Service, Price.
381. Select Other Settings, Vertical Grand Totals select None.
382. Select the Services Group tab, in the Location of grouping fields list, select Separately and only in totals, and in the Heading field, enter List of services.
383. Select a tab Options, select Report Date, click Custom Settings Item Properties, turn on the Include in Custom Settings check box, click OK.
384. In the window for editing the configuration object Report List of services, select the Subsystems tab, select Provision of services and Accounting.
385. Open the periodic Prices register, add a new value for the Diagnostics service for July 27 - 350 rubles.
386. Let's launch 1C:Enterprise in debugging mode, in the action panel of the Services section, select List of services, enter the date July 26, click Generate, the diagnostic price should be 600.
387. Let's launch 1C:Enterprise in debugging mode, in the action panel of the Services section, select List of services, enter the date July 27, click Generate, the diagnostic price should be 350.
11.9. Report 5: Using a calculated field in a report
388. Let's create a report: select the branch Reports, MP in the tree of configuration objects, select Add, enter Client Rating in the Name field, press tab and it should appear in the Synonym field Customer rating, in the advanced view field, enter List of services provided,
389. Click Open with data composition diagram . In the layout designer window, select a layout type Data composition diagram, click Finish.
390. Add a new data set - query: click the Add button, select Add Dataset - Query.
391. Create a request text: click the button Request constructor
sa.
392. As a data source for the request, select the virtual table of the savings register Sales.Turnover.
393. Select fields from table
SalesTurnover.Client
SalesTurnover.RevenueTurnover
393. Select the Association/Aliases tab, replace the RevenueTurnover field with Revenue, CostTurnover with Cost.
394. Click OK.
395. Select the Calculated Fields tab, click the Add button, enter Revenue in the Data Path field, and enter
Revenue - Cost
396. Select the Resources tab, select Revenue, Income, Cost
397. Select the Settings tab, select the root element Report, MP, New Chart.
398. Select Points, MP, New grouping by Client field.
399. Select Selected Fields, select Revenue.
400. Select Other settings, chart type – 3-D pie, enter Customer Rating in the title field.
401. In the window for editing the configuration object Report List of services, select the Subsystems tab, select Provision of services and Accounting.
402. Let's launch 1C:Enterprise in debug mode, in the action panel of the Services section, select Customer rating, click Generate.
11.10. Report 6. Outputting data to a table
Let's create a universal report to allow the user to change its structure and appearance.
403. Let's create a report: select the Reports, MP branch in the tree of configuration objects, select Add, enter Universal in the Name field, press tab and Universal should appear in the Synonym field, enter List of services provided in the expanded view field,
404. Click Open with data composition diagram . In the layout designer window, select a layout type Data composition diagram, click Finish.
405. Add a new data set - query: click the Add button, select Add Dataset - Query.
406. Create a request text: click the button Request constructor
sa.
407. As a data source for the request, select the virtual table of the accumulation register Sales.Turnover.
408. Select fields from table
SalesTurnover.Nomenclature
SalesTurnover.Client
SalesTurnover.Master
SalesTurnover.QuantityTurnover
SalesTurnover.RevenueTurnover
SalesTurnover.CostTurnover
409. Click OK.
410. Select the Resources tab, select >>.
411. Select the Settings tab, select the root element Report, MP, New Table.
412. Select the Table element in the structure and click the Custom Settings Element Properties button. Select Selected Fields, Row Grouping, Column Grouping.
413. In the window for editing the configuration object Report List of services, select the Subsystems tab, select Provision of services.
414. Let's launch 1C:Enterprise in debugging mode, in the action panel of the Services section, select Universal, click Generate. Empty!
415. In the Selected fields line, click the three dots and select RevenueTurnover.
416. In the Lines line, click the three dots, add a grouping by the Nomenclature field with the Hierarchy type.
417. In the Columns row, add a grouping by the Master field.
418. Click Generate.
419. In the Selected fields line, click the three dots and select CostTurnover.
420. In the Lines line, click the three dots, delete the grouping by the Items field, enter the grouping by the Customer field.
421. Click Generate.
422. In the Selected fields line, click the three dots and delete CostTurnover.
423. In the Lines line, click the three dots, delete the old grouping, enter a grouping by the Nomenclature field with the Hierarchy Only type.
424. In the Columns line, add a grouping by the Client field, and place it first..
425. Click Generate.