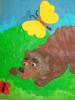
Plasticineography in kindergarten: how to conduct creativity lessons. Plasticineography in kindergarten: how to conduct creativity lessons Plasticineography for children 2 3
Plasticineography is becoming increasingly popular in kindergartens these days. This is not only a pleasant leisure activity, but also a whole area of creativity, which has its own types and techniques. It is gaining more and more attention from teachers, since it allows you to solve many developmental and educational problems during the game. But what is especially important is that the child has the opportunity to create a beautiful work of art with his own hands.
Plasticineography as an unconventional way of combining modeling and drawing
You can draw in different ways. Today, non-traditional techniques are popular among preschool teachers: drawing with fingertips, palms, prints of objects, blotography, plasticineography.
A child's mind is at his fingertips.
V. A. Sukhomlinsky
On the one hand, the child is involved in a fascinating process, but at the same time, many nerve endings on the tips of the fingers and the surface of the palms transmit signals to the brain, activating its activity. When little hands tear a paper napkin, learn to roll a dough ball, feel materials, or make a magpie-crow gesture, information enters the brain and is distributed to various centers (auditory, visual, thinking, emotional and speech).
Plasticineography is an unconventional way of drawing using plasticine. Children are taught activities with plastic materials at an early age. Modeling trains your fingers and activates sensors located on the hand that are associated with brain function, and helps relieve muscle and emotional tension. Modeling classes develop not only manual dexterity and coordination, but also creative imagination.
Creating a picture using this technique is a new level of working with plasticine, which can become art.
True works of art are created using plasticineography technique
Using techniques, methods and techniques in working with preschoolers
Plasticineography in its pure form is available for children in the middle and older groups of kindergarten. Young children master basic skills during short-term individual or subgroup lessons.
It is important for the teacher to remember that in groups of primary and secondary preschool age this type of creativity is aimed not so much at results, but at obtaining positive emotions, developing children’s interest and desire to improve skills.
To make the lesson enjoyable, the materials must be of high quality and the tools must be comfortable. For the basis of a future plasticine painting, paper is suitable, but thick cardboard, plastic, plexiglass or ordinary glass is preferable. The plasticine must be non-greasy, otherwise stains will appear on the paper or cardboard base, and the work will have an untidy appearance. Choose a bright and pliable material for modeling.
The tools you will need are a modeling board (can be replaced with a piece of plastic or oilcloth), a plastic rolling pin for rolling out plasticine, a set of stacks, scissors, various devices for creating patterns on a plasticine surface (brushes, a pastry syringe, a strainer, a plastic fork).
Methods of teaching plasticineography:
- visual (showing samples of work, illustrations on the topic, observing the actions of the teacher);
- verbal (conversation, explanation, story);
- practical (exercises with material, practicing techniques, game actions, experimentation).
The techniques used in plasticineography are already partially familiar to children from modeling classes. This is rolling and rolling, flattening and stretching, that is, the usual actions with a piece of plasticine to give it the required shape. But there are also some techniques here: pinching, smearing, pressing, smoothing, mixing colors. The teacher pays special attention to mastering them.
Tasks of plasticineography from nursery and second junior to preparatory groups
- Developmental. Techniques for working with plasticine develop finger dexterity and prepare the brush for writing. The ability to correctly perceive composition and scale improves.
- Cognitive. Pupils get acquainted with a new type of fine art, comprehend the interaction of two different techniques - appliqué and modeling, the basics of which they have already mastered.
- Aesthetic. Children develop a sense of color and shape. The first experiments are being carried out with a combination of shades and materials.
- Educational . Children are taught to be independent, diligent, patient and neat, and gain experience working in a team. Depending on the topic, love for the native land, the ability to see and cherish the beauty of nature, a friendly, grateful attitude towards family and friends, love for pets, etc. are cultivated.
Children's skills and abilities become more complex from year to year. The main directions of work with preschoolers are also changing.
- In the first junior group of a preschool educational institution, children learn to make elements from plasticine, one lesson - one element (ball, cylinder, sausage); create images of simple objects; master the techniques of pinching and smearing, develop the basics of the ability to work according to a given pattern.
- For children of the second youngest group, it is important to develop the ability to draw with plasticine and cultivate independence (the child does not repeat after the teacher, but learns to build a composition himself). Training to work in a subgroup begins.
- In the middle group, skills in working with plasticine and creating more complex images are honed; children are taught to create works using a variety of materials (cereals, beads, buttons, etc.); interest in teamwork develops.
- Senior and preparatory groups are characterized by the complication and development of the plot and game concept of the lesson; development of speech activity of pupils in the process of creating plasticine images; learning to create a collective work of artistic value.
Types of drawing with plasticine in kindergarten
Plasticineography can be divided into several types, based on the material that is taken as the basis for the picture. Work is performed on paper, cardboard, plastic, ordinary or organic glass.
Thick cardboard is often deformed, but it is simple and easy to work with. Plastic and glass bases are easy to apply (they won't bend or wrinkle), but to avoid cuts, be sure to provide safety training and teach your children how to seal the edges of the base with tape, or do it yourself first.
According to the method of creating an image, plasticineography is:
- Direct Made with plasticine of different colors. In the first younger group it can be vegetables, winter snowfall, leaves.
- In the second younger group, children will willingly perform bright works on the theme “Dishes for dolls”, “Fish”, “Mushroom”. In the middle group, the plot and outline are much more complex: transport, trees, houses.
- Stained glass or reverse. The outline of the image drawn with a marker on a glass base is filled with plasticine.
- Mosaic. Plasticine balls of different colors are applied to the base in accordance with the design.
- Contour. This type of work is recommended for students in the senior and preparatory groups, because it requires perseverance. Warmed plasticine flagella of different colors need to be squeezed out of a syringe (without a needle) and filled with them in the outline.
- Multilayer. Plasticine is applied to the base with strokes in several layers, various colors and shades of the material are combined, resulting in a three-dimensional, complex image.
How to warm up the material: roll out some of the plasticine into a sausage, push it into the syringe. We cut off the excess material in a stack. We close the syringe using the piston and heat its contents using water or a microwave.
Photo gallery: types of plasticineography depending on the method of application
Contours are painted over with plasticine in the first junior group “Fish” is performed in the 2nd junior group The work of a middle group student is made as a “Gift for Dad” Reverse plasticineography “Teddy Bear” is suitable for children of senior preschool age Such painstaking mosaic work “Matryoshka” requires perseverance and patience Contour plasticineography “ Fish" Multi-layer technique is very picturesque and allows you to convey the colors of living nature
Difficulty level of crafts
Children of each age group have different ability levels. For harmonious work and positive emotions, this point must be taken into account.
Table: level of abilities of children of different ages
| Age group | Skills in working with plasticine | Form of work | Type of work |
| Nursery | mastery of the skills of rolling, unrolling, flattening, joining elements | individual | creation according to model |
| Second younger | honing the skills acquired in the nursery group, mastering more complex skills: pinching, pulling, cutting, smoothing, working with simple tools: stacks, scissors | individual | creation according to the model, doing something like this |
| Average | honing skills acquired in early age groups, mastering the technique of mixing plasticine of different colors, working with more complex tools: brushes, curly shapes, syringe (regular without a needle or a pastry syringe with a variety of attachments) | individual, work in subgroups | doing something like this independent composition planning |
| Older | the use of waste material is added, combining elements of various types of plasticineography | individual, work in subgroups, teamwork | independent choice of materials, thinking through the composition, attraction of plot and game elements |
| Preparatory | acquaintance with new techniques (bas-relief, tile), training in the design of finished work (frame, baguette, background, mat) | individual, work in subgroups, collective | independent choice of materials and type of work performed, thinking through the composition, a combination of various artistic techniques, mandatory use of plot and game elements |
Photo gallery: samples of work by children of different age groups
Image of a flower in direct technique (first junior group) “Daisies” made by children of the second junior group Children of the middle group can do the composition “Space” Work of children of the senior group A beautiful gift for Mother’s Day (preparatory group)
We are planning plasticineography classes in kindergarten
For a teacher, visual arts classes are an opportunity to create a connection between art and different areas of knowledge. The development of speech, patriotic, labor and environmental education are integrated into the creative process. Therefore, topics are selected so that they reflect the diversity of the surrounding world and correspond to socially significant events that occur in the time or season closest to the lesson. For example, it would be advisable to plan a patriotic theme in November, for National Unity Day; making flowers and treats would be appropriate for Mother’s Day.
Approximate topics for classes with children of middle preschool age
- "Apples and berries on a plate."
- "Bugs in a flower bed."
- "Mushrooms".
- "Sun in the clouds."
- "Rowan sprig."
- "Autumn tree."
- "Fish"
- "Christmas tree".
- "Christmas decorations".
- "Snowman".
- "The snow woman is a dandy."
- "Teremok".
- "Owl".
- "Jolly Rocket"
- “A gift for dad (grandfather).”
- "Pie for Mom."
- "Flower - seven-flowered."
- "White birch".
- "Space".
- "Starry Sky".
- "Easter Egg".
- "Lily of the valley".
- "Snail on a leaf."
- "Dandelion"
In the preparatory group, the themes “My Homeland”, “My Family”, “Underwater Kingdom”, “Autumn Tale”, “Winter brought us fun” should be introduced. "Round dance at the Christmas tree." They are more voluminous in content and require good preparation of children. You can also plan to depict painted dishes and various items of clothing, folk toys, for example, Dymkovo, or the human body in motion.
Children in their seventh year of life are sometimes capable of creating real masterpieces if they are given free rein to their imagination.
Photo gallery: works of children of middle and senior preschool age on the theme “Hedgehog”, “Peacock”, “Rowan Branch”, “Clown”, “Flowers” and others
“Hedgehog” Colorful image of a peacock On a wonderful tree we see signs of all seasons Collective work “Underwater World”  Funny bear made using the brushstroke technique Mosaic plasticineography “New Year’s ball” Original Christmas tree decorations in mixed media “Chrysanthemums” “Grandma Yaga’s hut” Painted Easter eggs “Rowan branch” “Jolly clowns” “Flag of Russia”
Templates to help the teacher
Templates, the outline of which must be filled with plasticine of different colors, are suitable for direct and more complex types of plasticineography.
Photo gallery: templates depicting fruits, vegetables and animals
Template “Ladybug” Template “Hedgehog” Template “Puppy” Template “Bullfinch” Template “Cat” Template “Vegetables and fruits”
Photo gallery: clothing and tableware templates
Template “Jug” Template for painting “Gzhel” Template “Teapot” Template “Cup” Template “Pan” Template “Pants” Template “Sweater” Template “Jacket”  Template “Fur Coat” Template “Skirt” Template of an elegant dress Template of clothes for dolls
Photo gallery: templates of transport and human figures
Truck template Ambulance template Taxi template Steamboat template Ship template Helicopter template Airplane template Steam locomotive template  Template “Human Figures” Template “Clown” Template “Men” Template “Children” Template “Man in Motion”
It is also interesting to work with templates on cardboard with a ready-made background. The contours are filled with colored material.
Photo gallery: animal templates with ready-made backgrounds
 Template “Lion” Template “Bug” Template “Grasshopper” Template “Dragonfly”
  Stegosaurus template
  Template "Pterolactyl"
  Dinosaur template
  Template "Piglet"
  Rooster template
  Ostrich template
Description of the contents of the abstract of GCD on plasticineography for the nursery group “Kolobok” by the author N. G. Potekaeva.
- Preliminary work: reading the fairy tale “Kolobok”, looking at the illustrations for it, coloring coloring pages based on the fairy tale “Kolobok”.
- Form of work: subgroup (6–7 people).
- Goals: training in rolling, attaching, pinching techniques; development of coordinated work of both hands; training to work in a team.
Progress of the lesson

Organization of a project or circle on plasticineography
You can diversify the forms of working with children on drawing with plasticine using project and circle activities. In the first case, the teacher has the opportunity to take a deeper and more systematic approach to introducing children to this wonderful form of art; in the second, to expand the range of topics and additional materials used.
Stages of project preparation
- Goal: to develop the creative thinking of preschool students using plasticineography techniques.
- Tasks:
- training in performing simple elements using a given technique;
- learning to create objects of the surrounding world in artistic form;
- training to work in a given space;
- development of spatial thinking;
- development of aesthetic taste;
- mastering the basics of design;
- fostering perseverance, accuracy, and patience;
- involvement in team work.
- Drawing up detailed planning:
- preparatory stage of work;
- attraction of motivating material at the beginning of project activities;
- If possible, time the project to coincide with a significant event in the life of the kindergarten (Mother’s Day, Autumn Holiday, New Year, Victory Day, Cosmonautics Day).
- Implementation of project activities.
- Project presentation. When the project is finished, it can be shown (to another group, in the kindergarten hall, in the assembly hall at a holiday). Children talk about their work to listeners who evaluate their creativity.
Description of the project “Gifts of Autumn”
- Goal: to prepare creative work for the Autumn Festival in kindergarten.
- Tasks:
- honing skills in working with plasticine;
- development of aesthetic taste;
- artistic reproduction of objects of the surrounding world;
- group work training.
- Pupils are divided into subgroups and independently distribute responsibilities for creating individual parts of the composition: drawing mushrooms with plasticine, creating tree trunks using contour techniques, using mosaic techniques to depict berries and animals, using methods of working with scissors and stacks to create three-dimensional elements.
- Presentation of the work at the Autumn Festival in the assembly hall (with musical accompaniment and reading of poems).
Photo gallery: collective work of children from the preparatory group on the “Autumn” project
“Autumn trees” “Children in an autumn park” “Autumn in the forest” “Plasticine autumn”
Literature and tips for creating a circle
Before developing a work program for a circle, it is recommended that you familiarize yourself with the methodological manuals on working with preschoolers using this technique:
- G.N. Davydova. Plasticineography for kids. – Scriptorium, 2003.
- Shnitskaya I. O. Application from plasticine D.: Phoenix, 2008.
- Yanushko E. A. Modeling with young children (1–3 years). Methodological manual for educators and parents. – M.: Mosaic - Synthesis, 2006.
For self-education, it will be useful for the teacher to familiarize himself with manuals on the development of fine motor skills in children:
- Anishchenkova E. S. Finger gymnastics for the development of speech in preschool children. – M.: AST: Astrel, 2006.
- Bolshakova S. E. Formation of fine motor skills of the hands: Games and exercises. - M.: TC Sfera, 2009.
- Koltsova M. M. Motor activity and development of child brain functions. – M.: Pedagogy, 1973. – P. 144.
- Pavlova L. The importance of the development of hand actions. Preschool education. 1984, no. 1.
- Tsvintarny V.V. We play with our fingers and develop speech. - St. Petersburg: Hardford, 1996.
The club program takes into account:
- age characteristics of children who will study in the circle;
- forms of conducting classes;
- methods and techniques that the teacher will use;
- means (materials and tools for creativity, attraction of ICT and technical means);
- training mode;
- predicted results to be achieved when implementing the program;
- topics of classes.
Fragments from the program of a circle on drawing with plasticine for the senior group
- It is recommended to use information and computer technologies. This is necessary to display working diagrams, visual examples, images of works of art. Viewing such material develops the imagination and creative thinking of students.
- In preschoolers, visual-figurative thinking predominates, so presentations and video materials stimulate emotionally rich work with plasticine.
- Class schedule: for older children (5–6 years old), classes are held in the afternoon, twice a week. The duration of the lesson is 25–30 minutes.
- The work of drawing with plasticine is carried out in several stages, at each of which the child is given different tasks.
Program monitoring shows what skill levels were at the beginning of the school year and what children have learned at the end. For each child there is a table that displays the level of skills in working with plasticine and modeling tools, the ability to follow the teacher’s recommendations, the level of development of creative thinking, independence in constructing a composition and developing a creative plan.
Videos on drawing with plasticine
We bring to your attention video materials about different plasticineography techniques.
Video: “Fish in an aquarium” made from plasticine
Video: master class on contour drawing with plasticine
Video: aquarium - crafts with plasticine in a combination of plasticineography and modeling on a plane
Video: drawing an autumn forest with plasticine
In plasticineography classes, children work with different materials and tools, develop fine motor skills and train their hand to write. This type of art introduces the original use of materials and opens up a new perspective on everyday objects and natural objects. Preschoolers improve their speech skills and enjoy communication in a group.
Not long ago I published an article about how you can organize your first classes in . In the article I talked mainly about educational games with dough, which will help the baby learn to pinch off, cut the dough, leave prints on it, and generally do a lot of interesting things with it :) Today I would like to continue the topic of modeling, but dwell a little more on modeling is no longer from dough, but from plasticine, and bring to your attention options for the very first plasticine crafts with your baby.
Modeling classes are known to be extremely beneficial for children. Even during such seemingly simple actions as rolling out a kolobok or sausage, the child’s imagination and creative thinking develop. The child learns to perceive three-dimensional images, and at the same time trains fine motor skills, which has a very beneficial effect on the development of speech and on preparing the hand for writing. In other words, modeling in general has a very beneficial effect on the intellectual and emotional development of a child, so it is very advisable to include it in regular activities with your child.
Often mothers think that it is too early to sculpt with a one-year-old baby, because... the child will most likely want to taste the plasticine. However, even if your child tries to try it, don’t give up on your creativity lessons right away! Try to demonstrate to your child what plasticine is capable of, show how many unusual things can be made from it. Even if the child persistently continues to “try” the modeling mass, then at first sculpt from. Firstly, nothing bad will happen if the child tries it, since it is absolutely natural, and secondly, after several tastings, the child will most likely refuse this activity, because... the dough tastes very salty.
All the crafts in this article can be made from either plasticine or dough (store-bought, Play Doh, or homemade). The only thing worth noting is that when you make stickers on paper, the plasticine will stick to the paper much better than the dough. If you do work with plasticine, then choose the softest plasticine for practice so that the baby is not disappointed after his first attempts to sculpt.
Always remember that creative activities should last no more than 5-10 minutes. Do not restrain or force your child to sculpt with plasticine if he does not want to or is naughty. Even slight pressure on the baby will lead to the fact that he will eventually lose all interest in creativity. Therefore, if a child refuses to sculpt, just offer him this activity after some time (in a day, a week, or maybe a month), most importantly, don’t force it!
Where to start modeling classes with a child 1-2 years old
Naturally, you shouldn’t sculpt complex crafts in your first lessons. Now our task is to master the basic and simplest skills of working with plasticine. So, what should you teach your child first:
- Pinch off a piece plasticine with thumb and forefinger
- Knead plasticine in the palm of your hand
- "Flatten" small plasticine balls with your index finger. At first, the mother makes the balls for the baby, then gradually we learn to roll the balls together.
- Roll the bun between two palms. It is preferable to use both hands (rather than rolling the bun on the table), since in this case both palms are massaged, which is twice as beneficial for the baby’s motor skills. If it is difficult to roll a ball with two palms, at first you can learn to roll the bun on your mother’s palm. Give the resulting ball different images, so your simple manipulations with plasticine will take on meaning. For example, by adding a leaf to a ball, you can turn it into an apple, and with the help of a match or a toothpick you can easily make a real bun that rolled away from grandma and grandpa!
- Roll the sausage between two palms. An ordinary plasticine sausage can easily become a cucumber for a hungry doll Masha or a worm that will then crawl along a baby’s hand.
Well, now there are various options for plasticine crafts that you can create even with a one-year-old toddler.
The simplest crafts from plasticine
For all crafts, you will need to draw or print a picture template in advance. In the article I added the ability to download the simplest b/w templates. If you wish, you can pre-color them, or, if you have a color printer, find more interesting color analogues of the templates. I think the baby will like any option, even black and white.
Try to ensure that when creating a craft, the child plucks off each piece of plasticine himself and, if possible, rolls it into a ball.
- Ladybug –

- Chicken grains –

- Snowflakes –

- Watermelon with seeds –

- Specks on the fly agaric –

- Tree with leaves –

Crafts made from plasticine with the arrangement of elements in specific places
- Beads –

- Rungs for stairs . Invite your child to help the girl climb a palm tree to get coconuts - there’s no way to do this without a ladder. –

- Train wheels –

- Flower –

- Zebra stripes –

- Plasticine hide and seek . Hiding the bun from the fox -

You can also use ready-made manuals in your classes. This is very convenient, because... does not require any additional preparation before class. Here are the manuals we used:
- (Ozon, Labyrinth, My-shop)

- (Ozon, My-shop)

At this age, children are already good at rolling koloboks and sausages, pinching off, smearing and flattening plasticine. However, plasticine crafts with many small details, which can be found in popular children's modeling manuals, are not yet possible for them: as a rule, they lack either patience or motor skills. In this article you will find ideas for modeling that a 2-3 year old child can cope with with minimal help from his mother. After all, independence in creativity is extremely important for a child! Try to always remember this while teaching your child.
Activities during which the mother does most of the work for the child do not in any way contribute to creative development. Allow your koloboks to be crooked and your eyes to be in a completely different place than you would like them to be. Do not demand ideal forms from your child, achieving a strong resemblance to real objects . If it is very difficult for your child to cope with the task, it is better to simplify it (By the way, you can find ideas for simpler plasticine crafts for children in the article “ Modeling for children 1-2 years old »).
It seems to me that the ideal activity is when everyone makes their own craft: for example, the mother makes her own snowman, the child makes his own, while the mother comments on her actions, and the baby is guided by what the mother is doing. In our experience, closer to 3 years this becomes possible. But the smallest creators often do not have enough finger strength to cope with plasticine, so, of course, sometimes they need help, but at the same time they should always strive for independence in creativity.
Don’t be confused by the fact that the crafts in the photographs in this article are smooth and neat and do not at all look like children’s crafts; I specially made most of them for this article, because... what we sculpted with my daughter mostly did not survive. After all, having molded some figure, Tasya immediately includes it in her game. And not all of Tasya’s crafts would make it clear to readers what was originally intended
So, ideas for modeling with children 2-3 years old (or rather, this is only half of the ideas, here is the continuation).
Making treats for toys
You can start the lesson with something like this: the bear came to visit the hare, they gathered to drink tea, but there was nothing to drink it with. The baby will have to help the toys and make treats for them. You should not make more than 1-2 types of treats at a time, otherwise the child will get tired of the protracted activity.

- Bagel and pretzel . First we roll the sausage. To make a bagel, we connect the ends of the sausage to each other, in the case of a pretzel, we slightly cross the ends.
- Candies . Roll out a small plasticine sausage and attach small balls to the edges.
- Pie . First we roll a large bun, then flatten it. Fold the resulting flatbread in half and pinch the edges.
- Eggs on a plate . Roll a large bun, flatten it, level it with your fingers - you get a plate. Then we roll small balls and put them on a plate - these are eggs.

- Apples . We roll the balls and make small indentations in them with our fingers. Then we attach small leaf cakes to the recesses.

- Mushrooms . We roll the bun and flatten it - this is the mushroom cap, we roll the column - this is the leg. Mushrooms can be put in a basket, “collected in the forest.”

Candies with candy wrappers
. We roll small sausages or balls, and then wrap them in prepared pieces of colored paper or foil, like in a candy wrapper. Most likely, you will have to help the baby wrap the candy, because... this task is not easy. Just be careful that your baby doesn’t eat this candy, it looks too much like the real thing!

- Pie/cake/pizza . First, we make a large bun and flatten it into a not too thin flat cake - we get the base for a cake or pizza, whichever you prefer. Then we decorate with everything we have on hand: beans, pasta, peas, buckwheat or any other cereal.

Crafts based on “koloboks”
- Snowman . We roll three koloboks, which we then carefully mold together. We make the eyes and mouth in a stack. The nose can be made into a stack, or you can make a carrot nose with your mother’s help.
- Tumbler . We roll two balls and mold them together. We roll two small buns separately and attach them to the sides as hands.

- Caterpillar . We roll small balls - as many as you have patience for. In my opinion, it’s best to make a caterpillar together: the baby makes a few balls, the mother makes a few, and then combine everything together. We make the face in a stack. Attach horns if desired.

- Christmas tree . I mentioned this craft earlier in the article “ New Year advent calendar" For this craft you will need a pine cone, which will be the Christmas tree. The toys on our Christmas tree will be small plasticine balls, or simply pieces of plucked plasticine. At the end of the lesson, mom fixes the Christmas tree on a plasticine base so that everyone can admire it on the eve of the holiday.

- Kolobok . The baby, of course, has rolled the bun more than once. This time, invite him to make all the small details from available materials. For example, our little bun has eyes and a nose made of peas, legs made of beans, and a hat made of buttons.

Crafts based on “sausages”
- Fence for a house . First, we roll multi-colored plasticine sausages, and then stick them one to the other near the drawn or any other house. In the photo, my daughter and I were “attaching” a fence to the house, which the day before had been glued together from multi-colored blocks painted with patterns.

- Airplane . Roll two sausages and place them crosswise. If you wish, you can also attach another small sausage to the tail of the plane for greater resemblance.

- Hut for a bunny. This craft can be made immediately after reading the fairy tale “Zayushkin's hut » ( Ozon , Labyrinth , My-shop ). Draw a bunny, a forest, and maybe other fairy tale characters in advance, explain that for some reason there is no hut in your drawing, and offer to make one out of logs. The logs will be plasticine sausages. Place a window on top of the resulting log house - a flat cake. A triangular roof can be made from a regular flat cake by stretching out the corners with your finger.

- Pyramid . First we make the base for the pyramid (cake). We attach a column to it in the middle. Next we roll a few rings together. To prevent your child from getting bored with the activity, you can make rings together: 2-3 rings for the child, 2-3 rings for the mother. When all the rings are ready, lay them out on a modeling board and determine in what order to string them onto the pin.

· Whale . To make a whale, first we roll a large bun, then on one side we pull out the tail with a pinch, on the other side we cut through the mouth with a stack. Eyes can be made either from small plasticine balls or simply by making small dots in a stack. A wonderful fountain will be made from a cocktail tube. Prepare in advance and make several cuts on a piece of tube with scissors.

- Snail . First, we roll out a long sausage, trying to roll it as long as possible. Then, together with the baby, we twist the sausage into a spiral - the snail is ready! You can also attach small horns.

- horse . Here you should get something like a Dymkovo toy. In the photo, it seems to me that the craft did not turn out very beautiful, but this is the easiest version of the horse. So, first we make a thick column and bend it into an arc. Then we roll a small bun, it will be the head, so we attach it to the appropriate place. Next, use your fingers to draw out the tail and mane. If desired, we make stacked stripes on them for greater similarity. And of course, eyes, mouth, nostrils.

- Hedgehog from a cone . First of all, roll out the bun again. We place it on the bump and stretch the plasticine with our fingers, trying to secure the hedgehog’s head to the bump. Hold your baby's bump to make it easier for him to smear the plasticine. Then we form a muzzle with a pinch, and make a nose and eyes from the balls. You can also attach several apple balls to the hedgehog's needles.

- Mouse . First, we roll the rounded body and separately the tail - a tiny sausage. In the place where the head is supposed to be, we pull out the nose and ears with pliers. You can attach a small black ball to the tip of the spout. Well, on the opposite side we attach a tail.
- Bunny. Here the child is again required to roll only koloboks and sausages.

- Goose . We roll a large round body, use our fingers to stretch the neck out of it, preferably longer, bend it slightly - we get a head. Make eyes in a stack. Pull out the tail from behind with a pinch. At the bottom we attach two small cakes - these are the paws.

- Birdie . We make the bird's head from a ball, and the body from a small column. Use pincers to form the tail and beak. Make eyes in a stack. At your next modeling lesson, you can make a nest for the bird. To do this, you will need to roll as many long thin sausages as possible. And, placing the “branches” crosswise, make a nest. The edges of the branches must be pinched.

- Snow Maiden . For this New Year's craft, you will need to prepare a cardboard cone in advance - this will be the Snow Maiden's fur coat. Next, to make the cone turn into a Snow Maiden, we add all the necessary plasticine parts together with the baby. We make a edging of a long sausage onto the fur coat, attach buttons, handles, and a hat. You can also add a scarf, braid and other details that you have enough imagination and patience for.

- Little man.

- Furniture . It is very simple and interesting to sculpt furniture from plasticine - it can immediately be used in a small story game. All elements of plasticine furniture are very easy to make - for the most part they are just flattened columns and koloboks, i.e. something that a 2-3 year old child has already mastered well. The inhabitants of your plasticine room can be either small plastic toys or previously sculpted plasticine men.

In general, I adore plasticine because you can mold almost anything from it. If something is missing for the game, plasticine always comes to the rescue. If you don't have enough doll dishes - please, an airplane - no problem. Everything that a child is currently interested in, be it dinosaurs or horses, can be easily sculpted, albeit in a simplified form. And don’t be afraid that it won’t turn out the same. No matter how much we sculpted crooked and slanting horses, swimming goggles and other toys, they were always very dear to Taisiya, and she found it much more interesting to play with them than with real toys. It is very important to always show your child that you can make anything out of anything. This is how the baby develops imagination and a creative approach to solving problems.
Well, in the photo there are plasticine swimming goggles, fashioned for the monkey Chupa during the period of our great love for the pool and swimming goggles in particular.

With this I say goodbye. See you on the blog pages!
Like
Modeling for kids: basic techniques, a system of play activities with children from 1 year to 3 years.
Modeling for kids
Modeling for kids: why do kids need modeling?
Modeling is a type of visual activity for a child. Classes with plasticine, dough, mass enrich the baby’s sensory experience, develop fine motor skills of the fingers, teach how to bring things to fruition, allow the child to develop the child’s speech, attention, thinking, imagination.
In modeling as a type of productive activity (that is, activity that results in a finished product - a sculpted product) develops the child’s ability to plan his actions.
Modeling teaches the baby to analyze, develops perception, after all, in order to display any object in modeling, you need to highlight its main parts, their characteristics (color, size, shape, proportions, location in space).
Also in sculpting we We clarify and consolidate the child’s ideas about the objects of the surrounding world.
In modeling, the child tries to correlate the features of the object with the features of the material (modeling dough or plasticine), this leads to memorization sensory standards(color – yellow, red, green, blue and others, size – small, large, shape – round, oval, triangular, long – short, wide – narrow).
Very important: games - modeling classes are easier for a child than drawing classes, since It is in modeling that the child begins to feel every movement of his finger(for example, when small objects are pressed into clay or modeling mass, small pieces are torn off from a piece of clay) and movements of your hands(when, for example, a ball is flattened into a flat cake, when a sausage or ball is rolled out). That is why it is best to start visual arts classes with modeling, and a little later start drawing with your baby. Also in modeling, the child easily feels the shape of the object(it is easier for him to understand that the ball is round, it is a ball in modeling, in which he rolls this ball himself, and not in a flat image in drawing).
Modeling will prepare the child’s hand for more complex movements.– mastery of pencil and brush in drawing.
Modeling for kids: at what age can you start modeling with a child?
You can start modeling with your child from the last months of the first year of life.
In the second year of life The child gets acquainted with play dough as a material, gets acquainted with its properties and qualities.
In the third year of life baby masters "the alphabet of modeling" - basic sculpting techniques, based on which you can make many different shapes. Based on the ABC of modeling learned at this age, all subsequent crafts of the child at an older age will be built.
Modeling for kids: materials for modeling with a young child
The first is play dough. (safe for the health of the youngest children and made from environmentally friendly materials).
Play dough recipe for children from 10 to 12 months: 300 gr. flour, 150 gr. water, 1 teaspoon sunflower oil (do not add salt to the dough). You can add freshly squeezed beet juice to the water to get a pink color. But it will only last for a day, a maximum of two days.
Recipe for salted play dough for children aged 1 to 2 years: 2 cups flour, 1 cup fine salt, 1 cup water colored with food coloring, 2 tablespoons vegetable oil. The dye is food grade, which is used for coloring Easter eggs and confectionery (take ½ or ¼ sachet of the same color for this portion of dough). The dough does not stick to your hands and holds its shape well. The dough can be stored for 3-4 weeks in a tightly sealed bag in the refrigerator. Better in advance make several colors of dough.
A figurine made from such dough can be baked in the oven over low heat. The color of the dough remains the same after baking. If you dry a figurine in the air, then a figurine 1-2 cm thick will dry for 10 days.
With children 2 years and older You can use different materials for modeling: modeling mass, plasticine, salt dough.
Clay- an excellent natural material for modeling, which is also useful psychologically. Clay is a great stress reliever! If you want to sculpt with clay with your baby, then buy light-colored clay at the store. Dark-colored clay often frightens young children, and they refuse to sculpt with it (for fear of getting dirty). Clay should be stored in a tightly tied bag in the refrigerator, as it dries out quickly.
Ready-made industrial dough or modeling mass It is advisable to buy classic, unflavored (without the smell of vanilla and other similar odors).
The second is an oilcloth to protect the table from plasticine or dough. As well as a modeling board and a damp cloth. This teaches you to be careful. The main reason why we can’t do without these items is that when using them, we won’t need to use prohibitions on the child (don’t touch, you’ll get dirty), we won’t have to pull him. Even if the baby gets the oilcloth dirty, the table will remain clean, and the oilcloth can be easily washed off.
Immediately teach your child that we only sculpt on oilcloth and immediately clean up after ourselves. At first you will do this, then the baby will get used to the order and begin to imitate you. He will know the rule - we sculpt at the table on oilcloth, after sculpting we put everything back in its place.
Modeling board It is better to have darker colors so that the light details made of dough or plasticine and their shape are clearly visible. It should be no smaller than the size of a landscape sheet (I don’t recommend buying small boards for modeling. They are very inconvenient for modeling with kids).
Damp cloth should be nearby on the table. It is needed to wipe your hands (the baby will need to show how this is done).
Third, if you are afraid that the child will stain his clothes, then put armlets on his arms (this is a “tube” made of easily washable waterproof fabric and is put on the child’s arm from wrist to elbow) and an apron. You will be calm that your baby will not get his clothes dirty, and he will be able to sculpt freely and joyfully. Your emotions and your calmness are very important - after all, the child “reads” them instantly and senses your emotional state well. And if the mother is constantly worried that we will get something dirty, then the child will not be happy to sculpt. Also, if you are afraid for the floor and its cleanliness (for example, you have carpet at home, then instead of worrying, you can simply protect the floor in advance - just lay a film on it).
Fourth. Additionally you can purchase stacks for plasticine (they are usually included with the plasticine set) - with their help you can apply different patterns to the surface of the product.
It is important:
- the place for modeling and all objects must be prepared by the mother in advance, before the game - activities with the child, since a small child cannot wait long - he needs to act immediately.
- a child over 2 years old already knows where the materials for modeling are at home and how to use them for their intended purpose; from this age he helps his mother put away all the materials after modeling (for example, arrange the remaining pieces by color, wash his hands, remove the apron)
Modeling for kids: how to sculpt with kids?
First stage. Getting to know the material.
Very often this stage is skipped, as a result the baby does not want to sculpt, wants to put the dough in his mouth, and nothing happens! Because before sculpting, we must take into account the nature of a young child.
For a child, one of the important means of understanding the world is experimentation and exploratory games. Let your child first enjoy the process of exploring new material and get to know it well. Otherwise, he simply won’t sculpt; he will be attracted to this new piece of something attractive, and not to the sculpting process!
Introduce your child to the dough (or plasticine, depending on the child’s age). Give the opportunity:
- slap it with your palm:"slap-slap"
- press with your finger and get a “hole” in a piece of material
- hold the piece in your hands and mash it in different ways,
- finger press into a piece of mass a piece of raisin (peas, beans),
- mix different colors and see what happens when you mix different colored dough. When buying plasticine for modeling, look at the instructions on the package. Manufacturers always indicate whether plasticine colors can be mixed to create new shades. It is advisable for kids to buy plasticine, in which you can mix different colors and get new shades.
Let your third-year-old baby experiment with colors on his own - for example, make a lot of different balls - “beads” on a Christmas tree or doll. Get each ball by mixing colors (yellow + blue = green, red + white = pink).
- You can let your baby knead the dough himself (help mom) and make “pies” out of it(whatever you want), pretzels and sausages for treating the dolls.
The child’s research interest must be encouraged and developed, the child must be praised, and not prohibited from his actions. A young child learns about the world through a sensory way, and not through our words or video presentations.
When the child explores the material and becomes familiar with its qualities and properties, it will be possible to give him the material for another task - for modeling.
This is important to remember: our way of teaching sculpting to the youngest children is as follows:
- from the baby’s acquaintance with the material (research activities)
- to use it for its intended purpose (for modeling)
- and further to the development of interest in the image that we want to convey in sculpting.
Helpful advice: If the child refuses to study the material, then you can give him different game tasks yourself: “hide the peas in a piece of text”, “what will happen if we mix two pieces, let’s try!”
Modeling for kids: basic sculpting techniques with young children
- rolling out a piece of dough or plasticine into a stick (sausage),
- rolling a piece into a ball,
- flattening (a ball into a flat cake, a sausage into stripes),
- obtaining an indentation in a piece by pressing a piece of plasticine with your finger,
- pinching off pieces
- attaching parts to a large piece of plasticine.
The baby masters these techniques by the age of three (of course, if he is taught modeling at home or in a circle or in kindergarten).
Modeling for kids: important points in organizing play activities with your baby at home
— In all age subperiods of early childhood, the child’s modeling is introduced into the play plot.
You need to not just ask the child to make a fungus - but to make it for a hedgehog who lost his fungus in the forest.
Or another example: you need to make pies for your doll for tea, because she is waiting for guests - her girlfriends!
Another example: we decided to make vegetables and fruits for the store game. Or they decided to stick nuts to treat their toy squirrel. Or now we’ll make candies that the doll will treat all guests to on her birthday.
IMPORTANT NUANCE: The hedgehog (toy) himself turns to the baby and asks the child to help him, and the baby happily agrees, talking to the hedgehog as if it were alive. At the end, the toy thanks the baby for his help.
TYPICAL ERROR: An adult says this: “The hedgehog asked you... The hedgehog thanks you.” This doesn't work with kids! The hedgehog himself turns to the baby and he asks, talks to the baby, takes the molded mushrooms from him and thanks him. An adult talks to a child as a hedgehog.
You will find a list of game plots at the end of this article.
— All fashioned products are used in the future for the child’s play(for example, in the situation with the hedgehog, we actually give the toy - the hedgehog the mushrooms we sculpted, he rejoices, thanks us, we accompany him to the forest - we completely act out this plot with the baby).
— When we sculpt an object (for example, a tumbler), before starting sculpting we must examine this object with the child, name its parts and their shape and size. You can consider a toy, a picture or a real object, if possible.
For example: “What an elegant tumbler! Oh, beauty, and how cheerful! (we stroke the tumbler's head). What did I pet? (head). What does she look like? (on the ball), What is this? (we stroke the balls - the hands of the tumbler, let the baby stroke them too). What are they like? To the balls! Only small ones! Now let's iron the tumbler's dress. How beautiful. What does it look like? Also on the ball. Only big!” Etc." The child needs to be given the toy in his hands to stroke it and name each part of it. And then put it in place and start sculpting it.
An example of such a conversation about a bird before it is sculpted(author - R.G. Kazakova): “The chicken lost its mother hen, ran, searched and came running to us. How did he escape? (on the paws). He’s tired, let’s pet him: “
Oh, you little yellow one! What did I pet? (back, wings). What does a chicken look like? On the ball! Now what did I stroke? Head! What does she look like? For a small ball. The chicken wanted to peck the grains, and began to look for the grains. What is he looking at? (with eyes). What does he eat the grains with? (beak). Waved at us with what? (tail).” After this, the adult shows how to sculpt a chicken, accompanying all his actions with comments and questions: What did I sculpt? Round body. What is this little ball? This is the head, and these are the eyes. The chicken immediately saw its mother chicken! What did he wave at her? Wings!
- First, the baby will sculpt according to your instructions, and a little later he will be able to sculpt himself according to his own design.
— If you teach your child a new sculpting technique (for example, teach him to roll a ball in a circular motion between his palms), then it is better to plan your home games - sculpting classes like this:
- The first day is learning how to roll a ball.
- The next day, we consolidate the skills the child has mastered in rolling a ball: we again sculpt a ball with the child (but in a different game plot).
- Then we take a break for 2-3 days.
- And again we make a ball again (already in the third game story).
For example, for the first time we made a ball - a bun. The second time it was balls - balls. The third time we made balls - balls for the kitten.
In the future, frequency will not matter.
Research has shown that this is precisely the frequency that a child needs to best master a new action. This is the most successful planning scheme that allows you to quickly consolidate a child’s new skill.
— Never disassemble ready-made crafts made by a child in front of him; this rule applies forever and is relevant for any age of the child. If you want to reuse plasticine, then disassemble the crafts so that the child does not see it.
— Do not leave your child alone while sculpting, Moreover, modeling at this age takes no more than 3-5 minutes.
— If a child doesn’t succeed in something, he wants to break his craft, just help him, correct it, show him how to fix it. Act on behalf of the toy - let it tell him what needs to be done to correct the craft.

Modeling for kids: modeling for children 1-2 years old
You can start introducing your baby to the test from the end of the first year of life. At the age of 1-2 years, the child becomes familiar with modeling dough as a material and explores it.
One game will take 3-5 minutes. This is the time when a child at this age can focus on the task and act purposefully with you.
Modeling for children 1-2 years old: options for game tasks
"Little Explorer" Place a piece of dough on the modeling board. Let the baby remember it, make indentations in it with his finger, make a hole, pinch off small pieces from a large piece of dough (“feed the chicken with grains”). If a child is afraid to touch the dough, then start playing with the dough yourself, commenting on all your actions. The baby will gradually get used to it and will be drawn to this material and want to play with it.
“We spank with our palm.” Place the play dough on a plate of a contrasting color and invite your child to slap the dough with his palm: slap-slap-slap! Try making holes in the dough with your finger: “Here’s a hole—boom!” And then there was a hole - a finger fell into it - bang! Bang!
“Feed the hen and the cockerel.” Next time during our play session, let a toy chicken and a cockerel come running to the baby and ask him to feed them grains. The baby plucks off small pieces of plasticine and puts them on a plate - “feeding” the cockerel and hen. The guests thank him for the treat!
Game "Ay". Take a piece of play dough and hide a small object, such as a ball, in it. Say: “The ball hid. Where are you? Awww! Let's call him together: aaaaaaaaaaaaaaaa! Ball, ah! Where is the ball? Here's the ball! Found!”
Game "One - Many". Hide several items in a piece of dough, for example, shelled nuts so that their pieces are visible from the dough. Invite your child to get them: “one nut, two nuts, three nuts!” Lots of nuts!”
Display with commentary. A child at this age will not yet be able to sculpt a craft, but he will be able to help you.
- Example 1. Roll a lot of balls yourself. And invite the child to slap them with his hand, making pancakes or pancakes out of them (Yu. A. Razenkova’s technique) and saying each time: “slap, slap, slap.” Place all your pancakes or pancakes on a doll's plate and serve them to the dolls.
- Example 2. You can sculpt any simple crafts yourself in front of your child’s eyes - a mouse, a bear, a bunny - and comment on your actions. Name the parts of the object, their color, size, shape: “I’ll sculpt the eyes. Where are the bear's ears? Here are the ears. Where are Vanya’s (child’s name) ears? Here are the ears! Vanya has big ears, and the bear has small ears. Round! That's what! What are we going to do next?”
Modeling for kids: modeling for children 2-3 years old
At this age, you can sculpt with your child from any materials: clay, plasticine, salt dough, mass and modeling dough, snow.
What can we teach a 2-3 year old child during play modeling classes: our tasks
- sculpt sticks and sausages (roll out a lump of plasticine between your palms with straight movements),
- connect the ends of the stick, pressing them tightly against each other and getting a “steering wheel”, “ring for a pyramid”,
- roll out a lump of plasticine or clay with circular movements of your palms (we get a bun, a ball, a snowball, a ball, an apple, a berry),
- flatten a lump of plasticine or a ball between your palms (we get a flat cake, cookies, gingerbread),
- make a depression in the middle of a flattened piece of plasticine, pressing with your fingers in the center (we get bowls for three bears, saucers for dolls),
- connect the two resulting parts into one object (connect two balls - you get a tumbler, connect a stick - a sausage and a ball and get a rattle),
- sculpt only on oilcloth on a sculpting board, help an adult clean the table after sculpting (put all objects in their places).
Modeling for children 2-3 years old: sequence of learning to model
At an early age, the child masters the “alphabet of modeling” - the basic techniques of modeling. The basic elements for modeling with a baby are a cylinder (we call it a “stick” for a child) and a ball. From these shapes you can create a variety of shapes with your child.
First stage. Familiarization with materials, games - research. We have already talked about this stage a little higher. If the child is not familiar with modeling dough and plasticine, then we always start from this stage.
Second phase. Rolling out a piece of plasticine/modeling dough/clay to length (receiving a “stick”, “column” or “sausage”, “cylinder”).
- First, the baby learns to roll the dough into a sausage on a board (with our palm we roll a piece of plasticine on the board with forward and backward movements to make a sausage).
- Only then is the child ready to roll out the piece with the same movements between his palms.
- The next complication is making images from our “sausages” - sticks. Making “bagels” from sausages (connecting a stick into a ring).
Third stage. Rolling the ball and flattening the ball into a cake. Combining shapes (ball + stick).
- First, the baby rolls a ball on the table in a circular motion (rolls a piece of plasticine on the table to make a ball).
- Then he masters a more complex movement - rolling a ball between his palms.
- After this, the child is ready to make figures from elements known to him. The form is supplemented with natural materials (for example, to express the image, you can use seeds, twigs, leaves like eyes, a tail, ears, mustache).
Modeling for children 2-3 years old: options for play activities in stages with gradual complication of tasks
First stage: familiarization with materials
— Let's feed the birds (pinching off small pieces of clay or plasticine from a whole piece),
— Norca for the mouse (hide the mouse from the cat)
- show the child how you can press your fingers deep into the center of a spherical piece of plasticine to form a “mink” - “hole”).
The second stage – we master rolling out a piece of bread (sausage) in length.
- make pencils for a bear or for any other toy (we teach how to roll out sausages),
- make a branch for the bird (sausage),
- making treats – sausages for puppies (roll out pieces of plasticine into “sausage sticks” and put treats in a toy plate, treat them to toys),
- let's make a fence (We lay out the molded sticks - sausages on the board like a fence. For example, you need to hide the cockerel from the fox by building a fence through which the fox will not pass),
- let's build a ladder (We lay out the sausages we have fashioned on a sheet of paper like a ladder. First we make two long vertical sticks. Then between them we lay out horizontal sticks like steps),
- airplane(connecting two sticks to form an airplane figurine),
- herringbone(We lay out the sticks like a Christmas tree on a modeling board. One long sausage in the center is the trunk of the Christmas tree. We place other green sausages on the sides obliquely - these are the branches of the Christmas tree),
- log house (train station, bus stop from logs): we sculpt a lot of identical sticks and build a structure out of them (like folding a log house or a log well), the roof can be made from a rectangular piece of cardboard or plywood.
- bagels
- pyramid rings (connecting the sausage into a ring),
- bracelets for dolls (connecting the sausage into a ring),
- other options (the child can figure out what his plasticine stick looks like: this is a dog bone, these are cucumbers, these are earthworms, these will be carrots if one end of the stick is made narrow and sharp),
- snail(Option 1. Laying out on a modeling board: twisting the sausage into a spiral. Option 2: “snail crawls.” We place our spiral on its edge, pull one end up and tilt it away from the shell - we get the head of a snail),
- stump for Mashenka and the bear (short wide sausage: “Sit on a stump, eat a pie,” a bunny, a fox, a bird can jump and sit on a stump),
- ribbon (river, road) – flattening the sausage into strips,
- scarf for snowman(scarves for animals) - flattening the sausage into stripes,
- carrot for bunny (when rolling, apply pressure on one side, and you will get not a stick, but a “carrot” with a sharp end on one side),
- snake (We make a long “sausage” from plasticine, bend it like a snake. Cut one end of the “sausage” - this will be the mouth, the head of the snake. We make the eyes of the snake from the seeds. You can place the snake in different ways: a) in a spiral - this is “the snake is sleeping "or b) a winding line - this is “the snake is crawling”),
- nest for a chick (together with the child, we roll out a lot of thin sausages - sticks and from them in a chaotic order we put together a nest, we help the birds “build a nest”),
- bridge(we connect the sticks into a bridge in accordance with your idea, there are many different options).
Third stage – mastering rolling the ball
- let's make balls and play with them (the kid makes balls and then plays with them - rolls them down the slide, rolls them into the hoop),
- modeling a bun for grandparents,
- modeling balls for a kitten (the kitten loves to play with balls),
- sculpting balls,
- modeling rattles (ball + sausage),
- apple(We make a ball and make a small depression in it at the top and bottom with our finger. If the child wishes, you can supplement the craft with a green cutting with a leaf: a) roll out a thin stick - a cutting - from green plasticine, b) then roll out a ball of green plasticine, flatten it slightly - you will get an oval leaf of an apple, attach the leaf to the cutting on the apple),
- tomato(made similarly to an apple, but without the stem and leaf),
- modeling berries (berries are small red balls, we put our “berries” in a basket or on a doll’s plate and treat the toys),
- raspberries for the bear (also red balls - berries),
- candy(making balls - candies for the doll, she will treat her friends with them at her birthday),
- beads(we make multi-colored balls of the same size. To do this, divide a piece of plasticine yourself into equal parts of the same size and give them to the child. We attach the finished beads to a thread),
- pyramid of balls (We make balls of different sizes - for this, prepare in advance and give the child pieces of plasticine of different colors and different sizes. Then we put them into a pyramid - on the largest ball we put a smaller ball, then we find and put an even smaller ball. We attach a bead or a small bright one to the top plasticine ball)
- let's build a snowman (Roll 3 balls of different sizes, place them on top of each other according to size, decorate the plasticine snowman with seeds or peas for the eyes, a straw for the nose, etc.),
- sculpting a bird or chicken (We make two balls, put them on top of each other, make eyes from peas or seeds, make a tail from a feather, make a beak by pinching it - pull a piece of plasticine from the ball - head forward so that you get a beak),
- bunny sculpting (We divide a piece of plasticine in half. From the first piece we roll a large ball - the body. We divide the second piece in half again. From the first part we make a small ball - the head. We divide the remaining part in half again - we get two sausages - ears. We make the eyes from natural material - peas, sunflower seeds),
- modeling of a cat, bear, mouse, dog. The head and body are made of balls. We make the ears by pinching them. We complement the image with a mustache (a thin plastic hard strand), eyes (seeds, peas),
- tumbler(The body is a large ball, the head is a small ball, the arms are the two smallest balls, we decorate the roly-poly dress with seeds, we also make the eyes from natural material),
- caterpillar(we connect several balls into a caterpillar, make eyes and a mouth from the seeds),
- cucumbers(roll balls from green plasticine, and then roll them into a stick - a cylinder, we get cucumbers),
- bananas(we make it similarly to a cucumber, but from yellow plasticine and bend it in the shape of a banana).
Technique for flattening a ball into a cake - a circle:
- making pancakes(Show how to flatten the ball into a cake - press it with your palm. Bake a pancake for the doll, put them on a toy plate. Let the doll treat all the toys with her pancakes over tea!),
- making vitamins for a doll (we make small multi-colored balls and flatten them into “cakes” - tablets),
- pancakes(we help grandma bake pancakes for tomorrow: we flatten small balls into flat cakes, put them on a doll plate and treat them),
- making a soft mat for a toy pussy (flattening and attaching small parts to the base),
- mushroom(we make a stick - a cylinder. We roll up a ball and flatten it into a disk. We attach the “cap” of the mushroom to its “leg”),
- Sun(we make a ball, flatten it into a “cake” - a disk. Next we make sticks - cylinders. We flatten them into strips. We lay out the stripes around the center of the sun. We make the eyes, nose, and mouth of the sun from seeds or draw them with a stack,
- turtle(roll up a ball, flatten it. Take a small piece of plasticine and roll a ball for the turtle’s head. Take 4 more small pieces of plasticine and roll them into a stick - a sausage, make turtle legs out of them),
All crafts can be made from modeling mass and then dried. You will get vegetables and fruits for playing “shop” and toys.
Modeling with kids- a very useful and very exciting activity for both adults and children. I wish you success and joyful moments of communication with children in the process of modeling!
Modeling books for kids
I wrote this article based on your letters and questions to me. And at the end of it, at the request of readers of the “Native Path” website, I give a list of books that I can recommend on this topic - modeling for the youngest children from one to three years old.
— First part: strips and circles of plasticine.
— Second part: three-dimensional pictures made of plasticine on a picture base.
— Third part: sculpt from dough.
The same author has other colorful separate small albums on modeling for children from 1 to 3 years old: “Plasticine Treats”, “Plasticine Berries”, “Plasticine Snakes”, “Plasticine Specks”, “Plasticine Strips”. You will find a description of all the play activities for modeling with kids from this series of “plasticine books” in the author’s first full book, “Sculpting with Young Children,” at the link above. And in separate albums for children, the same system of games is presented, just in a different form, more convenient for the family - with ready-made pictures.
4. Lykova I.A., Shipunova V. Delicious modeling for children and adults. . This is a book on making confectionery products - gingerbread houses, different types of pies with children. For those who love to bake.
5. From books published long ago that can no longer be purchased, but can be found on the Internet: Doronova T. N., Yakobson S. G. Teaching children 2-4 years old to draw, sculpt, and apply in games. - M.. 1992. Book for teachers.

Modeling for kids: modeling dictionary. How to correctly name actions in modeling
Pinching off - separating a small piece of plasticine using the thumb and forefinger (we use our fingers like tongs). First we press and pull out the piece, and then tear it off.
Topping - use your thumb and forefinger to pull a piece away from the part (we get, for example, a beak).
Compound— press the two parts of the craft together and carefully smooth the joint.
Rolling out - forming “sausages” (cylinders) from a piece of plasticine using “forward and backward” movements (first with your palm on the table, then between straight, tense palms).
Rolling up- forming a ball from a piece of plasticine using circular movements of the palm on the table or circular movements with straight palms.
Flattening - squeezing a piece of plasticine to give it a flat shape. Flatten a small piece between the index and thumb fingers. Flatten a medium and large piece of plasticine with your palm.
Indentation - making a depression in a piece of plasticine by pressing with the thumb or forefinger.
You will find more materials for classes with children from 1 to 3 years old in the articles on the site: link or on the course cover below for free subscription

It is perhaps impossible to find a child who does not like to sculpt from plasticine. Soft and pliable, it can take any shape; unlike other types of creativity (drawing, appliqué), a failed plasticine craft can be easily corrected. Such qualities attract children, so they enjoy modeling. On sale you can find any type of plastic material for home creativity and organize independent activities for your child. Both adults and children are happy! Meanwhile, not all parents know that plasticine can also be used to draw, creating three-dimensional pictures. This type of activity is called plasticineography.
What does the concept of plasticineography include? This unconventional drawing technique is a new direction in children's creativity, when a molded three-dimensional picture is created on a plane. An unusual way of drawing is a fascinating activity not only for children, but also for adults. Teachers advise parents to definitely learn unusual artistic techniques themselves and teach them to their child, since plasticineography’s goal is not only to develop children’s creative abilities, but also to expand knowledge about the world around them, shape intelligence, develop mental processes, and actively influence the development of fine motor skills. Such creative activities with children are easy to organize at home. The main thing is that parents themselves should be interested in plasticineography, then the child will become interested in this type of creativity.
Let's get acquainted with the secrets of plasticine technology
 What are the secrets of plasticineography? Is it possible to teach them to children? Teachers confidently say that this technique is quite accessible to preschool children, and with the right approach, plasticineography as a means of developing children’s creative abilities can become a serious support for family education. In order not to miss the moment, it would be nice for parents to know when they start creating stucco paintings with their kids. According to experts, such classes can be carried out with children as young as three years old. The main thing when creating pictures from plasticine is to take into account the child’s age and his technical skills, since due to the complexity of the image, interest in creativity may be lost. Therefore, children are first introduced to the simplest techniques of the “ABC of sculpting”:
- Smudging
- the most simplified method of plasticineography, accessible even to the smallest child. The plasticine is smeared with your fingers on the finished smooth base.
- Rolling out - increasing complexity of work. It requires certain muscular efforts, since the plasticine is rolled out with direct hand movements in the form of a cylinder or in a circular motion in the form of a ball.
- Flattening and stretching - the most important stages in creating stucco paintings. They are necessary for depicting various decorative and applied forms, for example, a flat cake, a heart, an oval or an elongated cylinder, a flagellum. To do this, first roll out a ball or sausage, and then squeeze it with your palms, using your fingers to convey various bends, indentations or an elongated tip.
The subjects of paintings for preschoolers at this age can be well-known autumn and summer motifs, for example, “Sun” (we flatten a yellow ball on a blue background, and smear rays around it); “Flowers on the grass” (spread green plasticine on a smooth base, place flattened multi-colored balls on top). In a similar way, “Autumn leaves on the ground”, “Falling snow”, “Hedgehog”, “Multi-colored fireworks”, “Christmas tree garlands” are decoratively depicted. Teachers advise be sure to use rhymes, riddles and short stories about a stucco picture to maintain interest in creativity and encourage the child, for example:
 I make the sky, the sun, a stream from plasticine,
I’ll stick flowers everywhere, draw a cornflower.
And daisies, forget-me-nots, little buttercups
They will smile at the sun and enjoy the warm summer!
We made koloboks
They were flattened from the sides.
Damn it turned out right there,
Very soft (plasticine).
Important: Working with plasticine is quite a difficult task for fragile children's fingers. Therefore, firstly, plasticine for plasticine printing must meet the necessary requirements (heat the solid mass in warm water); secondly, while creating a stucco picture, it is necessary to change types of activities, taking breaks to prevent the baby from overtiring.
Technology for older preschoolers
When the simplest methods are mastered by children, they move on to a more complex stage of learning, showing new techniques and a type of plasticineography. This creates a certain system for working on the painting. What plasticineography techniques are typical for this technique?
- Smoothing - the technique is necessary to prepare the basis for the future painting. To get a smooth surface, you need to carefully smooth out the layer of plasticine with your fingertips. You can wet your fingers with water, then things will go faster. The work requires certain muscular efforts, so it is only accessible to older preschoolers.
- Topping - used to create new details in the picture and make it decorative. The preschooler pinches the plasticine with his fingers where it is necessary to decorate the image.
- Smearing, pressing - techniques are necessary for tightly attaching the elements of the picture.
- Sticking- connects one part of the image to another or helps to apply the necessary details to a ready-made drawing or photograph.
- Mixing different colors of plasticine to obtain shades - necessary for painting decoration. Children are taught to knead colored balls in one piece or mix different colors directly in the outline of the picture in the form of neatly overlaying one colored piece on another.
To make plasticine paintings more expressive, it is good to use elements of natural material: leaves, shells, nuts, seeds, small pebbles, bean grains, etc. Beads, seed beads, and small buttons will look beautiful when decorating images.
Important: plasticineography as a means of developing fine motor skills of the hands involves a gradual transition from simple methods of work to more complex ones. Then the preschooler will be able to prepare the composition for a long time without getting tired. And the system of techniques for working with plastic materials that the child has mastered will help new ideas and creative discoveries emerge.
For older preschoolers, the subjects of paintings can be more complex than for children, compositions on themes of the seasons, for example, “It’s snowing,” “Butterflies in the meadow,” “Basket with mushrooms,” “Still life of fruit,” “Vase with wildflowers.” ", "Rainbow and Rain". Children like to create pictures from the lives of animals ("Zoo Inhabitants", "Hedgehog with Mushrooms", "Dog Plays with a Ball", "Kitten and a Ball"), from the lives of people ("Holiday", "Space", "Children are making a snow woman" ") or fairy-tale characters. They can make up little funny poems and stories themselves to complement their crafts:
I sculpt from plasticine
Ball, ball and penguin.
And this is a hippopotamus
He has a big belly.
Plasticine ears
Moving on top of my head
Important: Parents! Don’t forget to rejoice with your children in every creative discovery they make. Try to keep crafts for a long time, give them to loved ones and friends to give significance to children's creations.
Plasticineography method
To make it easy for parents to organize their children’s education at home, experts have developed a plasticineography technique for children, which involves the following step-by-step work:

- First, we teach younger preschool children to knead plasticine until it becomes pliable.
- We offer the kids a ready-made base or ask for a little help in preparing it, for example, creating an outline together with an adult.
- We teach the older children, who already have the skill of working with molded material, to prepare the base of the paintings. We correct the movements of the hand when smearing the plasticine from the center to the edges.
- For small children, we offer no more than two techniques for making simple images. The elders create paintings that are complex in decorative terms, using a whole range of techniques.
- To get a new color shade for a drawing, we teach even young children to combine different colors of plasticine, for example: yellow and red for orange, blue and yellow for emerald, blue and white for blue.
- We show older preschoolers that brush strokes can look like silk, glass or ceramics, be rough or embossed.
- To give the details roughness, we use various methods using a stack: we apply relief dots, strokes, stripes, curly lines. To depict thin plasticine threads, plastic syringes without needles will be indispensable.
- We teach children that when drawing it is best to use bright, soft material to give the image an interesting shape.
How to properly prepare materials for creating plasticine paintings
- To give the picture stability and avoid deformation, use only thick cardboard for the base of the picture.
- To avoid the appearance of untidy plasticine stains on the basis of the pattern, cover it with adhesive film.
- To avoid mistakes during the sculpting process, first apply the outline of the design to the cardboard under the film.
- To prevent the painting from deteriorating for a long time, cover it with colorless varnish.
- To make work on the painting go quickly, prepare the necessary materials in advance: cardboard, outlines of drawings, plasticine, hand napkins, stacks, toothpicks, a set of natural materials, a modeling board.
What is plasticineography?
 When teaching preschool children, teachers use various types of plasticineography, which are easy to organize at home. Parents need to know what and how it is used at different age periods. All preschoolers will have access to direct plasticineography
, in which the stucco image is built on a flat surface. When making a painting, you must first roll out three-dimensional shapes, for example, koloboks, sausages, then arrange them along the contour and flatten them in accordance with the plan, attaching the parts well.
When teaching preschool children, teachers use various types of plasticineography, which are easy to organize at home. Parents need to know what and how it is used at different age periods. All preschoolers will have access to direct plasticineography
, in which the stucco image is built on a flat surface. When making a painting, you must first roll out three-dimensional shapes, for example, koloboks, sausages, then arrange them along the contour and flatten them in accordance with the plan, attaching the parts well.
Children easily master this technique at the age of two or three. They are offered a simple drawing without small details, at the initial stage with a ready-made base. Older guys create more complex compositions. They independently prepare the base, make a contour, which is gradually filled with softened plasticine.
Reverse plasticineography (stained glass) involves drawing from the reverse side of the base. To do this, it must be transparent, for example, plastic or plexiglass. The drawing is drawn up on the base with a marker, and then its elements are filled with plasticine. Pieces of plasticine of the required size and color are selected into the image, softened, and then smeared onto a transparent base. To get a thin, neat layer, you can smear it with your fingers or a stick, carefully pressing the plasticine to the surface.
Modular plasticineography belongs to a complex technique and requires preschool children to be able to master all modeling techniques. Then you get a stucco picture consisting of various decorative elements: balls, cakes, cylinders, braids and other technical elements.
Mosaic plasticineography - a technique loved by children, since the image is made only from plasticine balls. A fairly simple technique is available to children of all ages. The main thing is to select the appropriate colors and carefully fill the contour space with elements without going beyond its boundaries. The working method consists of rolling small balls, placing them on a base and pressing them against it.
Contour plasticineography - involves sculpting an object along its contour. The step-by-step steps of the action will be as follows: first, a drawing is applied to the base with a marker, then an outline is laid out using thin rolled flagella, the image is filled with flagella of the corresponding color. Teachers advise using a large syringe without a needle, into which plasticine is placed, then the syringe is placed in hot water to soften. This way you can get beautiful, even flagella.
Multilayer plasticineography - represents layers of plasticine sequentially applied to the base. A similar technique is necessary for landscapes: images of forests, water, fields, when you need to select not only the main colors, but also their shades. This kind of work is quite difficult for small preschool children, and it is appropriate to do it only with older children. The working method is as follows: different colors of plasticine are selected, from which thin cakes are made. Then the blanks are placed on top of each other in the form of a multi-layer cake in accordance with the pattern.
 Textured plasticineography
- the most complex technique, as it involves the production of a three-dimensional image. It is possible to highlight bas-relief
(French bas-relief - low relief, the volume of the picture is less than half), high relief
(protruding more than half) and counter-relief
(Latin contra - against and relief, in-depth drawing). To get such paintings, you can use a special roller with an image printed on it. In stores you can purchase ready-made templates for this technique.
Textured plasticineography
- the most complex technique, as it involves the production of a three-dimensional image. It is possible to highlight bas-relief
(French bas-relief - low relief, the volume of the picture is less than half), high relief
(protruding more than half) and counter-relief
(Latin contra - against and relief, in-depth drawing). To get such paintings, you can use a special roller with an image printed on it. In stores you can purchase ready-made templates for this technique.
Caring parents will always find the opportunity to influence the development of children's creative abilities through plasticineography. This is perhaps the most accessible and exciting way to solve many issues of development and education, thereby preparing preschool children for school and enriching family leisure.